How To Transfer Your Iphone Media To Mac
How to transfer your iPhone media to Mac is a question that many Apple users have. Whether you’re upgrading to a new Mac, freeing up space on your iPhone, or simply want to have your photos and videos backed up, transferring media between devices is essential.
Luckily, there are several ways to do it, each with its own advantages and disadvantages.
This guide will walk you through the different methods for transferring your iPhone media to your Mac, including using iTunes, iCloud, AirDrop, and third-party apps. We’ll cover the pros and cons of each method, provide step-by-step instructions, and offer tips for troubleshooting common issues.
By the end, you’ll have a clear understanding of the best approach for your specific needs and be able to effortlessly transfer your iPhone media to your Mac.
Understanding the Transfer Process
Transferring media from your iPhone to your Mac is a common task, and there are several methods to achieve this. Choosing the right method depends on the type of media you want to transfer, your preferences, and the available resources.
Methods for Transferring iPhone Media
The following are the most common methods for transferring media from your iPhone to a Mac:
- Using iCloud:iCloud is a cloud-based service that allows you to store your media and access it from any device. To transfer media using iCloud, you need to enable iCloud Photos or iCloud Music Library on your iPhone and ensure your Mac is also signed into the same iCloud account.
The media will be automatically synced between your devices.
- Using AirDrop:AirDrop is a wireless technology that allows you to transfer files between Apple devices. To transfer media using AirDrop, you need to enable AirDrop on both your iPhone and Mac, and then select the media you want to transfer from your iPhone.
You will see your Mac as a destination option in the AirDrop menu.
- Using a USB cable:You can transfer media from your iPhone to your Mac using a USB cable. This method is particularly useful for transferring large files, such as videos or photos. To transfer media using a USB cable, you need to connect your iPhone to your Mac using a Lightning to USB cable.
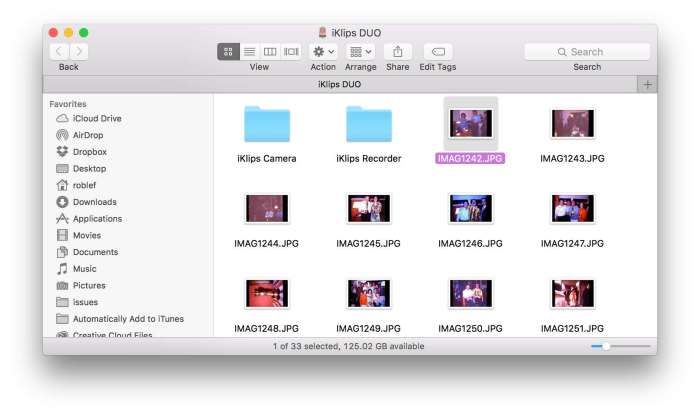
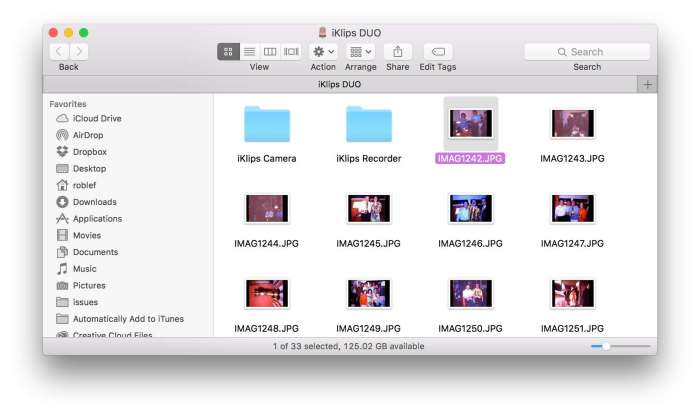
You can then access your iPhone’s files on your Mac using the Finder.
- Using third-party software:There are several third-party software applications that allow you to transfer media from your iPhone to your Mac. These applications often offer additional features, such as the ability to convert media files or manage your iPhone’s storage. Examples of such software include iMazing and PhoneView.
Moving your iPhone’s photos and music to your Mac is a breeze, especially if you’re using iCloud. Just make sure you’ve got enough space on your Mac and that iCloud is set up correctly. Oh, and if you’re ever having trouble with calls dropping, you might want to check out How to activate AT&T Wi-Fi Calling on your iPhone.
Once you’ve got that sorted, you’ll be good to go with transferring your media, no sweat.
Using iTunes
iTunes is a well-established method for managing and transferring media between your iPhone and Mac. While it might seem a bit outdated, it’s still a reliable option for many users, especially if you’re already familiar with the software. Let’s delve into the process of using iTunes for transferring your iPhone media.
Transferring Photos, Videos, Music, and Other Media
To transfer your iPhone media using iTunes, you’ll need to connect your iPhone to your Mac via a USB cable. Once connected, open iTunes and select your iPhone from the device list. The iPhone summary page will display different categories of content.
You can browse through these categories to view and manage your media. For example, to transfer photos, click on the “Photos” tab. Here, you can choose to sync photos from your Mac’s library to your iPhone or manually drag and drop photos from your computer to the iTunes window.Similarly, you can navigate to the “Music,” “Movies,” “TV Shows,” or “Books” tabs to manage the corresponding media types.
iTunes will automatically detect the available content on your iPhone and provide options to add or remove items from your device.
Syncing iPhone Content with iTunes Library
iTunes allows you to synchronize your iPhone content with your iTunes library. This means that any changes you make to your iTunes library will be reflected on your iPhone, and vice versa. To sync, simply select the content category you want to sync and check the “Sync” box.For example, to sync your music library, you would navigate to the “Music” tab, check the “Sync Music” box, and then choose the specific playlists or artists you want to sync.
iTunes will then transfer the selected content to your iPhone.
Troubleshooting Common iTunes Transfer Issues, How to transfer your iPhone media to Mac
While iTunes is generally reliable, you might encounter some issues during the transfer process. Here are a few common problems and solutions:
- iTunes Not Recognizing iPhone:If iTunes doesn’t recognize your iPhone, ensure that the USB cable is properly connected to both devices. Try restarting your iPhone and Mac. Also, check if your iPhone is locked or in Airplane mode, which can prevent connection. If the problem persists, you might need to update iTunes or your Mac’s operating system.
- Slow Transfer Speeds:Slow transfer speeds can be caused by various factors, such as a slow internet connection, a large amount of data being transferred, or a low-quality USB cable. Try transferring smaller amounts of data at a time, using a different USB cable, or ensuring your internet connection is stable.
- Error Messages:If you encounter error messages during the transfer process, check iTunes for any updates or troubleshoot the problem by restarting your iPhone and Mac. You can also consult Apple’s support website for specific error code solutions.
Utilizing iCloud
iCloud is a cloud-based storage service offered by Apple. It provides a convenient way to back up your iPhone data, including media, and restore it to your Mac or another iPhone. iCloud also allows you to access your media files from multiple devices.
Backing Up and Restoring iPhone Media
iCloud automatically backs up your iPhone data regularly. You can manually trigger a backup by going to your iPhone’s Settings app, selecting your Apple ID, tapping on iCloud, and then choosing iCloud Backup. To restore your iPhone media from an iCloud backup, follow these steps:
- Connect your iPhone to your Mac.
- Open iTunes and select your iPhone from the device list.
- Click on “Restore Backup” and choose the iCloud backup you want to use.
Transferring Photos, Videos, and Documents
iCloud Photo Library automatically uploads your photos and videos to iCloud. You can access them from your Mac by opening the Photos app and selecting iCloud Photo Library. You can also download individual photos or videos to your Mac. To transfer documents, you can use iCloud Drive.
iCloud Drive is a cloud-based file storage service that allows you to store documents, spreadsheets, and other files in the cloud. You can access your iCloud Drive files from your Mac, iPhone, or iPad.
Limitations of iCloud for Media Transfer
iCloud has a limited storage capacity. You can upgrade your storage plan for a fee, but the free plan is only 5GB. iCloud is also not the fastest method for transferring large files. If you need to transfer a lot of media, it’s best to use a wired connection or an external hard drive.
Leveraging AirDrop
AirDrop is a handy tool built into both your iPhone and Mac, allowing you to wirelessly transfer files, including photos, videos, and documents, with ease. It utilizes Bluetooth and Wi-Fi to establish a secure connection between your devices, making it a quick and convenient way to move your media.
Transferring Media with AirDrop
To transfer media using AirDrop, ensure both your iPhone and Mac are turned on and have Bluetooth and Wi-Fi enabled.
- On your iPhone, open the Control Center by swiping down from the top right corner (or up from the bottom on older models) and tap the AirDrop icon. Select “Everyone” to make your iPhone discoverable by all nearby devices, or “Contacts Only” to limit it to your contacts.
- On your Mac, open Finder and click on “AirDrop” in the sidebar. You can choose to make your Mac discoverable by “Everyone” or “Contacts Only” using the options at the bottom of the AirDrop window.
- Select the mediayou want to transfer on your iPhone. This could be a photo, video, or document. Tap the “Share” icon (the square with an upward arrow) and choose “AirDrop.”
- Select your Macfrom the list of available devices. You may need to wait a few seconds for your Mac to appear if it’s not already visible.
- Accept the transferon your Mac. The media will begin transferring to your Mac. The progress of the transfer will be displayed on both your iPhone and Mac.
Limitations and Potential Issues
While AirDrop is a convenient option, it’s essential to be aware of its limitations:
- File Size Limits: AirDrop has a maximum file size limit. While the exact limit varies, it’s generally around 5GB. Larger files might need to be transferred using other methods.
- Distance and Connectivity: AirDrop relies on Bluetooth and Wi-Fi, so the distance between your iPhone and Mac is crucial. The range for AirDrop is typically around 30 feet. Strong Wi-Fi signals are also essential for successful transfers.
- Compatibility: AirDrop is compatible with iPhones and Macs running specific operating systems. Ensure your devices meet the minimum requirements for AirDrop to function correctly.
- Security Considerations: While AirDrop uses encryption to secure your data, it’s important to be aware of potential security risks, especially if you’re transferring sensitive information. Always ensure that your devices are up-to-date with the latest security patches.
Exploring Third-Party Apps
While iTunes, iCloud, and AirDrop are excellent options for transferring iPhone media to your Mac, third-party apps offer additional features and flexibility. These apps can streamline the process, offer advanced features like file conversion or editing, and provide a more user-friendly interface.
Popular Third-Party Apps
Third-party apps provide a wide range of options for transferring iPhone media to your Mac. Here’s a comparison of some popular choices:
- iMazing: iMazing is a versatile tool that allows you to transfer various types of data, including music, photos, videos, messages, and contacts. It also enables you to backup and restore your iPhone, manage your apps, and even access your iPhone’s file system.
It’s a comprehensive solution for managing your iPhone on your Mac.
- AnyTrans: AnyTrans is another popular choice that offers a user-friendly interface for transferring data between your iPhone and Mac. It supports a wide range of file types, including music, videos, photos, and documents. It also provides features for managing your iPhone’s storage space and transferring data between different Apple devices.
- PhoneView: PhoneView specializes in transferring data from your iPhone to your Mac, including messages, contacts, call logs, and even voice memos. It offers a clear and intuitive interface, making it easy to browse and export your iPhone’s data. PhoneView is a good option if you’re primarily interested in transferring specific types of data.
- CopyTrans: CopyTrans offers a range of tools for managing your iPhone, including CopyTrans Contacts, CopyTrans Photos, and CopyTrans Manager. These apps allow you to transfer specific types of data, such as contacts, photos, or music, to your Mac. CopyTrans apps are a good choice if you need a more specialized solution for transferring specific data types.
Features and Functionalities
Each third-party app offers a unique set of features and functionalities.
- iMazing: iMazing offers a wide range of features, including:
- Transferring various data types: Music, photos, videos, messages, contacts, and more.
- Backup and restore: Create full backups of your iPhone and restore them to your Mac or another iPhone.
- App management: Install, uninstall, and manage your iPhone apps.
- File system access: Access and manage files directly on your iPhone.
- AnyTrans: AnyTrans provides a comprehensive set of features, including:
- Transferring multiple file types: Music, videos, photos, documents, and more.
- Storage management: Analyze your iPhone’s storage space and free up space by deleting unnecessary files.
- Data transfer between Apple devices: Transfer data between your iPhone, iPad, and Mac.
- PhoneView: PhoneView focuses on transferring specific data types, including:
- Messages: Transfer your iPhone’s messages to your Mac, including attachments.
- Contacts: Export your iPhone’s contacts to your Mac.
- Call logs: View and export your iPhone’s call logs.
- Voice memos: Transfer your iPhone’s voice memos to your Mac.
- CopyTrans: CopyTrans offers specialized tools for transferring specific data types:
- CopyTrans Contacts: Transfer contacts from your iPhone to your Mac.
- CopyTrans Photos: Transfer photos from your iPhone to your Mac.
- CopyTrans Manager: Transfer music, videos, and other files from your iPhone to your Mac.
User Reviews and Recommendations
User reviews and recommendations can provide valuable insights into the performance and usability of different third-party apps.
- iMazing: iMazing consistently receives positive reviews for its comprehensive features, user-friendly interface, and reliability. Users praise its ability to transfer various data types, manage apps, and access the iPhone’s file system.
- AnyTrans: AnyTrans is also well-regarded for its user-friendly interface and wide range of features. Users appreciate its ability to transfer multiple file types, manage storage space, and transfer data between different Apple devices.
- PhoneView: PhoneView receives positive feedback for its simplicity and effectiveness in transferring specific data types, particularly messages, contacts, and call logs. Users find it easy to use and appreciate its focus on transferring specific data types.
- CopyTrans: CopyTrans apps are generally well-received for their specialized features and ability to transfer specific data types. Users find them useful for transferring contacts, photos, or music to their Mac.
Transferring Specific Media Types
Once you’ve chosen your preferred method, you’ll need to understand the specific steps involved in transferring different types of media. This section will cover how to transfer photos, videos, music, and documents from your iPhone to your Mac.
Transferring Photos
Photos are often the most frequently transferred media type. You can transfer photos from your iPhone to your Mac using a variety of methods, including iTunes, iCloud, AirDrop, and third-party apps. Here are the steps for transferring photos using iTunes:* Connect your iPhone to your Mac using a USB cable.
- Open iTunes and select your iPhone from the device list.
- Click the “Photos” tab.
- Select the “Sync Photos” option.
- Choose the photos you want to transfer and click “Apply”.
To transfer photos using iCloud, follow these steps:* Ensure that iCloud Photo Library is enabled on both your iPhone and your Mac.
- Open the Photos app on your Mac and select the photos you want to transfer.
- Right-click on the photos and select “Download”.
Transferring photos via AirDrop is simple and straightforward:* Ensure that both your iPhone and Mac have AirDrop enabled.
- Open the Photos app on your iPhone and select the photos you want to transfer.
- Tap the “Share” button and select your Mac from the list of available devices.
Third-party apps like Google Photos, Dropbox, and OneDrive can also be used to transfer photos. These apps often offer additional features such as cloud storage and photo editing.
Transferring Videos
Videos can be transferred using the same methods as photos. iTunes, iCloud, AirDrop, and third-party apps all support video transfer.To transfer videos using iTunes, follow these steps:* Connect your iPhone to your Mac using a USB cable.
- Open iTunes and select your iPhone from the device list.
- Click the “Movies” or “TV Shows” tab.
- Select the videos you want to transfer and click “Apply”.
Transferring videos using iCloud is similar to transferring photos:* Ensure that iCloud Photo Library is enabled on both your iPhone and your Mac.
- Open the Photos app on your Mac and select the videos you want to transfer.
- Right-click on the videos and select “Download”.
AirDrop can also be used to transfer videos:* Ensure that both your iPhone and Mac have AirDrop enabled.
Moving your music and photos from your iPhone to your Mac is a breeze, especially with the help of iCloud. Just make sure your devices are connected to the same Wi-Fi network, and you’re good to go. While you’re setting up your Mac, you might want to take a look at How to use AirPods Pro Ear Tip Fit Test to make them sound their best so you can get the best audio experience.
Once you’ve got your media transferred, you’ll be ready to rock out on your Mac!
- Open the Photos app on your iPhone and select the videos you want to transfer.
- Tap the “Share” button and select your Mac from the list of available devices.
Third-party apps can also be used to transfer videos.
Transferring Music
Music can be transferred using iTunes, iCloud Music Library, and third-party apps.To transfer music using iTunes:* Connect your iPhone to your Mac using a USB cable.
- Open iTunes and select your iPhone from the device list.
- Click the “Music” tab.
- Select the “Sync Music” option.
- Choose the music you want to transfer and click “Apply”.
Transferring music using iCloud Music Library is simple:* Ensure that iCloud Music Library is enabled on both your iPhone and your Mac.
- Open the Music app on your Mac and select the music you want to transfer.
- Right-click on the music and select “Download”.
Third-party apps like Spotify and Apple Music can also be used to transfer music.
Transferring Documents
Documents can be transferred using iCloud Drive, AirDrop, and third-party apps.To transfer documents using iCloud Drive:* Ensure that iCloud Drive is enabled on both your iPhone and your Mac.
- Open the Files app on your iPhone and select the documents you want to transfer.
- Tap the “Share” button and select “Save to iCloud Drive”.
- Open the iCloud Drive folder on your Mac and access the transferred documents.
Transferring documents using AirDrop is straightforward:* Ensure that both your iPhone and Mac have AirDrop enabled.
- Open the Files app on your iPhone and select the documents you want to transfer.
- Tap the “Share” button and select your Mac from the list of available devices.
Third-party apps like Dropbox, Google Drive, and OneDrive can also be used to transfer documents.
Managing Storage Space
Transferring your iPhone media to your Mac can take up a significant amount of storage space on both devices. You need to consider how much space is available on both your iPhone and Mac to avoid running into storage issues during the transfer process.
Moving your iPhone pics and vids to your Mac is super easy, especially if you’re using a cable. Just plug your phone in and open up the “Photos” app on your Mac. You can also try out a cool Mac trick – hold down the Option key to unlock Mac’s hidden menu bar actions – which might give you more transfer options.
Once you’ve got your media on your Mac, you can organize it, edit it, or even share it with friends.
Managing Storage Space on iPhone
Managing storage space on your iPhone is crucial, especially before transferring media to your Mac. If you’re running low on storage, you might encounter problems during the transfer process, and you might not be able to transfer all of your media.
Here are some strategies for managing storage space on your iPhone:
- Delete Unnecessary Files:Start by identifying and deleting unnecessary files, such as old photos, videos, apps, and documents. You can find these files in the Photos, Videos, Files, and App Store apps. You can also use the Storage section in the Settings app to see what’s taking up the most space on your iPhone and to quickly delete files.
- Use iCloud Storage:If you’re a subscriber to iCloud+, you can use iCloud to store photos, videos, and other files in the cloud, freeing up space on your iPhone. You can also use iCloud Drive to store files, including documents, spreadsheets, and presentations.
- Optimize Photos and Videos:You can use the Optimize iPhone Storage option in the Settings app to automatically reduce the size of photos and videos stored on your iPhone. This option will keep high-resolution versions of your photos and videos in iCloud and store smaller versions on your iPhone, freeing up space.
Managing Storage Space on Mac
Similar to your iPhone, managing storage space on your Mac is important before transferring media from your iPhone. Ensure you have enough space to accommodate all the files you’re transferring. Here are some strategies for managing storage space on your Mac:
- Delete Unnecessary Files:Like your iPhone, you can free up space on your Mac by deleting unnecessary files, such as old documents, downloads, and applications. You can use the Finder to identify and delete these files.
- Use External Storage:If you have a lot of media to transfer, consider using an external hard drive or a cloud storage service to store the files. This will free up space on your Mac’s internal drive.
- Optimize Media Files:Before transferring media files, you can optimize them to reduce their file size, which will help to conserve storage space on your Mac. You can use a compression tool like HandBrake to reduce the size of video files, and you can use a photo editor like Adobe Photoshop to reduce the size of images.
Optimizing Media Files for Efficient Transfer and Storage
Optimizing media files for efficient transfer and storage is important, especially if you’re dealing with large files. Here are some tips for optimizing media files:
- Reduce Image Size:For photos, you can reduce the file size without sacrificing quality by adjusting the resolution or using a lossy compression method. Many photo editing programs have options for saving images in a smaller file size. For example, you can use the “Save for Web” option in Adobe Photoshop to create smaller versions of images for web use.
- Compress Video Files:Video files are often very large, and compressing them can significantly reduce their size. You can use a video compression tool like HandBrake to compress video files without losing too much quality. HandBrake allows you to choose different compression settings, and you can experiment to find the best balance between file size and quality.
- Convert Audio Files:Audio files can also be compressed, and you can convert them to a smaller file format. For example, you can convert a large WAV file to a smaller MP3 file. You can use a program like Audacity to convert audio files between different formats.
Troubleshooting Common Issues
It’s not uncommon to encounter hiccups during media transfer. This section dives into some common problems and offers solutions to get your media flowing smoothly.
Connection Errors
Connection issues can disrupt the transfer process. It’s essential to ensure your iPhone and Mac are connected securely and properly.
- Verify Cable Connection:Double-check that the Lightning cable connecting your iPhone to your Mac is firmly plugged into both devices. A loose connection can cause transfer errors.
- Check for Cable Damage:Inspect the cable for any signs of wear, fraying, or damage. A damaged cable can hinder data transfer.
- Try Different Ports:If using a USB-C port on your Mac, try a different port. Some ports might be malfunctioning.
- Restart Devices:Sometimes, restarting both your iPhone and Mac can resolve connection issues.
File Transfer Failures
File transfer failures can be frustrating. Understanding the causes and solutions can help you overcome these hurdles.
- Insufficient Storage Space:Ensure your Mac has enough free space to accommodate the media files you’re transferring. If not, delete unnecessary files to free up space.
- Network Connectivity:If using iCloud or AirDrop, ensure a stable internet connection. Weak Wi-Fi signals or unstable network connections can interrupt the transfer process.
- Firewall or Security Software:Your Mac’s firewall or security software might be blocking the transfer. Temporarily disable these programs to see if it resolves the issue.
- Corrupted Files:If a specific file consistently fails to transfer, it might be corrupted. Try deleting the file from your iPhone and transferring it again.
Data Loss
Losing media files during transfer is a nightmare. Here are some tips to prevent data loss:
- Backup Your iPhone:Before transferring media, create a backup of your iPhone using iTunes or iCloud. This will ensure you have a copy of your data in case something goes wrong.
- Verify Transfer Progress:Monitor the transfer progress closely. If the transfer stalls or shows an error, stop the process and try again.
- Avoid Disconnecting Devices:Don’t disconnect your iPhone from your Mac during the transfer process. This can cause data loss.
- Use Reliable Transfer Methods:Choose reliable transfer methods like iTunes or iCloud, which are designed to handle large file transfers safely.
Preventing Future Transfer Problems
Following these tips can help you avoid common transfer issues in the future:
- Keep Software Up-to-Date:Ensure both your iPhone and Mac have the latest software updates installed. Updates often include bug fixes and improvements that enhance transfer reliability.
- Use a High-Quality Cable:Invest in a high-quality Lightning cable from a reputable brand. This minimizes the risk of connection errors.
- Monitor Disk Space:Regularly check the available disk space on your Mac to ensure you have enough room for your media files.
- Back Up Regularly:Make it a habit to back up your iPhone frequently. This creates a safety net for your data and reduces the risk of data loss during transfers.
Data Security and Privacy
Transferring your iPhone media to your Mac involves sharing sensitive personal data, so it’s crucial to prioritize security and privacy throughout the process. While most transfer methods offer built-in security features, it’s essential to understand these features and take additional steps to protect your information.
Data Protection During Transfer
Data protection during transfer involves minimizing the risk of unauthorized access to your media while it’s being moved from your iPhone to your Mac. Here are some key ways to ensure your data is secure:
- Use a Secure Wi-Fi Network:When transferring data wirelessly, ensure you’re connected to a secure Wi-Fi network, preferably your own home network, to minimize the risk of data interception. Public Wi-Fi networks can be less secure, potentially exposing your data to unauthorized access.
- Disable Public Wi-Fi Sharing:Public Wi-Fi networks often allow anyone to connect, potentially exposing your data to others. Disable public Wi-Fi sharing on your iPhone and Mac to limit the risk of unauthorized access during the transfer.
- Enable Data Encryption:Encrypting your data during transfer is essential, especially if using a public Wi-Fi network. Both iTunes and iCloud offer encryption features to secure your data during the transfer process.
- Verify Transfer Source and Destination:Double-check the source and destination of the data transfer to ensure you’re sending data to the correct device and not a malicious website or app disguised as the intended recipient.
Secure Storage and Access
After transferring your media to your Mac, you need to ensure its secure storage and access to protect it from unauthorized use.
- Use Strong Passwords:Secure your Mac with a strong password, and consider using a password manager to store and manage your passwords securely. This prevents unauthorized access to your Mac and the media stored on it.
- Enable File Encryption:Encrypting files on your Mac provides an extra layer of security, preventing unauthorized access even if someone gains access to your Mac.
- Use File Sharing With Caution:When sharing files with others, be cautious about who you share them with and how you share them. Consider using encrypted file-sharing services or sharing individual files rather than entire folders.
- Regularly Backup Your Data:Back up your Mac regularly to ensure you have a copy of your media in case of data loss or device failure. Consider using cloud storage services with strong encryption features for additional security.
Last Recap: How To Transfer Your IPhone Media To Mac
Transferring your iPhone media to your Mac doesn’t have to be a complicated process. By understanding the different methods available and following the tips in this guide, you can easily and securely transfer your photos, videos, music, and documents. Whether you choose to use iTunes, iCloud, AirDrop, or a third-party app, you’ll be able to manage your media effectively and ensure that your precious memories are safely stored on both your iPhone and your Mac.
Commonly Asked Questions
What if I don’t have enough storage space on my Mac?
You can free up space on your Mac by deleting unnecessary files, moving large files to an external hard drive, or using cloud storage services like iCloud or Google Drive.
Can I transfer my iPhone media wirelessly?
Yes, you can transfer media wirelessly using iCloud, AirDrop, or some third-party apps.
Is it safe to transfer my iPhone media to my Mac?
Yes, as long as you use reputable methods like iTunes, iCloud, or AirDrop. Avoid using untrusted third-party apps, and always ensure that your devices are up to date with the latest security patches.

