Disassemble Your Xbox 360 Slim for Repairs or Modifications
How to Take Apart an Xbox 360 Slim for Repairs and Modifications – Delve into the world of Xbox 360 Slim repairs and modifications! This comprehensive guide will empower you with the knowledge and skills to take apart your console with confidence, whether you’re troubleshooting issues or giving it a fresh look.
With step-by-step instructions, clear explanations, and troubleshooting tips, you’ll navigate the inner workings of your Xbox 360 Slim like a pro. So, grab your tools and let’s get started on this exciting journey!
Disassembling the Outer Casing

Before you begin, ensure you have the necessary tools and a clean, well-lit workspace. Handle screws and panels with care to avoid damage.
Removing the Top Panel
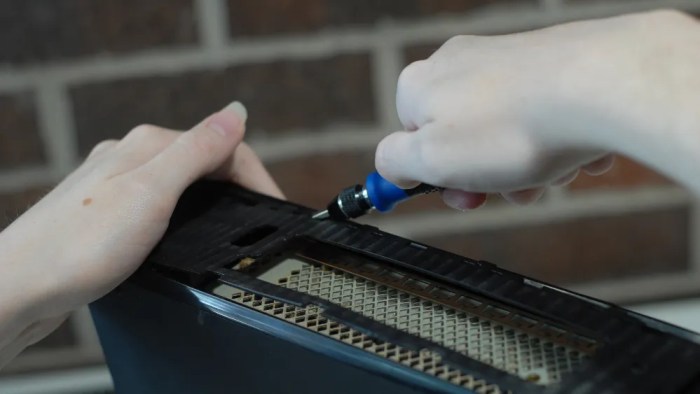
- Locate the four screws on the back of the console and remove them using a Torx T10 screwdriver.
- Slide the top panel towards the back of the console and lift it off.
Removing the Side Panels
- On each side panel, locate the two screws on the bottom and remove them using a Phillips #00 screwdriver.
- Slide the side panel towards the back of the console and lift it off.
Removing the Front Panel
- Locate the two screws on the bottom of the front panel and remove them using a Phillips #00 screwdriver.
- Slide the front panel towards the back of the console and lift it off.
Removing the Motherboard: How To Take Apart An Xbox 360 Slim For Repairs And Modifications
The motherboard is the central component of the Xbox 360 Slim. It houses the CPU, GPU, RAM, and other essential components. To perform repairs or modifications, it’s necessary to remove the motherboard from the casing.
To detach the motherboard, follow these steps:
Detaching the Motherboard
- Disconnect all cables and wires connected to the motherboard, including the power supply, AV cables, and hard drive.
- Remove the screws securing the motherboard to the casing.
- Carefully lift the motherboard out of the casing, being mindful of any remaining cables or connections.
Identifying Key Components
The motherboard is the central hub of the Xbox 360 Slim. It houses the CPU, GPU, RAM, and other essential components that make the console function.
CPU (Central Processing Unit)
The CPU is the brain of the Xbox 360 Slim. It handles all the processing tasks, including running games, applications, and the operating system. The CPU is connected to the motherboard via a socket, and it can be replaced if necessary.
GPU (Graphics Processing Unit)
The GPU is responsible for rendering graphics. It takes the data from the CPU and converts it into images that are displayed on the screen. The GPU is connected to the motherboard via a PCI Express slot, and it can be replaced if necessary.
RAM (Random Access Memory)
RAM is used to store data that is currently being processed by the CPU. It is a volatile memory, meaning that it loses its data when the console is turned off. The RAM is connected to the motherboard via slots, and it can be upgraded if necessary.
Replacing the Hard Drive
Replacing the hard drive in your Xbox 360 Slim can be necessary for several reasons, including upgrading storage capacity, replacing a faulty drive, or installing a solid-state drive (SSD) for faster performance.There are a few things to keep in mind when replacing the hard drive:
- Compatibility:The Xbox 360 Slim supports hard drives with a capacity of up to 500GB. You can use either a traditional hard disk drive (HDD) or a solid-state drive (SSD). SSDs are more expensive but offer faster performance.
- Formatting:The new hard drive must be formatted before it can be used with the Xbox 360 Slim.
You can format the drive using the Xbox 360’s built-in formatting tool.
- Data transfer:If you want to transfer your data from the old hard drive to the new one, you can use the Xbox 360’s data transfer tool. This will copy all of your games, apps, and data to the new hard drive.
Installing a New Optical Drive
The optical drive is responsible for reading discs, such as games and movies. It is located in the front of the Xbox 360 Slim console.To remove the old optical drive, you will need a Torx T10 screwdriver.
- Unplug the Xbox 360 Slim from the power outlet.
- Remove the faceplate from the console.
- Remove the two screws that secure the optical drive to the console.
- Lift the optical drive up and out of the console.
To install a new optical drive, simply reverse the steps above.
Connecting the Optical Drive
Once you have installed the new optical drive, you will need to connect it to the motherboard.
- Locate the optical drive connector on the motherboard. It is a white connector with 12 pins.
- Align the optical drive connector with the connector on the motherboard.
- Push down on the optical drive connector until it clicks into place.
Troubleshooting Common Issues
During repairs or modifications, several common issues may arise. This section provides troubleshooting tips to resolve these issues effectively.
Identifying the root cause of the problem is crucial before attempting any troubleshooting steps. This can be achieved by carefully examining the symptoms, error messages, or physical observations.
Loose Connections
Loose connections are a common cause of malfunctions in Xbox 360 Slim repairs or modifications. Ensure that all cables, wires, and connectors are securely attached to their respective ports or terminals. Inspect for any loose plugs, bent pins, or damaged wires.
If a loose connection is detected, carefully reconnect the affected components and ensure they are firmly in place. Avoid excessive force when connecting to prevent damage.
Power Supply Problems
Power supply issues can manifest in various ways, such as the console failing to turn on, experiencing random shutdowns, or displaying power-related error messages.
To troubleshoot power supply problems, start by checking the power cord and outlet. Ensure the cord is securely connected to both the console and the power outlet. If possible, try using a different power cord or outlet to rule out any issues with these components.
If the issue persists, the power supply unit (PSU) within the console may be faulty. Replacing the PSU requires technical expertise and should be performed by a qualified technician.
Overheating
Overheating can occur during extended use or if the console’s ventilation is obstructed. Symptoms of overheating include the console becoming unusually hot to the touch, noisy fan operation, or sudden shutdowns.
To prevent overheating, ensure the console has adequate ventilation and is not placed in enclosed spaces. Clean the console’s air vents regularly to remove dust and debris that may block airflow. If the issue persists, consider replacing the thermal paste on the console’s CPU or GPU.
Hard Drive Issues
Hard drive issues can cause various problems, such as the console failing to boot, experiencing data corruption, or displaying error messages related to storage.
To troubleshoot hard drive issues, start by checking the connections between the hard drive and the motherboard. Ensure the SATA cable and power connector are securely attached. If possible, try using a different hard drive to rule out any issues with the current one.
If the issue persists, the hard drive may be physically damaged or have developed bad sectors. In such cases, replacing the hard drive is the most effective solution.
Software Glitches
Software glitches can occasionally occur, leading to unexpected behavior, freezes, or crashes.
To resolve software glitches, try restarting the console. If the issue persists, consider performing a factory reset. This will erase all data from the console, so be sure to back up any important files before proceeding.
If the issue remains after a factory reset, the console’s software may be corrupted. In such cases, it may be necessary to reinstall the console’s operating system using a USB flash drive.
Cleaning and Maintenance

Maintaining the cleanliness of your Xbox 360 Slim is crucial for its optimal performance and longevity. Regular cleaning helps prevent dust and debris from accumulating, which can lead to overheating, malfunctions, and reduced lifespan.To ensure proper maintenance, it’s recommended to clean the console’s exterior and interior regularly.
For the exterior, use a soft, dry cloth to wipe away dust and smudges. Avoid using abrasive materials or harsh cleaning agents that could damage the surface.
Taking apart an Xbox 360 Slim for repairs or modifications can be a daunting task, but with the right guidance, it can be a breeze. One way to ensure a successful repair is to keep a record of your progress, and for that, you may want to check out How to Delete Your Facebook Watch History (and Why You Should) . By keeping a detailed log, you can easily track your steps and avoid any costly mistakes.
This way, you can confidently proceed with your Xbox 360 Slim repair or modification, knowing that you have a reliable record to fall back on.
Cleaning the Interior, How to Take Apart an Xbox 360 Slim for Repairs and Modifications
Cleaning the interior of the Xbox 360 Slim requires more care and attention. Here are the steps to follow:
- 1.
- *Unplug the console from all power sources.
- 2.
- *Remove the outer casing by following the disassembly steps Artikeld earlier.
- 3.
- *Use a soft brush or compressed air to remove dust and debris from the motherboard, heatsink, and other internal components.
- 4.
- *For stubborn dirt or grime, use a cotton swab dipped in isopropyl alcohol to gently clean the affected areas.
- 5.
- *Allow the console to dry completely before reassembling it.
Upgrading the System

Upgrading your Xbox 360 Slim can enhance its performance and capabilities. Options include replacing the hard drive with a larger or faster model, adding an external hard drive for additional storage, or installing a custom firmware that enables advanced features.
Hard Drive Upgrade
A larger hard drive provides more storage space for games, apps, and media files. A faster hard drive, such as a solid-state drive (SSD), can improve loading times and overall system responsiveness. However, replacing the hard drive requires technical skills and voids the warranty.
External Hard Drive
An external hard drive is a convenient and affordable way to expand storage without opening the console. It can be used to store games, apps, and media files, and it’s easily portable between devices. However, external hard drives can be slower than internal hard drives.
Custom Firmware
Custom firmware, such as Freeboot or JTAG, allows you to install unsigned games and applications, play backups of games, and modify system settings. However, installing custom firmware is complex and risky, and it can brick your console if not done correctly.
Knowing how to take apart an Xbox 360 Slim for repairs and modifications can be incredibly useful for gamers and tech enthusiasts alike. If you’re having trouble with your Xbox 360 Slim, you can consult online resources like this guide to help you troubleshoot and repair your console.
Customizing the Appearance
The Xbox 360 Slim’s sleek design offers a variety of customization options to match your personal style. From vibrant faceplates to protective skins, you can transform the console’s exterior into a unique expression of your gaming personality.
If you’re a tech whiz looking to tinker with your Xbox 360 Slim, we’ve got you covered with our step-by-step guide on how to disassemble it. But hold up! If you’re facing the “externally-managed-environment” error while working on Linux, check out this handy guide How to Fix the pip “externally-managed-environment” Error on Linux . Once you’ve sorted that out, you can dive back into our Xbox 360 Slim disassembly guide and get your hands dirty!
Custom Faceplates
Custom faceplates are a quick and easy way to change the look of your Xbox 360 Slim. Available in a wide range of colors and designs, they simply snap onto the console, providing a secure and stylish fit.
Skins
Skins offer a more permanent and protective customization option. These thin, adhesive covers wrap around the console’s exterior, shielding it from scratches and spills. Skins come in a variety of materials, including vinyl, leather, and carbon fiber, allowing you to choose the perfect look and feel for your console.
Other Accessories
In addition to faceplates and skins, there are various other accessories available to enhance the appearance of your Xbox 360 Slim. These include:
- LED lights:Add a touch of ambiance to your gaming setup with LED lights that illuminate the console’s interior or exterior.
- Controller skins:Match your console’s design with custom controller skins that provide a comfortable and personalized gaming experience.
- Carrying cases:Protect your console and accessories during travel with a stylish carrying case that reflects your gaming style.
Creating a Dedicated Gaming Setup
Establishing a dedicated gaming setup for your Xbox 360 Slim offers numerous advantages, including enhanced immersion, optimized performance, and tailored comfort. This dedicated space allows you to focus solely on your gaming experience without distractions, creating an environment that caters specifically to your gaming needs.
When designing your dedicated gaming setup, consider the following tips to optimize it for your Xbox 360 Slim:
Ergonomic Seating
Invest in a comfortable and supportive gaming chair that provides adequate lumbar support and adjustability to ensure prolonged gaming sessions without discomfort.
Optimized Lighting
Create a visually appealing and functional lighting setup that minimizes eye strain and enhances the ambiance of your gaming space. Consider dimmable lighting or LED strips to customize the lighting intensity.
Audio Enhancement
Upgrade your audio experience with a dedicated sound system or high-quality headphones. This allows you to immerse yourself in the game’s soundscape and enjoy clear and dynamic audio.
Cable Management
Keep your gaming area organized and clutter-free by managing cables effectively. Utilize cable ties, velcro straps, or cable channels to conceal and secure wires, reducing tripping hazards and maintaining a clean aesthetic.
Peripherals and Accessories
Enhance your gaming experience with additional peripherals such as a gaming keyboard and mouse for enhanced precision and control. Consider specialized accessories like a steering wheel or flight stick for immersive racing or flight simulations.
Customization and Personalization
Make your gaming setup unique by customizing it with personal touches. Display your favorite gaming memorabilia, add artwork or posters, and choose color schemes that reflect your style and preferences.
Safety Precautions
When working on any electrical device, safety should be your top priority. This is especially true when dealing with the Xbox 360 Slim, as it contains several potentially hazardous components.
Before beginning any repairs or modifications, be sure to take the following precautions:
Handling Electrical Components
- Always unplug the Xbox 360 Slim from the power outlet before opening it up.
- Wear anti-static gloves to prevent electrostatic discharge (ESD), which can damage sensitive electronic components.
- Handle the motherboard and other electrical components with care. Avoid touching the contacts or solder joints.
Using Tools
- Use the proper tools for the job. Do not use screwdrivers that are too small or too large for the screws you are trying to remove.
- Be careful not to overtighten screws, as this can strip the threads.
- If you are using a soldering iron, be sure to use a heat-resistant surface and wear eye protection.
Final Conclusion
Congratulations! You’ve successfully mastered the art of Xbox 360 Slim disassembly. Whether you’ve fixed a pesky issue or transformed its appearance, you can now enjoy your console with newfound appreciation. Remember, the key to successful repairs and modifications lies in careful planning, attention to detail, and a dash of troubleshooting savvy.
Keep these principles in mind, and your Xbox 360 Slim will continue to bring you countless hours of gaming bliss.
Question Bank
Q: What tools do I need for this project?
A: Essential tools include a Torx T8 screwdriver, a Phillips #0 screwdriver, and a plastic opening tool.
Q: Can I replace the hard drive with a larger one?
A: Yes, the Xbox 360 Slim supports hard drives up to 500GB.
Q: How do I troubleshoot a faulty optical drive?
A: Check the disc for scratches or damage. Clean the lens with a cotton swab and isopropyl alcohol. If the issue persists, the optical drive may need to be replaced.