How To Set Up Your New Mac Like A Pro
How to set up your new Mac like a pro? It’s not just about clicking through the initial setup wizard, it’s about making your Mac work for you, not the other way around. From customizing your workspace to maximizing performance, we’ll walk you through everything you need to know to make your Mac experience truly yours.
Think of it as getting your Mac ready for college. You’ll need the right apps for your classes, a way to stay organized, and a system for handling all those deadlines. We’ll cover all that and more, so you can start using your Mac like a pro in no time.
Initial Setup and Personalization

The initial setup of your new Mac is a breeze, guiding you through the essential steps to personalize your experience. From language selection to account creation and customizing your appearance, this process sets the stage for a tailored Mac experience.
Language Selection and Account Creation
The initial setup process begins with language selection. Choose your preferred language, and the Mac will adapt its interface and system settings accordingly. This is a crucial step to ensure a comfortable and familiar experience from the start. Next, you’ll create your primary user account.
This account acts as your gateway to the Mac, allowing you to access your files, applications, and system settings. You’ll need to provide a username and password, which you can use to log in and secure your data.
Apple ID Configuration
Your Apple ID is the key to unlocking the full potential of your Mac. It acts as your digital identity across all Apple devices, granting you access to various services like iCloud, App Store, and Apple Music. During setup, you’ll be prompted to sign in with your existing Apple ID or create a new one.
Configuring your Apple ID allows you to sync your data across devices, download apps, and enjoy the benefits of Apple’s ecosystem.
Personalizing Your Mac’s Appearance
After setting up your account, you can start customizing your Mac’s appearance to reflect your personal style.
Choosing a Wallpaper
The first step is to select a wallpaper that sets the mood for your desktop. The Mac comes with a collection of stunning wallpapers, or you can choose from your own photos or download new ones from the internet. You can also set different wallpapers for your desktop and lock screen, adding another layer of personalization.
Setting Up the Dock
The Dock is a crucial element of the Mac experience, providing quick access to your favorite apps, documents, and folders. You can customize the Dock by adding or removing items, rearranging them, and even changing its appearance. You can also choose to show or hide the Dock, making it a more discreet or prominent feature depending on your preferences.
Adjusting System Preferences
The System Preferences menu is your control center for customizing every aspect of your Mac’s behavior. From managing notifications and sound settings to configuring network connections and customizing the trackpad, you can fine-tune your Mac to work exactly the way you want it to.
Managing User Accounts and Parental Controls
You can create multiple user accounts on your Mac, each with its own set of settings and permissions. This allows you to share your Mac with family members or colleagues while maintaining your own privacy and security. For families, parental controls are a valuable tool to manage children’s access to apps, websites, and other features.
You can set time limits, block inappropriate content, and restrict specific apps, creating a safe and controlled environment for your children.
Essential Apps and Software
You’ve got your Mac set up, but now it’s time to fill it with the apps that will make your life easier and more productive. There’s a vast world of software out there, but we’ll focus on some essentials to get you started.
Apple’s Built-In Apps
Apple’s built-in apps are designed to work seamlessly with macOS and offer a solid foundation for many tasks. These apps are pre-installed on your Mac and are generally reliable and user-friendly.
- Safari: A fast and secure web browser with built-in privacy features and a clean interface. It integrates well with other Apple devices and offers a robust extension library.
- Mail: Manage your email with ease, allowing you to create and send emails, organize messages into folders, and filter spam. It also supports multiple accounts, including Gmail, Yahoo Mail, and Outlook.
- Calendar: A calendar app for scheduling appointments, meetings, and events. You can create reminders, set alarms, and share calendars with others.
- Pages: A word processing app for creating documents, reports, letters, and more. It offers a variety of templates and features for formatting text, adding images, and creating tables.
- Numbers: A spreadsheet app for organizing and analyzing data. It allows you to create charts, graphs, and formulas, and it integrates with other Apple apps like Pages and Keynote.
- Keynote: A presentation app for creating slideshows with stunning visuals and animations. It offers a variety of templates, transitions, and effects to make your presentations engaging and memorable.
Productivity Apps
Productivity apps can help you streamline your workflow, manage tasks, and stay organized.
- Todoist: A popular task management app that helps you break down projects into manageable tasks, set deadlines, and prioritize your workload. You can access Todoist from your Mac, iPhone, and web browser.
- Notion: A versatile workspace that combines note-taking, task management, and project management capabilities. You can create databases, wikis, and documents, and it offers robust collaboration features.
- Evernote: A note-taking app that allows you to capture ideas, organize notes, and access them from any device. It supports text, images, audio recordings, and web clippings.
- Slack: A communication platform that helps teams collaborate and stay connected. It offers instant messaging, file sharing, and video conferencing capabilities.
Creativity Apps
Macs are known for their creative capabilities, and there are countless apps to unleash your artistic side.
Setting up a new Mac can be a breeze if you know the right tricks. From customizing your Dock to installing essential apps, there’s a lot you can do to make your experience smoother. And if you’re looking to push the boundaries of your Mac’s capabilities, you might want to check out How to use your Mac with Vision Pro.
This guide will help you unlock a whole new level of productivity and immersion. Once you’ve got your Mac set up like a pro, you can start exploring the exciting world of Vision Pro and see how it can enhance your workflow.
- Adobe Photoshop: The industry standard for photo editing and manipulation. It offers a vast array of tools and features for enhancing images, creating composites, and designing graphics.
- Affinity Designer: A powerful vector graphics editor that provides a professional-grade alternative to Adobe Illustrator. It’s known for its speed and intuitive interface.
- GarageBand: A free music production app that allows you to create, record, and edit music. It includes a wide range of instruments, loops, and effects.
- Final Cut Pro: A professional video editing software that offers advanced tools for creating high-quality films, documentaries, and commercials.
Communication Apps
Stay connected with friends, family, and colleagues through a variety of communication apps.
- FaceTime: Apple’s video calling app that allows you to make free video and audio calls to other Apple devices.
- WhatsApp: A popular messaging app that allows you to send text messages, make voice and video calls, and share files with friends and family.
- Telegram: A messaging app known for its privacy features and cross-platform compatibility. It offers end-to-end encryption for messages and calls.
- Zoom: A video conferencing app that allows you to host meetings, webinars, and online events with multiple participants.
Other Essential Apps
Beyond the categories above, there are other apps that can enhance your Mac experience.
- 1Password: A password manager that helps you securely store and manage your online credentials.
- CleanMyMac X: A system optimization app that helps you clean up your Mac, remove junk files, and free up disk space.
- Alfred: A productivity app that allows you to quickly launch apps, search files, and automate tasks.
- Bartender: A menu bar management app that helps you organize and hide icons from your Mac’s menu bar.
Optimizing Performance and Storage: How To Set Up Your New Mac Like A Pro
Your Mac is a powerful machine, but like any computer, it can benefit from some optimization to keep running smoothly. This section explores ways to enhance your Mac’s performance by managing background processes, clearing cache, and updating software. We’ll also discuss strategies for managing storage space, including using external drives, cloud storage, and deleting unnecessary files.
Finally, we’ll provide tips for troubleshooting common performance issues and maintaining a clean system.
Managing Background Processes
Background processes, those that run in the background without your direct interaction, can consume resources and slow down your Mac.
- To view running processes, open Activity Monitor(found in Applications > Utilities).
- In Activity Monitor, click the CPUtab to see which processes are using the most CPU resources.
- If you see a process consuming excessive resources, select it and click Force Quit. This will terminate the process, but you may need to restart the related application.
Clearing Cache
Your Mac stores temporary files, known as cache, to speed up common tasks. Over time, this cache can become cluttered and slow down your system.
- To clear the cache, you can use a third-party utility like CleanMyMac Xor Onyx. These apps can scan your Mac for unnecessary files, including cache, and remove them.
- You can also manually clear the cache for specific applications. For example, to clear the Safari cache, go to Safari > Preferences > Advancedand check the box next to Show Develop menu in menu bar. Then, go to Develop > Empty Caches.
Updating Software
Outdated software can lead to performance issues and security vulnerabilities. Keeping your Mac and its applications up to date is crucial for optimal performance.
- To check for software updates, go to System Preferences > Software Update. MacOS will automatically check for updates and install them if available.
- To update individual applications, open the App Storeand click the Updatestab. Any available updates will be listed here.
Managing Storage Space
As you use your Mac, files accumulate, and storage space can become limited.
- To see how much storage space is available, go to Apple Menu > About This Mac > Storage.
- You can manage storage space by deleting unnecessary files, using external drives, or using cloud storage.
Using External Drives
External drives offer a convenient way to store large files, freeing up space on your Mac’s internal drive.
- You can connect an external drive to your Mac via USB, Thunderbolt, or other interfaces.
- You can then move files to the external drive or use it as a backup destination.
Cloud Storage
Cloud storage services like iCloud, Dropbox, and Google Drive allow you to store files online, accessible from any device.
- This can be a good option for storing important files or files you need to access frequently from different devices.
- Cloud storage services typically offer a free tier with limited storage space, and you can purchase additional storage if needed.
Deleting Unnecessary Files
One of the easiest ways to free up storage space is to delete unnecessary files.
- You can use the Finderto locate and delete files you no longer need.
- You can also use the Storagesection in System Preferencesto see which files and applications are taking up the most space and delete them.
Troubleshooting Performance Issues
If your Mac is experiencing performance issues, there are several steps you can take to troubleshoot the problem.
- Restart your Mac:Sometimes, a simple restart can resolve performance issues.
- Check for updates:Make sure your Mac and its applications are up to date.
- Run Disk Utility:Disk Utility can check your hard drive for errors and repair them. To access Disk Utility, go to Applications > Utilities.
- Check for malware:Malware can slow down your Mac. You can use a reputable antivirus program to scan your Mac for malware.
- Reset the SMC:The System Management Controller (SMC) manages various hardware functions. Resetting the SMC can sometimes resolve performance issues. To reset the SMC, follow the instructions on Apple’s website.
Maintaining a Clean System
Maintaining a clean system is crucial for optimal performance.
- Regularly delete unnecessary files:This will help free up storage space and improve performance.
- Run Disk Utility:Disk Utility can help keep your hard drive healthy and optimized.
- Use a third-party cleaning utility:Apps like CleanMyMac X can help you clean up your Mac and optimize its performance.
Connectivity and Networking
Staying connected is crucial for any Mac user, whether you’re browsing the web, streaming content, or collaborating with others. This section will guide you through setting up Wi-Fi and Ethernet connections, configuring Bluetooth devices, and securing your network for enhanced privacy and safety.
Connecting to Wi-Fi Networks
Connecting to a Wi-Fi network on your Mac is a simple process. You can access the Wi-Fi menu in the top right corner of the screen, which will display a list of available networks. To connect, simply click on the desired network and enter the password if prompted.
Setting Up Ethernet Connections
For a more stable and potentially faster connection, you can use an Ethernet cable. Most Macs come with an Ethernet port, typically located on the side or back of the device. Simply connect one end of the cable to your Mac’s Ethernet port and the other end to your router or modem.
Once connected, your Mac will automatically recognize the network and establish a connection.
Configuring Bluetooth Devices
Bluetooth technology allows you to connect wirelessly to various devices, such as headphones, speakers, keyboards, and mice. To pair a Bluetooth device with your Mac, follow these steps:
- Open the Bluetooth preferences by clicking on the Apple menu and selecting System Settings. Then click on Bluetooth.
- Make sure Bluetooth is turned on.
- Put your Bluetooth device in pairing mode. This typically involves pressing a button on the device or following instructions in its manual.
- Your Mac will scan for available Bluetooth devices. When your device appears in the list, click on it to pair.
- You may be prompted to enter a passcode or confirm the pairing request.
Securing Network Connections
Protecting your Mac’s network connections is crucial for privacy and security. Here are some tips:
- Use strong passwords for your Wi-Fi network and router.
- Enable WPA2 or WPA3 encryption for your Wi-Fi network. These protocols encrypt data transmitted over the network, making it difficult for unauthorized individuals to intercept it.
- Consider using a VPN (Virtual Private Network) to encrypt your internet traffic, especially when using public Wi-Fi networks.
- Keep your Mac’s operating system and software up to date to ensure you have the latest security patches.
- Be cautious about connecting to unknown or unsecured Wi-Fi networks.
Managing Privacy Settings, How to set up your new Mac like a pro
Your Mac offers several privacy settings to control what information is shared with others.
- Access the Privacy & Security section in System Settings to manage settings for location services, camera, microphone, and other sensitive data.
- Review and adjust the settings to ensure your privacy is protected. For example, you can choose to disable location services for specific apps or limit the data shared with websites.
Security and Privacy
Your Mac is a powerful tool that holds a lot of your personal information, so it’s essential to take security and privacy seriously. Protecting your data is paramount, and a few simple steps can make a big difference in keeping your Mac and your information safe.
Strong Passwords and Two-Factor Authentication
Strong passwords are the first line of defense against unauthorized access to your Mac and online accounts. A strong password is at least 12 characters long and includes a mix of uppercase and lowercase letters, numbers, and symbols. Avoid using common words or phrases that can be easily guessed.
Two-factor authentication adds an extra layer of security by requiring you to enter a code from your phone or other device in addition to your password. This makes it much harder for hackers to access your accounts, even if they have your password.
You can enable two-factor authentication for your Apple ID, as well as for many other online services.
Managing User Permissions and Controlling Access to Sensitive Data
MacOS provides granular control over user permissions, allowing you to determine who can access specific files and folders. You can create separate user accounts for different family members or for work and personal use. Each user account has its own set of permissions, so you can restrict access to sensitive data based on the user’s role.You can also set permissions for individual files and folders, allowing you to control who can read, write, or delete them.
This is particularly important for files containing sensitive information, such as financial records or personal documents.
Protecting the Mac from Malware and Phishing Attacks
Malware is software designed to harm your computer or steal your personal information. Phishing attacks use deceptive emails or websites to trick you into revealing your passwords or other sensitive data. Here are some tips for protecting your Mac from these threats:* Keep your software up to date.Software updates often include security patches that fix vulnerabilities that could be exploited by malware.
- Use a reputable antivirus program.Antivirus software can help detect and remove malware from your Mac.
- Be cautious about clicking on links in emails or on websites.If you’re not sure about a link, don’t click on it.
- Don’t download files from untrusted sources.Only download files from websites you trust.
- Be aware of phishing attacks.Phishing emails often try to trick you into clicking on a link or providing personal information. If you receive an email that seems suspicious, don’t click on any links or provide any information.
Customization and Personalization

Macs are known for their flexibility and ability to be tailored to individual preferences. From keyboard shortcuts to themes, you can make your Mac feel like your own.
Keyboard Shortcuts
Keyboard shortcuts are a great way to speed up your workflow. You can customize the existing shortcuts or create new ones for specific tasks.
- To customize existing shortcuts, go to System Settings> Keyboard> Keyboard Shortcuts. You can then search for the shortcut you want to change and click on the current shortcut to assign a new one.
- To create a new shortcut, click on the +button at the bottom of the window and select the application and the action you want to assign a shortcut to. Then, enter the new shortcut you want to use.
You can also create custom keyboard layouts.
- To create a custom keyboard layout, go to System Settings> Keyboard> Keyboard Layouts. Click the +button and choose the keyboard layout you want to customize. Then, click the Customizebutton.
- You can then change the keys and their corresponding characters. For example, you can swap the positions of the Qand Akeys to make it easier to type in a specific language.
Themes and Widgets
Themes can change the look and feel of your Mac. You can find a variety of themes online, from minimalist to colorful.
- To install a theme, download it from a reputable source and double-click on the theme file. The theme will then be installed automatically.
- To change the theme, go to System Settings> Desktop & Screen Saver> Desktop. Then, select the theme you want to use.
Widgets are small applications that can be added to your desktop. They can provide quick access to information, such as the weather, news, or your calendar.
- To add a widget, go to System Settings> Desktop & Screen Saver> Widgets. Then, drag the widget you want to add to your desktop.
- You can customize the size and position of widgets by dragging them around on your desktop.
Workspace Organization
A well-organized workspace can help you be more productive.
- Create folders for different types of files. For example, you could have a folder for documents, another for images, and another for music.
- Use the Finderto organize your files and folders. You can create new folders, rename existing ones, and move files between folders.
- Take advantage of the Spotlightsearch feature to quickly find files and applications. You can search for files by name, content, or even date.
Productivity and Workflow

A new Mac offers a plethora of productivity tools and features that can streamline your workflow and boost efficiency. By mastering these features, you can save time and focus on what matters most.
Spotlight Search
Spotlight is a powerful search tool built into macOS that can quickly find files, apps, emails, contacts, and more. You can access Spotlight by clicking the magnifying glass icon in the menu bar or by pressing Command+Space. Here are some tips for using Spotlight effectively:
- Use natural language search queries. For example, instead of typing “document about marketing,” you can simply type “marketing document.”
- Combine multiple search terms to narrow down your results. For instance, you can search for “PDF documents created yesterday.”
- Use operators to refine your search. For example, you can use the “AND” operator (represented by a space) to find files that contain both “marketing” and “strategy.”
- Use quotes to search for exact phrases. For example, “marketing strategy” will only return results that contain that exact phrase.
- Use the “kind:” operator to search for specific file types. For example, “kind:pdf” will only return PDF files.
- Use the “date:” operator to search for files created or modified within a specific time range. For example, “date:today” will return files created or modified today.
- Use the “size:” operator to search for files within a specific size range. For example, “size:10MB” will return files that are 10MB in size.
Custom Search Filters
You can customize Spotlight search filters to tailor your search results to your specific needs. To create a custom search filter:
- Open Spotlight by clicking the magnifying glass icon in the menu bar or by pressing Command+Space.
- Type the name of the filter you want to create. For example, “work documents.”
- Click the “Save” button to save the filter.
You can then access your custom search filter by typing its name in Spotlight.
Automation Tools
macOS offers several automation tools that can help you streamline repetitive tasks. These tools can automate tasks such as:
- Converting files
- Renaming files
- Sending emails
- Creating backups
- Downloading files
- Opening applications
Automator
Automator is a visual workflow editor that allows you to create automated tasks by dragging and dropping actions. You can use Automator to create workflows that automate tasks such as:
- Converting images to PDFs
- Renaming multiple files at once
- Creating a PDF from a folder of images
- Sending a batch of emails
AppleScript
AppleScript is a scripting language that allows you to control applications and automate tasks. You can use AppleScript to create scripts that automate tasks such as:
- Opening a specific folder
- Creating a new document in a specific application
- Sending a message to a specific contact
- Closing all open windows
Managing Multiple Windows
When working with multiple applications and windows, it can be challenging to stay organized and efficient. macOS offers several features that can help you manage multiple windows effectively:
- Use Mission Control (by pressing F3 or swiping up with three fingers on your trackpad) to see all of your open windows and switch between them quickly.
- Use the “Snap” feature to automatically resize and position windows on your screen.
- Use the “Split View” feature to divide your screen into two sections, each with its own application.
Virtual Desktops
Virtual desktops allow you to create multiple virtual desktops, each with its own set of open windows. This can be helpful for organizing your work by project or task. To create a virtual desktop:
- Click the “Mission Control” icon in the Dock.
- Click the “+” button to create a new virtual desktop.
Optimizing Multitasking
macOS offers several features that can help you optimize multitasking and improve your productivity. These features include:
- Use the “Spaces” feature to create separate workspaces for different tasks.
- Use the “Exposé” feature to quickly view all windows from a specific application.
- Use the “Hot Corners” feature to assign specific actions to the corners of your screen.
- Use the “Trackpad Gestures” feature to control your Mac with gestures on your trackpad.
Multimedia and Entertainment
Your Mac is a powerhouse for multimedia, offering a seamless experience for managing, editing, and enjoying your photos, videos, music, and movies. Let’s explore how to make the most of these features and create a personalized entertainment hub.
Photos App: Organizing and Editing Your Visual Memories
The Photos app is a central hub for all your images and videos, providing powerful tools for organizing, editing, and sharing your visual memories.
- Importing and Organizing:Import photos and videos from your camera, phone, or external drives directly into the Photos app. Use albums to categorize your content, create smart albums based on criteria like date or location, and easily search for specific images using s or faces.
- Editing:Photos offers a range of editing tools to enhance your images and videos. Basic adjustments like cropping, rotating, and adjusting brightness and contrast are readily available. For more advanced edits, explore tools like selective color adjustments, blemish removal, and filters to achieve a specific look and feel.
- Sharing:Share your photos and videos easily with friends and family through email, social media, or AirDrop. Create slideshows and photo books to showcase your memories in a more engaging way. Photos even lets you create personalized photo projects like calendars and greeting cards.
Music and Apple TV: Immersive Streaming Experiences
Apple Music and Apple TV+ are your gateways to a vast library of music, movies, and TV shows.
- Apple Music:Access millions of songs, curated playlists, and radio stations. Enjoy personalized recommendations based on your listening history. Listen offline with downloaded content for seamless playback even without an internet connection.
- Apple TV+:Discover original movies, TV shows, and documentaries from Apple. Enjoy high-quality streaming with support for 4K resolution and Dolby Atmos sound. Explore a diverse range of genres and enjoy new releases regularly.
Optimizing Your Audio Experience
- System Sound Settings:Adjust the overall volume and output device for your Mac in System Settings > Sound. Fine-tune the sound balance for different audio outputs and choose your preferred audio output device for different scenarios.
- External Speakers:Connect external speakers via Bluetooth, USB, or HDMI to enhance your audio experience. Consider factors like speaker size, power, and audio quality to choose the best option for your needs. Experiment with different speaker placements for optimal sound distribution.
- Equalizer Settings:Customize your audio experience with the built-in equalizer in the Sound settings. Adjust frequency levels to enhance specific sound elements like bass, treble, or mids. Experiment with different presets or create your own custom profiles for different music genres or audio sources.
Troubleshooting and Support
Even with the best setup, occasional issues can arise. Knowing how to troubleshoot common problems and leverage Apple’s support resources can save you time and frustration.
Common Mac Issues and Troubleshooting
Troubleshooting common Mac issues often involves identifying the root cause. Here are some common problems and steps to resolve them:
- Slow Performance:A sluggish Mac can be frustrating. Start by checking for resource-intensive processes using Activity Monitor (found in Applications > Utilities). Close any unnecessary apps, and consider upgrading RAM or storage if needed.
- Application Crashes:Applications can crash for various reasons. First, try restarting the app and your Mac. If the issue persists, check for updates. If it’s a new app, it may be incompatible with your system.
- Internet Connectivity Issues:Verify your Wi-Fi or Ethernet connection. Restart your modem and router. Check your network settings (System Preferences > Network) and ensure the correct network is selected.
- Storage Space Issues:If you’re running out of storage, check your disk usage (Apple Menu > About This Mac > Storage). Delete unnecessary files, move large files to external storage, or upgrade your storage.
- Hardware Problems:If you suspect a hardware issue, try resetting the SMC (System Management Controller) and PRAM (Parameter RAM). If the problem persists, consider contacting Apple Support or an authorized service provider.
Apple Support Resources
Apple offers a comprehensive suite of support resources to assist you:
- Online Documentation:Apple’s website provides extensive documentation for all its products, including detailed guides, tutorials, and troubleshooting tips.
- Community Forums:Apple’s support communities are a valuable resource for finding answers to your questions and connecting with other Mac users.
- Customer Service:Apple offers phone, chat, and email support for technical assistance. You can also schedule appointments at Apple Stores or authorized service providers for in-person support.
Backing Up Your Mac and Recovering Data
Regular backups are essential for protecting your data. Apple offers several backup options:
- Time Machine:Apple’s built-in backup solution, Time Machine, automatically backs up your Mac to an external drive. It creates incremental backups, allowing you to restore your Mac to a previous state.
- Cloud Backup Services:Services like iCloud and third-party cloud backup providers offer off-site data storage, providing an extra layer of protection.
- Manual Backups:You can manually copy important files and folders to external drives or cloud storage.
Tip:Set up Time Machine to automatically back up your Mac regularly. This ensures you have a recent backup in case of data loss.
Advanced Features and Utilities
Beyond the basics, macOS offers a suite of powerful features and utilities that can significantly enhance your Mac experience. These tools provide granular control over your system, allowing you to fine-tune performance, manage storage, and troubleshoot issues.
Time Machine Backups
Time Machine is a built-in backup solution that automatically creates regular snapshots of your entire system, including files, applications, and settings. These backups are stored on an external drive, providing a safety net in case of data loss due to hardware failure, accidental deletion, or malware infection.Time Machine offers several advantages:
- Automated backups:Time Machine runs silently in the background, creating backups at regular intervals, ensuring your data is protected without any manual effort.
- Version history:Time Machine keeps multiple versions of your files, allowing you to restore specific versions from different points in time. This is particularly useful for recovering from accidental edits or recovering older versions of files.
- Simple restoration:Restoring files or your entire system from a Time Machine backup is straightforward. You can either select individual files or restore your entire system to a previous state.
To set up Time Machine:
- Connect an external drive to your Mac.
- Open System Settingsand navigate to General> Time Machine.
- Select the external drive as your backup destination.
- Click Back Up Nowto initiate an initial backup.
Disk Utility
Disk Utility is a powerful tool for managing storage and repairing disk errors. It provides a range of functionalities, including:
- Disk formatting:Disk Utility allows you to format drives with different file systems, such as APFS, macOS Extended (HFS+), and FAT32.
- Disk partitioning:You can create and manage partitions on your hard drives, allowing you to allocate space for different purposes, such as a separate partition for macOS and another for data storage.
- Disk repair:Disk Utility can repair disk errors and issues that may arise due to corrupted data or file system inconsistencies.
- Disk verification:You can verify the integrity of your hard drives and ensure they are functioning correctly.
- Disk cloning:Disk Utility allows you to create an exact copy of your entire hard drive, which can be useful for creating a bootable backup or migrating to a new drive.
To access Disk Utility:
- Open Finderand navigate to Applications> Utilities.
- Double-click Disk Utility.
Terminal and Other Utilities
Terminal is a command-line interface that provides access to advanced system functionalities. It allows you to execute commands, automate tasks, and manage your system with greater control.Terminal is particularly useful for:
- System administration:Performing tasks such as managing user accounts, installing software, and troubleshooting network issues.
- Automation:Creating scripts to automate repetitive tasks, such as file manipulation, system maintenance, and web scraping.
- Customization:Modifying system settings and preferences that are not accessible through the graphical user interface.
- Troubleshooting:Diagnosing and resolving system issues by examining logs and running diagnostic commands.
To access Terminal:
- Open Finderand navigate to Applications> Utilities.
- Double-click Terminal.
Other advanced utilities include:
- Activity Monitor:Monitors system resources, including CPU, memory, disk usage, and network activity.
- Console:Provides access to system logs, which can be helpful for troubleshooting and debugging issues.
- Network Utility:Offers tools for diagnosing network connectivity problems and managing network settings.
- Keychain Access:Manages passwords and other sensitive information stored in your keychain.
These advanced features and utilities empower you to take full control of your Mac, optimize performance, manage storage, and troubleshoot issues effectively. By familiarizing yourself with these tools, you can enhance your Mac experience and unleash its full potential.
Integration with Other Devices
The beauty of Apple’s ecosystem lies in the seamless integration of your Mac with other Apple devices. This allows you to effortlessly move between your Mac, iPhone, iPad, and Apple Watch, creating a unified and efficient experience.
Connecting to iOS Devices and AirDrop
AirDrop allows you to share files, photos, and more between your Mac and iOS devices wirelessly. It’s a simple and convenient way to transfer content without needing to rely on cables or cloud services. To use AirDrop, ensure that both your Mac and iOS device have Bluetooth and Wi-Fi turned on.
Setting up a new Mac can be a blast, especially when you get all the little details right. One of those details is making sure your music sounds consistent, no matter what song you’re listening to. You can totally achieve that with Sound Check, a feature that lets you Force Apple Music to play all songs at the same volume with Sound Check.
This way, you’ll be able to rock out without having to constantly adjust the volume. And once you’ve got your music sorted, you’ll be ready to dive into all the other cool things your new Mac has to offer.
Then, open Finder on your Mac and select “AirDrop” from the sidebar. You’ll see a list of nearby devices that support AirDrop. Simply drag and drop the file you want to share onto the desired device’s icon.
Using iCloud for Data Synchronization
iCloud is Apple’s cloud storage service that seamlessly synchronizes your data across all your Apple devices. This includes your documents, photos, contacts, calendars, and more. When you make changes on one device, those changes are automatically reflected on all your other connected devices.
Setting up a new Mac can be super easy, especially if you know where to look. You can find tons of helpful guides online, and even learn how to customize your experience. But hey, before you get too deep into the Mac world, maybe you should check out this guide on how to make your own hand sanitizer ! It’s super easy, and you’ll be glad you did when you’re setting up your new Mac and don’t want to worry about germs.
To use iCloud, you need to sign in with your Apple ID on all your devices. You can then choose which data you want to synchronize with iCloud. iCloud Drive allows you to store and access files from any of your devices.
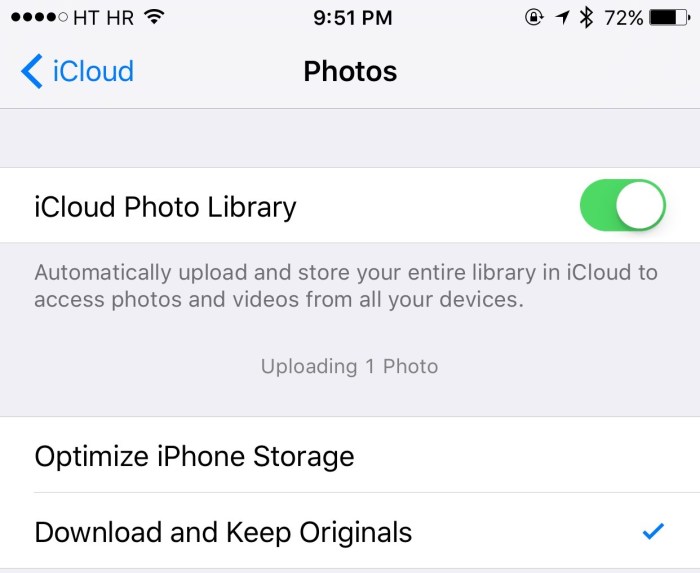
iCloud Photos keeps your photo library synced across all your devices, including your Mac.
Managing a Multi-Device Ecosystem
Your Mac can serve as a central hub for managing your multi-device ecosystem. You can use the Continuity features to make calls, send and receive text messages, and even share your Mac’s clipboard with your iPhone or iPad. You can also use Handoff to seamlessly switch between tasks on your Mac and iOS devices.
For example, you can start writing a document on your iPhone and then continue working on it on your Mac.
- Continuity Camera:This feature lets you use your iPhone’s camera as a webcam for your Mac. This is especially useful for video calls and presentations.
- Universal Clipboard:This feature allows you to copy and paste text, images, and other content between your Mac and iOS devices.
- Auto Unlock:If you have an Apple Watch, you can use it to automatically unlock your Mac.
By leveraging the features and capabilities of Apple’s ecosystem, you can create a seamless and integrated experience across your devices.
Last Point
Setting up your new Mac doesn’t have to be a daunting task. With a little planning and the right tools, you can have your Mac working seamlessly for you. Whether you’re a student, a professional, or just someone who wants to get the most out of their Mac, this guide has everything you need to make your experience smooth and productive.
Questions Often Asked
How do I transfer my data from my old Mac to my new one?
You can use Apple’s Migration Assistant to easily transfer your data, including apps, settings, and files. Just connect your old Mac to your new one and follow the on-screen instructions.
What are some good free apps for Mac?
There are many great free apps available for Mac, including:
- LibreOffice:A free and open-source office suite that’s a great alternative to Microsoft Office.
- VLC Media Player:A versatile media player that can play almost any video or audio file.
- GIMP:A powerful free image editor that’s a great alternative to Adobe Photoshop.
How do I create a backup of my Mac?
Apple’s Time Machine is the easiest way to create backups of your Mac. Simply connect an external hard drive to your Mac and follow the instructions in Time Machine.