How To Set Up Your New Iphone Xr The Right Way
How to set up your new iPhone XR the right way is a crucial step to unlocking the full potential of this powerful device. From unboxing and initial setup to exploring key features and managing storage, this guide will walk you through everything you need to know to get started with your new iPhone XR.
The iPhone XR boasts a stunning display, a powerful A12 Bionic chip, and an exceptional camera system, making it an excellent choice for anyone looking for a premium smartphone experience. This comprehensive guide will help you navigate the setup process and personalize your iPhone to meet your specific needs.
Unboxing and Initial Setup
You’ve got your shiny new iPhone XR in hand, and it’s time to get it set up! Let’s dive into the unboxing process and initial setup steps.
Unboxing the iPhone XR
The iPhone XR box contains the following items:
- iPhone XR
- EarPods with Lightning Connector
- Lightning to USB Cable
- USB Power Adapter
- Documentation
Powering On and Setting Up the Language and Region
1. Power On
Press and hold the side button, located on the right side of the phone, until the Apple logo appears.
2. Choose Language
Select your preferred language from the list.
3. Choose Region
Select your region to ensure the correct time zone, currency, and other region-specific settings are applied.
Transferring Data from a Previous Device
You have two main options for transferring data from your old device to your new iPhone XR:
- iCloud Backup:If you’ve previously backed up your old iPhone to iCloud, you can easily restore your data to the new iPhone XR. This includes apps, settings, photos, videos, and more. Simply sign in to iCloud with your Apple ID, and select the iCloud backup you want to restore.
- Direct Transfer:You can transfer data directly from your old iPhone to the new iPhone XR using a Lightning cable. This method allows you to transfer data like apps, photos, videos, contacts, and messages directly. Connect both iPhones using the Lightning cable, and follow the on-screen instructions to transfer data.
Setting Up Apple ID and iCloud
Your Apple ID is your key to the Apple ecosystem. It’s your passport to accessing all your favorite Apple services, from the App Store and Apple Music to iCloud and Apple Pay. It’s also how you keep your data secure and synced across all your devices.
Creating or Signing Into an Existing Apple ID
To use your new iPhone XR, you’ll need an Apple ID. If you already have one, you can simply sign in. If not, you’ll need to create a new one. Creating an Apple ID is straightforward and free.
- Create a new Apple ID:Open the Settings app and tap on “Sign in to your iPhone”. Then tap on “Create Apple ID” and follow the onscreen instructions. You’ll need to provide your name, birthdate, email address, and create a password. You’ll also need to verify your email address.
- Sign in with an existing Apple ID:If you already have an Apple ID, simply enter your email address and password when prompted.
Benefits of Using iCloud
iCloud is Apple’s cloud storage service. It’s a convenient way to store your data, back up your devices, and sync your data across all your devices.
- Storage:iCloud provides free storage for your data, with additional storage available for purchase. This storage is used to store your photos, videos, documents, and other data.
- Backups:iCloud automatically backs up your iPhone XR’s data, including your settings, apps, and data. This means that if you ever lose your iPhone or need to restore it to factory settings, you can easily restore your data from iCloud.
- Syncing:iCloud keeps your data synced across all your Apple devices. This means that if you make changes to your contacts on your iPhone, those changes will be reflected on your iPad and Mac.
Enabling iCloud Features
To take advantage of iCloud’s features, you’ll need to enable them in the Settings app.
- Photos:iCloud Photos allows you to store your photos and videos in iCloud and access them from any of your devices. This also ensures that your photos are backed up and protected.
- Mail:iCloud Mail lets you access your email from any of your devices. You can also use iCloud Mail to send and receive email attachments.
- Contacts:iCloud Contacts keeps your contacts synced across all your devices. This means that you’ll always have your contacts with you, no matter which device you’re using.
Personalizing Your iPhone

Now that you’ve set up your iPhone XR, it’s time to make it your own! This section will guide you through customizing your home screen, setting up Face ID, and configuring notifications, sounds, and accessibility settings.
Customizing Your Home Screen
Your home screen is your main point of access to your iPhone’s apps and features. Here’s how to personalize it:
- Adding Apps:You can easily add apps to your home screen by opening the App Store, searching for the app you want, and tapping the “Get” button. Once downloaded, the app icon will appear on your home screen.
- Creating Folders:To organize your apps, you can create folders. Simply press and hold an app icon, then drag it on top of another app icon. A folder will be created, and you can add more apps to it. You can also rename folders by tapping on the folder name and typing in a new name.
- Changing the Wallpaper:To change your iPhone’s background, go to Settings > Wallpaper. You can choose from a variety of Apple-provided wallpapers or select your own photos. You can also set different wallpapers for your home screen and lock screen.
Setting Up Face ID
Face ID is a secure and convenient way to unlock your iPhone. Here’s how to set it up:
- Go to Settings > Face ID & Passcode.
- Tap “Set Up Face ID” and follow the on-screen instructions.
- You’ll need to scan your face from different angles. Ensure that you’re in a well-lit area and that your face is clearly visible.
- Once Face ID is set up, you can unlock your iPhone by looking at it. You can also use Face ID to authorize purchases, access apps, and more.
Configuring Notifications, Sounds, and Accessibility Settings
Notifications, sounds, and accessibility settings allow you to tailor your iPhone experience to your preferences.
- Notifications:To manage notifications, go to Settings > Notifications. Here, you can customize how notifications are displayed, the sounds they make, and which apps are allowed to send notifications. You can also choose to receive notifications on your lock screen, in your notification center, or both.
- Sounds:To change your iPhone’s sounds, go to Settings > Sounds & Haptics. Here, you can choose from a variety of ringtones, alert tones, and other sounds. You can also adjust the volume of your iPhone’s speakers and adjust the volume of calls, media, and other sounds.
- Accessibility:To make your iPhone more accessible, go to Settings > Accessibility. Here, you can adjust text size, color contrast, and other settings. You can also enable features such as VoiceOver, which reads aloud the text on your screen, and Zoom, which magnifies the screen.
You can customize these settings to suit your needs.
Exploring Key Features

The iPhone XR’s camera system is a powerful tool for capturing memories and expressing your creativity. Its single-lens camera, though seemingly simple, packs a punch with a range of features that enable you to take high-quality photos and videos. Let’s delve into the capabilities of the iPhone XR’s camera system.
Camera Modes
The iPhone XR offers a variety of camera modes, each tailored to different scenarios and creative intentions.
- Photo Mode:This is your standard camera mode, perfect for capturing everyday moments. It utilizes the main lens to take clear and detailed photos.
- Portrait Mode:This mode simulates a shallow depth of field effect, blurring the background and making your subject stand out. This is ideal for capturing portraits, product shots, or creating artistic effects.
- Video Mode:The iPhone XR supports recording high-quality videos in various resolutions and frame rates. You can capture smooth and detailed footage, perfect for vlogging, documenting your adventures, or creating short films.
- Slo-mo Mode:Capture slow-motion video to emphasize details and create dramatic effects. This is particularly effective for capturing action-packed moments or showcasing intricate movements.
- Time-lapse Mode:Capture the passage of time by compressing long periods into short videos. This is perfect for documenting events like sunsets, clouds moving across the sky, or the growth of a plant.
- Panorama Mode:Capture wide-angle shots by stitching together multiple photos. This is useful for capturing expansive landscapes, cityscapes, or group photos.
Connecting to Networks
Staying connected is a key part of the iPhone XR experience. Whether you’re browsing the web, streaming music, or keeping in touch with friends and family, you’ll need to connect to a network. This section covers how to connect to Wi-Fi and cellular networks, and how to configure mobile data and roaming settings.
Connecting to Wi-Fi
Connecting to a Wi-Fi network is a simple process. To connect, open the Settings app, tap on Wi-Fi, and select the desired network from the list. If the network is password-protected, you’ll need to enter the password. Once connected, you’ll see a checkmark next to the network name.
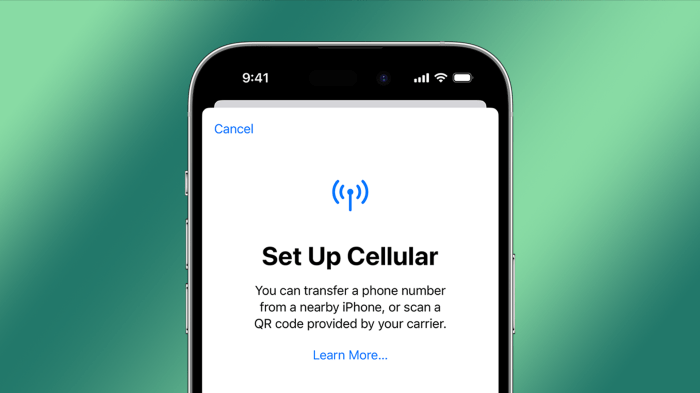
Connecting to Cellular Networks
To connect to a cellular network, you’ll need to insert a SIM card into your iPhone XR. Once the SIM card is inserted, your iPhone XR will automatically search for available cellular networks and connect to the strongest one. You can also manually select a network by opening the Settings app, tapping on Cellular, and then tapping on Cellular Data Network.
Mobile Data and Roaming
Mobile data allows you to access the internet when you’re not connected to a Wi-Fi network. You can manage your mobile data usage and roaming settings in the Settings app.
Mobile data settings are important for managing your data usage and costs. You can set data limits, turn off mobile data, or disable roaming to prevent unexpected charges.
Setting Up Bluetooth
Bluetooth allows you to connect your iPhone XR to wireless devices, such as headphones, speakers, and car kits. To set up Bluetooth, open the Settings app, tap on Bluetooth, and then turn on Bluetooth. Your iPhone XR will now be visible to other Bluetooth devices.
To pair with a device, select it from the list of available devices.
App Store and Downloading Apps
The App Store is the hub for all your iPhone apps, offering a vast selection of games, productivity tools, social media apps, and more. It’s easy to navigate and find the perfect apps to enhance your iPhone experience.
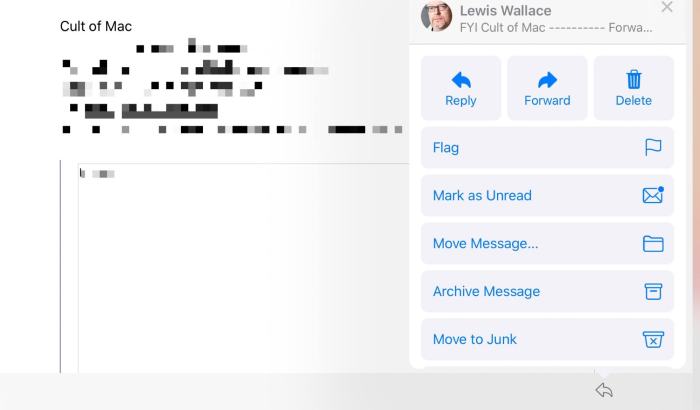
Setting up your new iPhone XR is super easy, but there are a few things you should do right off the bat. One of the most important things is to set up your email accounts. You can avoid getting buried in a sea of spam by using the awesome iOS Mail filters, which you can learn about here.
Once your email is set up, you can start exploring all the other cool features of your new phone.
Accessing the App Store and Browsing for Apps
To access the App Store, simply tap the blue icon with a white “A” on your home screen. Once you’re in the App Store, you can browse through different categories like “Top Charts,” “Games,” “Apps,” and “Today.” You can also use the search bar to find specific apps by name or .
Setting up your new iPhone XR is a breeze, but you might want to check out some cool tips before you start snapping pics. You know, like how to capture those epic shots of the next solar eclipse. Check out this awesome guide on How to take solar eclipse photos with iPhone , and you’ll be ready to capture some amazing memories.
After that, you’ll be all set to customize your XR and make it your own!
Downloading and Installing Apps
Once you’ve found an app you want to download, tap the “Get” button. If the app is free, it will start downloading automatically. For paid apps, you’ll need to enter your Apple ID password to confirm the purchase. After the download is complete, the “Get” button will change to “Open,” allowing you to launch the app.
App Reviews and Permissions
Before downloading an app, it’s essential to read the app reviews and check the permissions it requests. App reviews provide insights from other users, helping you determine if the app is worth downloading. Permissions allow apps to access your data, such as your location, contacts, and camera.
Carefully consider the permissions an app requests and ensure you’re comfortable with the access it needs. If you’re unsure about an app’s permissions, it’s best to avoid downloading it.
Managing Storage and Battery

Keeping your iPhone XR running smoothly involves managing its storage space and battery life. You can do this by optimizing storage, monitoring battery usage, and utilizing charging options effectively.
Storage Management
Managing storage space on your iPhone XR is crucial for optimal performance.
- Delete Unused Apps:Regularly review your app list and remove apps you no longer use. This can free up significant storage space.
- Offload Unused Apps:If you want to keep an app but don’t use it frequently, you can offload it. This removes the app’s data but keeps the app itself on your phone, allowing you to download it again if needed.
- Clear App Cache:Many apps store temporary data in their cache. Clearing this cache can free up storage space. To clear the cache, go to Settings > General > iPhone Storage and tap on the app you want to clear the cache for.
- Manage Photos and Videos:Photos and videos take up a lot of storage space. Consider using iCloud Photos to store your photos and videos in the cloud, freeing up space on your device.
- Delete Large Files:Check your files for large files you no longer need and delete them.
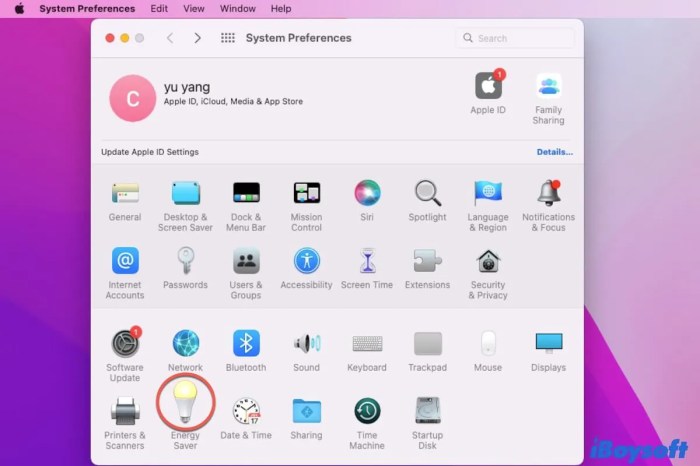
Battery Usage and Optimization
Monitoring your battery usage and optimizing battery life is essential for extended usage.
- Check Battery Usage:Go to Settings > Battery to see which apps are using the most battery power. You can then decide whether to limit their usage or uninstall them if they are not essential.
- Reduce Screen Brightness:A brighter screen consumes more battery. Adjust the screen brightness to a comfortable level.
- Enable Low Power Mode:When your battery is low, enable Low Power Mode to extend battery life. This mode reduces background activity and performance.
- Disable Background App Refresh:Apps can refresh in the background, consuming battery power. Disable background app refresh for apps you don’t need to be updated constantly.
- Turn Off Location Services:Location services can drain battery life quickly. Turn off location services for apps that don’t require them.
- Disable Bluetooth and Wi-Fi:When not in use, disable Bluetooth and Wi-Fi to save battery power.
Charging Options and Accessories
The iPhone XR supports fast charging and wireless charging.
- Fast Charging:Use a fast charging adapter and cable to charge your iPhone XR quickly. This can charge your phone from 0% to 50% in about 30 minutes.
- Wireless Charging:You can charge your iPhone XR wirelessly using a Qi-certified wireless charging pad. Place your phone on the charging pad to charge it.
- Charging Accessories:There are many charging accessories available, such as portable power banks and car chargers, to keep your iPhone XR charged on the go.
Security and Privacy
Your iPhone XR stores a ton of personal information, from your contacts and photos to your banking details and passwords. It’s crucial to take steps to protect this information from unauthorized access. Here’s how to set up your iPhone XR to prioritize security and privacy.
Setting a Strong Passcode and Enabling Face ID
A strong passcode is your first line of defense against unauthorized access to your iPhone. A complex passcode, with a mix of upper and lowercase letters, numbers, and symbols, is harder to guess. Face ID, Apple’s facial recognition technology, provides an additional layer of security.
Setting up your new iPhone XR is a breeze, but don’t forget to check out the Safari settings in iOS 13! You can customize your browsing experience by checking out How to use Safari’s amazing new settings in iOS 13 , which will help you personalize everything from your start page to your privacy settings.
Once you’ve got your Safari settings dialed in, you’ll be ready to explore the world of apps and features on your new iPhone XR.
When you set up Face ID, your iPhone uses a sophisticated 3D map of your face to authenticate your identity.
Managing Privacy Settings
You have granular control over what data your iPhone shares with apps and services. Here’s how to manage privacy settings:
Location Services
- When an app requests access to your location, you can choose to grant access “Always,” “While Using the App,” or “Never.”
- For apps that don’t need constant access to your location, choose “While Using the App” to limit the amount of data shared.
- You can also disable location services entirely for specific apps or for all apps.
Microphone and Camera Access
- Apps that need to use your microphone or camera will request permission.
- You can grant access “Always,” “While Using the App,” or “Never.”
- For apps that only need to use your microphone or camera occasionally, choose “While Using the App” to minimize data sharing.
Other Privacy Settings
- Tracking:You can limit the ability of apps to track your activity across different apps and websites.
- Advertising:You can limit the use of your data for personalized advertising.
- HomeKit:You can choose which devices and accessories have access to your home network.
Protecting Your Device from Malware and Phishing Attacks
- Install Apps Only from the App Store:The App Store is Apple’s curated marketplace for iOS apps, ensuring that all apps have been vetted for security.
- Be Wary of Phishing Emails and Text Messages:Phishing attacks try to trick you into revealing sensitive information like passwords or credit card details. Never click on links in suspicious emails or text messages.
- Keep Your Software Up to Date:Apple regularly releases security updates to patch vulnerabilities. Make sure your iPhone’s operating system and apps are always up to date.
- Use a Strong Password Manager:A password manager helps you create and store strong, unique passwords for all your online accounts.
Essential iPhone Apps
You’ve got your iPhone XR set up and ready to go, but now it’s time to fill it with some essential apps. This is where the real fun begins! There are tons of amazing apps available on the App Store, but we’ll focus on some key categories to get you started.
Essential Apps
Here’s a list of apps that are sure to make your iPhone experience even better:
| App Name | Category | Description | Download Link |
|---|---|---|---|
| Messaging | A popular messaging app that allows you to send text messages, make voice and video calls, and share photos and videos with friends and family. | App Store | |
| Social Media | A photo and video sharing app that lets you connect with friends and family, share your experiences, and discover new content. | App Store | |
| Google Maps | Navigation | A powerful navigation app that helps you get around, find places, and explore new destinations. | App Store |
| Spotify | Music Streaming | A music streaming service that offers millions of songs, podcasts, and audiobooks. | App Store |
| Evernote | Productivity | A note-taking app that allows you to organize your thoughts, ideas, and tasks. | App Store |
| Netflix | Entertainment | A streaming service that offers a wide variety of movies, TV shows, and documentaries. | App Store |
Troubleshooting Common Issues: How To Set Up Your New IPhone XR The Right Way
It’s normal to encounter some hiccups while setting up your new iPhone XR, even with its user-friendly interface. This section will guide you through common issues and their solutions, ensuring a smooth experience.
Connectivity Problems
Connectivity issues can be frustrating, especially when you’re eager to explore your new iPhone. These problems can stem from various factors, such as network signal strength, Wi-Fi settings, or even software glitches.
- Check your network signal strength:Ensure you have a strong signal by checking the signal bars at the top of your screen. If the signal is weak, try moving to a different location or restarting your phone.
- Verify Wi-Fi settings:Make sure your iPhone is connected to the correct Wi-Fi network and that the password is entered correctly. You can also try restarting your Wi-Fi router to refresh the connection.
- Restart your iPhone:Sometimes, a simple restart can resolve connectivity issues. To restart your iPhone, press and hold the side button and either volume button until the slider appears. Drag the slider to power off your iPhone, then press and hold the side button again to turn it back on.
- Check for software updates:Outdated software can sometimes cause connectivity issues. Make sure your iPhone is running the latest iOS version by going to Settings > General > Software Update.
- Contact your carrier:If none of these solutions work, contact your mobile carrier for assistance. They can help troubleshoot network-related issues or provide further support.
App Crashes
App crashes can be annoying, especially when you’re in the middle of using an important app. While some crashes might be caused by temporary glitches, others could indicate deeper issues.
- Force quit the app:Double-tap the home button to bring up the app switcher, then swipe up on the app card to force quit it. This will close the app and free up resources.
- Restart your iPhone:As mentioned earlier, restarting your iPhone can often resolve temporary glitches that cause app crashes.
- Update the app:Outdated apps can be prone to crashes. Check the App Store for updates and install any available updates for the app.
- Delete and reinstall the app:If the app continues to crash, try deleting it and reinstalling it from the App Store. This can sometimes fix corrupted data or files.
- Check for compatibility issues:Make sure the app is compatible with your iPhone XR’s iOS version. You can find compatibility information in the App Store listing for the app.
Battery Drain, How to set up your new iPhone XR the right way
Battery drain is a common concern for all smartphone users, especially when you’re using your phone extensively. However, excessive battery drain can sometimes indicate an issue that needs attention.
- Check your screen brightness:A bright screen consumes more battery power. Reduce your screen brightness by going to Settings > Display & Brightness and adjusting the slider.
- Disable background app refresh:Apps that refresh in the background can drain battery. To disable background app refresh, go to Settings > General > Background App Refresh and turn off the switch for apps you don’t need to refresh in the background.
- Turn off location services:Apps that use location services constantly can drain battery. Go to Settings > Privacy > Location Services and turn off location services for apps that don’t need access to your location.
- Reduce notifications:Excessive notifications can drain battery. Go to Settings > Notifications and manage notifications for apps that you don’t need to receive notifications from.
- Close apps you’re not using:Apps that are running in the background can consume battery. Double-tap the home button to bring up the app switcher and swipe up on app cards to close apps you’re not using.
Last Recap

With your iPhone XR set up and personalized, you’re ready to dive into the world of apps, explore the camera features, and connect with others. Remember, this guide is just the beginning; there’s always more to discover and explore with your iPhone XR.
So, go ahead, experiment, and personalize your device to create a truly unique and enjoyable smartphone experience.
Key Questions Answered
How do I transfer data from my old iPhone to my new iPhone XR?
You can transfer data from your old iPhone to your new iPhone XR using iCloud backup or direct transfer via a cable. iCloud backup allows you to restore your data wirelessly, while direct transfer requires a cable and lets you choose specific data to transfer.
Can I use my old iPhone case on my new iPhone XR?
No, the iPhone XR has a different design than older iPhones, so your old case won’t fit. You’ll need to purchase a new case specifically designed for the iPhone XR.
How do I set up Face ID on my iPhone XR?
To set up Face ID, open the Settings app, go to Face ID & Passcode, and follow the on-screen instructions. You’ll need to scan your face from different angles to ensure accurate recognition.
What are some essential iPhone apps I should download?
Some essential iPhone apps include messaging apps like WhatsApp and Telegram, social media platforms like Instagram and Facebook, productivity tools like Google Docs and Evernote, and entertainment apps like Netflix and Spotify.
What should I do if my iPhone XR is running slow?
If your iPhone XR is running slow, try restarting your device, closing unnecessary apps, deleting unused files, and updating your operating system. If the problem persists, you can contact Apple support for further assistance.