Capture Audio with Screen Recordings: A Guide to the Windows 11 Snipping Tool
How to Record Audio While Screen Recording in the Windows 11 Snipping Tool – Unlock the power of capturing both audio and screen with the Windows 11 Snipping Tool. In this guide, we’ll delve into the ins and outs of recording audio while screen recording, empowering you to create engaging and informative content.
From activating the feature to customizing settings and troubleshooting common issues, we’ve got you covered. So, let’s dive right in and explore the world of audio-enhanced screen recordings!
Explain how to activate the audio recording feature in the Windows 11 Snipping Tool.: How To Record Audio While Screen Recording In The Windows 11 Snipping Tool
To activate the audio recording feature in the Windows 11 Snipping Tool, follow these steps:
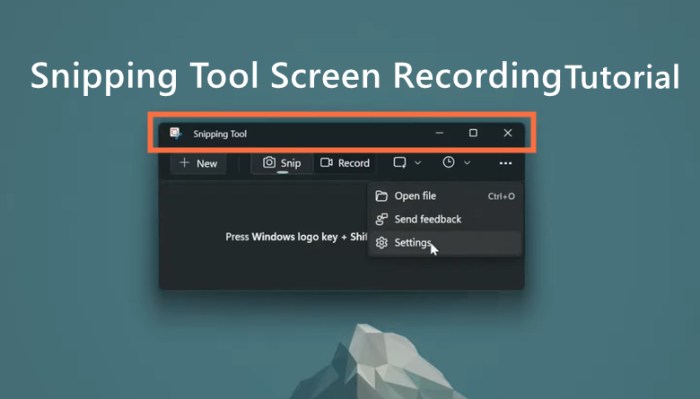
- Open the Snipping Tool from the Start menu or by pressing Windows key + Shift + S.
- Select the “Record” option from the top toolbar.
- Choose the desired audio source from the dropdown menu.
- Click the “Start” button to begin recording.
- Click the “Stop” button to end recording.
You can also adjust the sound quality settings by clicking the “Settings” icon in the top toolbar. This will open the Sound Settings window, where you can select the desired recording device and adjust the volume levels.
Microphone Selection
The Snipping Tool allows you to select the microphone you want to use for recording. To change the microphone, click the dropdown menu next to the “Microphone” label in the Sound Settings window.
Sound Quality Settings
The Snipping Tool also allows you to adjust the sound quality settings. To do this, click the “Advanced” tab in the Sound Settings window. Here, you can adjust the following settings:
- Sample rate:The sample rate determines the quality of the audio recording. A higher sample rate will result in a higher quality recording, but it will also require more storage space.
- Bit depth:The bit depth determines the number of bits used to represent each sample. A higher bit depth will result in a higher quality recording, but it will also require more storage space.
- Channel count:The channel count determines the number of audio channels that will be recorded. A higher channel count will result in a more immersive recording, but it will also require more storage space.
Describe the various methods for initiating an audio recording during a screen capture.
To start audio recording during a screen capture, you can use keyboard shortcuts or the Snipping Tool interface. When using keyboard shortcuts, press Windows Key + Alt + R to start recording and press it again to stop. Alternatively, you can click the “Record” button in the Snipping Tool interface to start recording and click it again to stop.
Capturing Audio from Internal and External Sources
The Snipping Tool can capture audio from both internal and external sources. Internal audio refers to sounds generated by your computer, such as system sounds or music played through speakers. External audio refers to sounds captured through a microphone, such as your voice or sounds from the environment.
To capture internal audio, ensure that the “Record computer audio” option is enabled in the Snipping Tool settings. To capture external audio, connect a microphone to your computer and select it as the audio input device in the Snipping Tool settings.
Elaborate on the options for customizing the audio recording settings.
The Windows 11 Snipping Tool provides various options to customize the audio recording settings during screen captures. These settings allow users to adjust the quality and size of the recorded audio to suit their specific requirements.
Audio Volume
Adjusting the audio volume allows users to control the loudness of the recorded audio. A higher volume setting will result in a louder recording, while a lower setting will produce a quieter one. This setting is particularly useful when recording audio from different sources, ensuring that all sounds are captured at an appropriate level.
Bitrate
Bitrate refers to the amount of data used to encode the audio recording. A higher bitrate will result in a higher-quality recording with a larger file size, while a lower bitrate will produce a smaller file size but may compromise the audio quality.
Users can choose the bitrate based on their desired balance between quality and file size.
Sample Rate
The sample rate determines the number of times per second the audio signal is sampled during recording. A higher sample rate will result in a more accurate representation of the original audio, but it will also increase the file size.
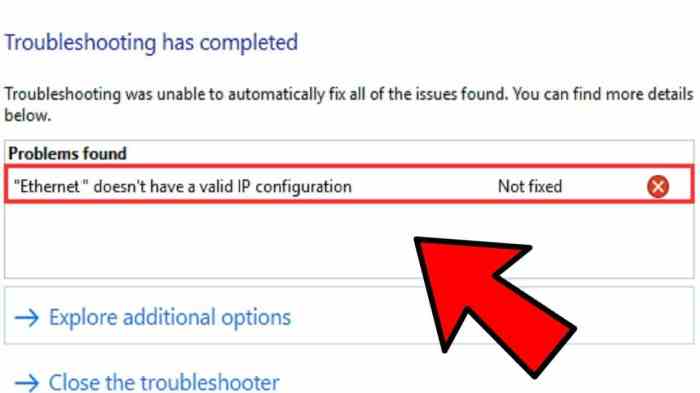
For those who need a quick fix on their Windows 11 Snipping Tool audio recording, there are easy steps to follow. However, if you’re facing the dreaded “Ethernet Doesn’t Have a Valid IP Configuration” error, check out this comprehensive guide: How to Fix the “Ethernet Doesn’t Have a Valid IP Configuration” Error on Windows . Once your internet connection is up and running again, you can return to mastering the audio recording feature in the Snipping Tool.
Users can select the sample rate based on the desired audio quality and the limitations of their recording device.
Create a table comparing the different audio recording formats supported by the Snipping Tool.
The Snipping Tool in Windows 11 supports several audio recording formats, each with its own advantages and use cases. Here’s a table comparing the different formats:
| Format Name | File Extension | Quality | Compatibility |
|---|---|---|---|
| WAV | .wav | High | Widely compatible with most media players and software |
| MP3 | .mp3 | Good | Highly compatible with most devices and platforms |
| M4A | .m4a | Good | Compatible with Apple devices and iTunes |
| AAC | .aac | Good | Compatible with iOS devices and some Android devices |
| WMA | .wma | Fair | Compatible with Windows Media Player and some other software |
Use Cases:
- WAV: Ideal for high-quality audio recordings, such as music or podcasts, where sound fidelity is important.
- MP3: Suitable for general-purpose audio recordings, such as screencasts or voiceovers, where file size and compatibility are important.
- M4A: Best for audio recordings on Apple devices, such as iPhones and iPads.
- AAC: Ideal for audio recordings on iOS devices and some Android devices, where compatibility and file size are important.
- WMA: Compatible with Windows Media Player, making it suitable for recordings intended for playback on Windows devices.
Explain how to troubleshoot common audio recording issues in the Snipping Tool.

The Snipping Tool in Windows 11 offers a convenient way to capture screen recordings with audio. However, users may occasionally encounter issues with audio recording, such as no audio being captured or poor audio quality. This guide provides solutions to troubleshoot common audio recording problems in the Snipping Tool.
Identifying Potential Problems
Before troubleshooting, it’s essential to identify the potential problems that may be causing the audio recording issues. Some common issues include:
- No audio is captured during the screen recording.
- The recorded audio has poor quality, such as being distorted or muffled.
- The audio recording is out of sync with the screen capture.
Solutions and Workarounds
To resolve common audio recording issues in the Snipping Tool, try the following solutions and workarounds:
No Audio Captured
- Ensure that your microphone is properly connected and enabled.
- Check the audio settings in the Snipping Tool to make sure that the microphone is selected as the audio source.
- Restart the Snipping Tool and try recording again.
Poor Audio Quality
- Adjust the microphone settings to improve the audio quality.
- Move the microphone closer to the sound source.
- Use a different microphone with better audio quality.
Audio Out of Sync
- Check the system clock to ensure that it is accurate.
- Update the audio drivers on your computer.
- Try using a different video editing software to combine the audio and video recordings.
Additional Tips
- Use a high-quality microphone for better audio recording.
- Record in a quiet environment to minimize background noise.
- Test the audio recording before starting the actual screen capture to ensure everything is working correctly.
By following these troubleshooting steps, you can resolve common audio recording issues in the Snipping Tool and capture high-quality screen recordings with clear audio.
Discuss the advantages and disadvantages of using the Snipping Tool for audio recording.
The Snipping Tool in Windows 11 offers a convenient way to capture both screen and audio, making it a valuable tool for creating tutorials, presentations, and other multimedia content. However, it’s essential to understand the advantages and disadvantages of using the Snipping Tool for audio recording to determine if it meets your specific needs.
If you’re having trouble with screen recording on Windows 11, check out our guide on How to Record Audio While Screen Recording in the Windows 11 Snipping Tool. But if you’re facing issues with text message alerts or sounds on your iPhone, you might want to take a look at How to Fix No Text Message Alerts or Sounds on iPhone: 15+ Solutions . Getting back to the Snipping Tool, remember to check the audio settings before starting your screen recording to ensure you capture the audio you need.
Advantages
- Ease of Use:The Snipping Tool is straightforward and easy to use, even for beginners. Its intuitive interface allows you to quickly capture screen and audio without any complex setup or configuration.
- Built-in Audio Recording:Unlike many other screen recording tools, the Snipping Tool has a built-in audio recording feature, eliminating the need for additional software or complicated setups.
- Lightweight and Efficient:The Snipping Tool is a lightweight application that doesn’t consume excessive system resources, making it suitable for use on older or less powerful computers.
Disadvantages
- Limited Features:Compared to dedicated screen recording software, the Snipping Tool offers a limited range of features. It lacks advanced editing capabilities, annotation tools, and customization options.
- No Webcam Recording:The Snipping Tool can only record audio from the computer’s microphone, not from an external webcam. This can be a limitation if you want to capture both screen and webcam footage simultaneously.
- File Size Limitations:The Snipping Tool has a file size limit for audio recordings, which can be an issue for extended or high-quality recordings.
Comparison to Other Screen Recording Software
The Snipping Tool is a basic screen recording tool with limited audio recording capabilities. If you need more advanced features, such as webcam recording, editing tools, or higher quality audio, you may want to consider dedicated screen recording software like OBS Studio, Screencast-O-Matic, or Camtasia.
Create a flowchart demonstrating the process of recording audio while screen recording in the Snipping Tool
Flowchart
Step 1:Open the Snipping Tool. Step 2:Click on the “New” button. Step 3:Select the area you want to capture. Step 4:Click on the “Record” button. Step 5:Click on the “Stop” button when you are finished recording.
Step 6:Click on the “Save” button to save the recording.
The Windows 11 Snipping Tool is a versatile tool for capturing screenshots, but did you know you can also use it to record audio while screen recording? This feature is especially useful for creating video tutorials or demos. If you’re having trouble getting the Snipping Tool to record audio, you may need to check your system settings.
For more help with troubleshooting software issues, check out this guide on how to fix “apt-get: command not found” in the Linux Terminal . Once you’ve resolved any issues, you can easily record audio while screen recording in the Windows 11 Snipping Tool.
Design a user interface for the Snipping Tool’s audio recording feature.
The Snipping Tool’s audio recording feature can be accessed through a dedicated button located in the main toolbar. The button features a microphone icon and a tooltip that reads “Record audio during screen capture”.
Menu Options
When the audio recording button is clicked, a drop-down menu appears with the following options:
- Start recording:Begins recording audio along with the screen capture.
- Stop recording:Stops the audio recording.
- Mute microphone:Silences the microphone during the screen capture.
- Settings:Opens the audio recording settings dialog box.
Settings, How to Record Audio While Screen Recording in the Windows 11 Snipping Tool
The audio recording settings dialog box allows users to customize the following options:
- Audio input device:Select the microphone to be used for audio recording.
- Audio format:Choose the audio format for the recorded audio (WAV, MP3, or M4A).
- Audio quality:Set the audio quality for the recorded audio (low, medium, or high).
Elaborate on the potential uses of audio recording while screen recording.
Incorporating audio recordings during screen captures offers a range of benefits and potential uses, particularly in the realm of content creation and communication.
Enhancing Presentations and Tutorials
- Clarifying Complex Concepts:By adding audio commentary to screen recordings, educators and presenters can provide additional context and explanations, making it easier for viewers to understand complex topics.
- Adding Personalization and Engagement:Audio recordings allow creators to add a personal touch to their presentations, making them more engaging and relatable for viewers.
- Creating Interactive Content:Combining audio and visual elements allows for the creation of interactive tutorials and demonstrations, where viewers can both see and hear the steps involved in a process.
Enhancing Other Content Types
- Enriching Social Media Posts:Screen recordings with audio commentary can add depth and value to social media posts, making them more informative and engaging.
- Creating Marketing Materials:Audio recordings can enhance marketing materials, such as product demos and promotional videos, by providing additional information and persuading viewers.
- Facilitating Remote Communication:Screen recordings with audio can be a valuable tool for remote communication, allowing team members to share ideas, provide feedback, and collaborate effectively.
Overall, the ability to record audio while screen recording significantly expands the possibilities for creating effective and engaging content, fostering clearer communication and deeper understanding.
Create a video tutorial demonstrating how to record audio while screen recording in the Snipping Tool.
Creating a video tutorial that demonstrates how to record audio while screen recording in the Snipping Tool involves several key steps:
- Plan the tutorial: Determine the target audience, the scope of the tutorial, and the key steps that need to be covered.
- Gather necessary resources: Prepare the computer with the Snipping Tool, screen recording software, and any other materials needed for the tutorial.
- Create a script: Artikel the steps of the tutorial, including the narration and any on-screen annotations or captions.
- Record the screencast: Use the screen recording software to capture the screen while performing the steps Artikeld in the script.
- Add audio narration: Record your voiceover using a microphone or other audio recording device and synchronize it with the screencast.
- Edit the video: Use video editing software to add annotations, captions, and any other visual elements to enhance the tutorial.
- Export the video: Choose an appropriate video format and export the tutorial for distribution.
By following these steps, you can create a clear and engaging video tutorial that effectively demonstrates how to record audio while screen recording in the Snipping Tool.
Final Review

With the Windows 11 Snipping Tool, you’re now equipped to seamlessly record audio and screen, unlocking new possibilities for your presentations, tutorials, and other creative endeavors. Remember, combining audio and visual elements amplifies your message, making it more impactful and engaging.
FAQ Section
Can I record audio from both my microphone and computer simultaneously?
Yes, the Snipping Tool allows you to capture audio from multiple sources, including your microphone and computer’s internal audio.
How do I adjust the audio quality of my recordings?
You can customize the audio settings by adjusting the bitrate and sample rate. Higher values generally result in better audio quality but larger file sizes.
What file format should I use for my audio recordings?
The Snipping Tool supports various audio formats, including MP3, WAV, and M4A. Choose the format that best suits your needs, considering factors like quality, compatibility, and file size.