How To Record Apple Music From Your Iphone To Your Mac
How to record Apple Music from your iPhone to your Mac is a question many music lovers ask. Whether you want to create a personal playlist, edit your favorite songs, or simply have offline access, recording Apple Music on your Mac offers a ton of benefits.
This guide will walk you through the different methods, from using Apple Music’s built-in features to utilizing screen recording and exploring third-party software. We’ll cover everything you need to know, including legal considerations and best practices for capturing high-quality audio.
Recording Apple Music on your Mac can be a valuable tool for both casual listeners and aspiring musicians. You can use it to create custom mixes, experiment with audio editing, or even share your favorite tracks with friends. This guide will empower you to unlock the full potential of Apple Music on your Mac, ensuring you can enjoy your music in a way that suits your needs.
Introduction
Recording Apple Music from your iPhone to your Mac might sound like a complicated process, but it’s actually quite straightforward. This process allows you to create a personal library of your favorite Apple Music tracks, which you can enjoy offline on your Mac, even without an active internet connection.
There are several benefits to recording Apple Music on your Mac, including the ability to listen to your music on your computer without a subscription, share your music with friends and family, and create custom playlists for specific occasions. There are two primary methods for recording Apple Music on your Mac: using a dedicated screen recording software or utilizing a dedicated audio recording tool.
Methods for Recording Apple Music
The process of recording Apple Music on your Mac involves capturing the audio output of your iPhone, which is playing the Apple Music track. You can accomplish this using either screen recording software or audio recording software.
- Screen recording software captures the entire screen of your iPhone, including the audio output. This method is ideal for capturing video content, such as music videos, but it can also be used to record audio-only content.
- Audio recording software captures only the audio output of your iPhone, allowing you to record just the music without any visual content. This method is more efficient for recording music and provides a cleaner audio output.
Using Third-Party Recording Software
If you’re looking for a more robust solution that offers additional features and control over the recording process, using third-party recording software is the way to go. These applications are designed specifically for audio recording and provide a wide range of options for customizing your recordings.
Popular Third-Party Recording Software Options
Third-party recording software offers a variety of features and functionalities. Some popular options include:
- Audacity:A free, open-source audio editor and recorder available for Mac, Windows, and Linux. Audacity offers a wide range of features, including multi-track recording, editing, and effects.
- GarageBand:A free audio and music creation software included with macOS. GarageBand provides a user-friendly interface for recording, editing, and mixing audio, along with a library of instruments and loops.
- Adobe Audition:A professional audio editing and mixing software offered by Adobe. Audition provides advanced features for audio restoration, mastering, and mixing, along with support for a wide range of audio formats.
- Logic Pro X:A professional digital audio workstation (DAW) designed for Mac. Logic Pro X offers a comprehensive set of tools for recording, editing, mixing, and mastering audio, along with a vast library of instruments, loops, and effects.
Features and Benefits of Third-Party Recording Software
Third-party recording software provides several benefits over built-in recording options:
- Advanced Recording Options:Third-party software often includes features such as multi-track recording, audio effects, and the ability to adjust recording settings like sample rate and bit depth.
- Customization and Control:You have greater control over the recording process, including the ability to choose recording formats, set recording levels, and apply audio effects.
- Post-Production Capabilities:Most third-party software includes editing tools for trimming, splicing, and manipulating audio, as well as effects for enhancing or modifying the sound.
- Integration with Other Software:Many third-party recording software applications seamlessly integrate with other music production software, such as DAWs and audio editors.
Comparing and Contrasting Software Options
When choosing third-party recording software, consider the following factors:
- Features:Determine the specific features you need, such as multi-track recording, audio effects, and editing tools.
- Ease of Use:Choose software with a user-friendly interface that suits your skill level.
- Cost:Some software is free, while others require a subscription or purchase.
- Compatibility:Ensure the software is compatible with your Mac and other software you may use.
Audio Editing: How To Record Apple Music From Your IPhone To Your Mac
You’ve successfully recorded Apple Music from your iPhone to your Mac, but the journey doesn’t end there. Just like a raw diamond needs polishing, your audio recording needs a bit of editing to shine. Audio editing helps you refine the quality, remove unwanted noise, and ensure a smooth listening experience.
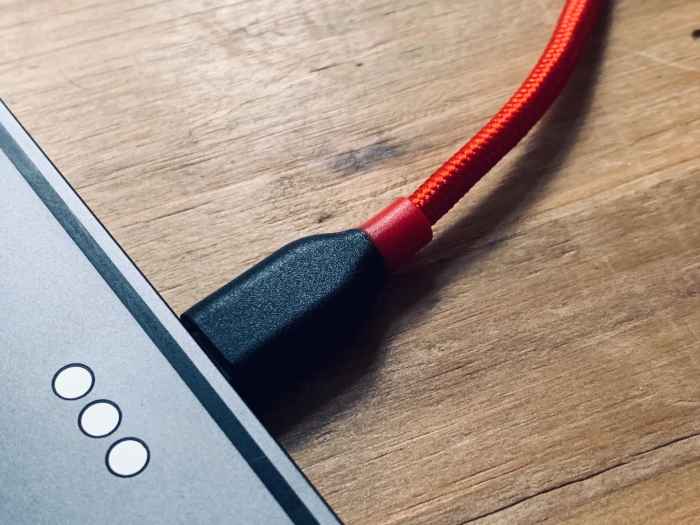
Recording Apple Music from your iPhone to your Mac can be a bit of a pain, but there are some workarounds. First, you’ll want to make sure your iPhone is connected to your Mac via USB. Then, you can use a screen recording app like QuickTime Player to capture the audio.
You might want to disable Auto Brightness on your iPhone before recording, though, to avoid any sudden changes in screen brightness that could mess up your recording. Check out How to switch off Auto Brightness in iOS 11 for a quick guide.
Once you’ve got Auto Brightness sorted, you’re ready to start recording!
Audio Editing Software
Audio editing software provides a range of tools to manipulate and enhance your audio recordings. Popular options include:
- Audacity: This free, open-source software is user-friendly and packed with essential editing features. It’s a great choice for beginners.
- GarageBand: Apple’s free audio editing and music creation software is intuitive and comes pre-installed on Macs. It offers a user-friendly interface and a variety of audio editing tools.
- Adobe Audition: A professional-grade audio editing software with advanced features for mastering, noise reduction, and more. It’s ideal for serious audio editors.
Noise Reduction
Noise can significantly affect the quality of your recordings. Here’s how to remove unwanted noise:
- Identify Noise: Before you start editing, listen carefully to your recording to identify the types of noise present. It could be background hum, static, or even your own breathing.
- Use Noise Reduction Tools: Most audio editing software includes noise reduction tools. These tools use algorithms to identify and reduce unwanted noise while preserving the original audio.
- Selective Noise Reduction: Some software allows you to select specific sections of the audio to apply noise reduction, ensuring that you only target the noisy parts.
Audio Enhancement
To optimize the audio quality, you can use various techniques:
- Equalization (EQ): This tool allows you to adjust the frequencies of your audio. By boosting or cutting specific frequencies, you can enhance the clarity and fullness of your recording.
- Compression: Compression helps even out the volume levels of your audio. It reduces the dynamic range, making quieter parts louder and louder parts quieter, resulting in a more consistent volume.
- Normalization: This feature sets the overall volume level of your recording to a specific level, ensuring consistency across different recordings.
File Formats and Storage
When you record Apple Music from your iPhone to your Mac, you have the option to choose the file format for the saved audio. This choice impacts the audio quality and file size, which can affect storage space and playback compatibility.
Let’s explore the common file formats available and their implications.
Recording Apple Music from your iPhone to your Mac can be tricky, especially if you’re not sure how to do it. You might need to use a screen recording tool or find a way to connect your phone to your computer.
If you’re dealing with unsaved QuickTime files, check out this handy trick Recover unsaved QuickTime files with this handy trick that might help. Once you’ve got your recording setup sorted, you can start capturing your favorite tunes and playlists.
Common File Formats
The most common file formats for recorded Apple Music include MP3, AAC, and WAV. Each format offers unique advantages and disadvantages based on factors like audio quality, file size, and compatibility.
- MP3: This format is widely recognized and compatible with various devices and platforms. It uses lossy compression, meaning some audio data is discarded during the encoding process, resulting in a smaller file size. However, this can affect audio quality, especially at lower bitrates.
- AAC: Advanced Audio Coding (AAC) is another lossy format, but it typically offers better sound quality than MP3 at similar bitrates. It’s often used for streaming services like Apple Music and is widely supported across devices and software.
- WAV: This format uses uncompressed audio, preserving the original audio quality without any loss. WAV files are larger than MP3 or AAC files, making them ideal for high-fidelity audio but less practical for storage or sharing.
Choosing the Right File Format, How to record Apple Music from your iPhone to your Mac
The choice of file format depends on your needs and priorities. Consider the following factors:
- Audio Quality: If you prioritize audio fidelity, choose WAV for the highest quality. However, if you need a balance between quality and file size, MP3 or AAC are good options.
- Storage Space: WAV files are significantly larger than MP3 or AAC files, so consider your storage capacity and the number of recordings you plan to save.
- Compatibility: MP3 and AAC are widely compatible with most devices and software, while WAV might require specific playback software or hardware.
- Sharing and Transfer: MP3 and AAC files are typically smaller and more convenient for sharing and transferring across devices or online platforms.
File Size Considerations
The file size of recorded Apple Music can vary based on the chosen format and the length of the audio.
- MP3: A 3-minute MP3 song at a bitrate of 128kbps might be around 3MB.
- AAC: A 3-minute AAC song at a bitrate of 256kbps might be around 5MB.
- WAV: A 3-minute WAV song at a bitrate of 44.1kHz/16bit might be around 10MB.
Legal Considerations
Recording and distributing copyrighted music without permission is illegal. You should always be mindful of copyright laws and respect the rights of artists and creators.
Fair Use and Copyright Laws
Copyright law grants creators exclusive rights to their work, including music. However, there are exceptions to copyright protection under the concept of “fair use.” Fair use allows limited use of copyrighted material for specific purposes, such as criticism, commentary, news reporting, teaching, scholarship, and research.
The fair use doctrine is a complex legal concept, and determining whether a particular use is fair use is often a case-by-case analysis. Here are some factors that courts consider when evaluating fair use:
- The purpose and character of the use
- The nature of the copyrighted work
- The amount and substantiality of the portion used
- The effect of the use on the potential market for or value of the copyrighted work
In general, it’s safer to assume that recording and distributing copyrighted music without permission is illegal, even for personal use. If you’re unsure about the legality of a particular use, it’s always best to consult with an attorney.
“The Fair Use Doctrine allows for limited use of copyrighted material for specific purposes, such as criticism, commentary, news reporting, teaching, scholarship, and research.”
Troubleshooting
Recording Apple Music on your Mac can be a smooth process, but like any tech endeavor, you might encounter some hiccups along the way. This section explores common issues and provides solutions to help you overcome them and achieve flawless recordings.
Troubleshooting Common Recording Issues
Recording Apple Music on your Mac can be a smooth process, but like any tech endeavor, you might encounter some hiccups along the way. This section explores common issues and provides solutions to help you overcome them and achieve flawless recordings.
- Audio Quality Problems: If your recordings are plagued by crackling, distortion, or a noticeable drop in audio quality, it’s likely due to issues with the recording software, audio settings, or even your internet connection. To tackle this, consider:
- Software Compatibility: Ensure your chosen recording software is compatible with your Mac’s operating system and Apple Music.
Outdated or incompatible software can lead to audio quality issues.
- Audio Settings: Adjust the recording software’s settings to match your desired audio quality. Experiment with different sample rates (e.g., 44.1 kHz for CD-quality audio) and bit depths (e.g., 16-bit or 24-bit for higher fidelity).
- Internet Connection: A stable internet connection is crucial for streaming Apple Music without interruptions. If your connection is unstable, you might experience audio dropouts or stuttering in your recordings.
- Software Compatibility: Ensure your chosen recording software is compatible with your Mac’s operating system and Apple Music.
- Recording Errors: Sometimes, recordings might fail to start or stop abruptly. These errors can stem from various factors, including:
- Software Bugs: Bugs within the recording software can lead to recording errors. Update your software to the latest version to address known bugs and improve stability.
- Insufficient System Resources: If your Mac’s system resources (CPU, RAM, disk space) are strained, recording might fail or encounter errors. Close unnecessary applications and free up resources before starting your recording.
- Permissions Issues: Ensure your recording software has the necessary permissions to access your Mac’s microphone and audio output.
Check your Mac’s privacy settings to grant the required permissions.
Advanced Techniques
If you’re looking to take your Apple Music recording to the next level, there are several advanced techniques you can explore. These methods can enhance the quality of your recordings and provide more flexibility in your music projects.
Audio Interfaces
Using an audio interface can significantly improve the sound quality of your recordings. Audio interfaces are external devices that connect your iPhone to your Mac, providing a high-quality audio connection. They typically offer multiple inputs and outputs, allowing you to record multiple instruments or microphones simultaneously.
This also provides a more stable connection, reducing noise and interference that can occur with the standard iPhone headphone jack.
Audio interfaces typically offer a variety of features, such as preamps, EQ, and compression, which can be used to enhance your recordings.
Professional Recording Software
While built-in Mac applications like GarageBand are suitable for basic recording, professional recording software like Logic Pro X or Ableton Live offers a wider range of tools and features for more complex projects. These programs provide advanced audio editing capabilities, mixing and mastering tools, and support for multiple tracks, allowing you to create intricate musical arrangements.
Professional recording software allows for advanced audio manipulation, such as time stretching, pitch shifting, and applying various audio effects.
So you want to record Apple Music from your iPhone to your Mac, huh? Well, before you get too caught up in that, you might want to check out Apple seeds first AirPods Pro beta firmware — here’s how to get it.
Who knows, maybe those new features will change your mind about how you want to record your music. But if you’re still determined to get that Apple Music onto your Mac, there are a few ways to do it.
Audio Effects and Enhancements
Audio effects and enhancements can be used to improve the quality of your recordings and add creative flair. These effects can be applied during or after recording using recording software or dedicated audio plugins.
Audio Effects
- Equalization (EQ):Adjusts the frequency balance of your audio, emphasizing or reducing certain frequencies to shape the sound. This can be used to enhance the clarity of vocals, boost the bass, or reduce unwanted frequencies.
- Compression:Reduces the dynamic range of your audio, making quieter parts louder and louder parts quieter. This can be used to create a more consistent volume level and improve the overall clarity of your recordings.
- Reverb:Simulates the acoustic environment of a space, adding depth and realism to your recordings. This can be used to create a sense of space, intimacy, or grandeur.
- Delay:Creates echoes or repetitions of your audio, adding texture and interest. This can be used to create a sense of space, movement, or rhythmic patterns.
Audio Enhancements
- Noise Reduction:Reduces unwanted background noise, such as hiss, hum, or wind noise. This can be used to improve the clarity and intelligibility of your recordings.
- De-essing:Reduces excessive sibilance (hissing sounds) from vocals, making them sound smoother and more natural.
- Pitch Correction:Corrects vocal pitch, making it sound more consistent and polished. This can be used to fix minor pitch imperfections or to create a more stylized vocal sound.
Multi-Track Recording
Multi-track recording allows you to record different instruments or vocals separately, creating a more layered and complex musical arrangement. This technique is often used in professional music production, but it can also be used for home recording projects.
Multi-track recording involves recording each instrument or vocal part on a separate track in your recording software. You can then mix and manipulate these individual tracks to create a final mix.
Conclusion
Recording Apple Music from your iPhone to your Mac can be a valuable way to enjoy your favorite music offline or for personal use. We’ve explored a variety of methods, from using built-in tools to utilizing third-party software, along with essential considerations for legality, file formats, and audio quality.
Choosing the Right Method
The best method for recording Apple Music depends on your specific needs and technical expertise. If you’re looking for a simple solution, screen recording or using a dedicated audio recorder app might be suitable. However, if you prioritize audio quality and flexibility, exploring third-party recording software is recommended.
Here are some key takeaways to consider:
- Screen recording is a straightforward method but may result in lower audio quality due to limitations in capturing system audio.
- Using a dedicated audio recorder app offers more control over audio settings and may provide better audio quality.
- Third-party recording software provides the most comprehensive features, allowing you to customize recording settings, edit audio files, and convert them to various formats.
- Remember to prioritize legal considerations and respect copyright laws. Avoid sharing or distributing recordings without proper authorization.
Closing Summary
Recording Apple Music from your iPhone to your Mac opens a world of possibilities, allowing you to personalize your music experience and explore creative avenues. Whether you’re using Apple Music’s built-in features, screen recording, or third-party software, this guide has equipped you with the knowledge and tools to achieve successful recordings.
Remember to prioritize audio quality, legal considerations, and best practices to ensure your recordings are both enjoyable and ethical. Happy recording!
FAQ Compilation
What if I don’t have a Mac?
If you don’t have a Mac, you can still record Apple Music from your iPhone using a variety of third-party apps available on the App Store. These apps often offer similar features to the methods described in this guide, allowing you to record your music and enjoy it offline.
Are there any limitations to recording Apple Music?
Yes, Apple Music has limitations on recording and sharing. You can’t directly record Apple Music using its built-in features. Also, remember to respect copyright laws and avoid sharing or distributing recorded music without permission.
What if I’m having trouble with audio quality?
If you’re experiencing poor audio quality, make sure your recording settings are optimized. You can also try using an external microphone or audio interface for a clearer sound. Experiment with different audio editing software to find one that best suits your needs.

