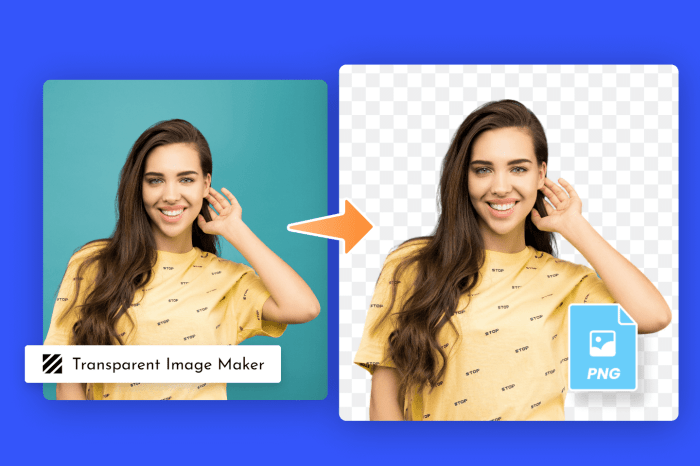
Master the Art of Image Transparency: 7 Ways to Make Backgrounds Disappear
Unleash your creativity and elevate your image editing skills with “How to Make an Image Background Transparent: 7 Different Ways.” Dive into this comprehensive guide to learn the secrets of removing backgrounds like a pro. Whether you’re a seasoned designer or just starting out, this journey will equip you with the knowledge and techniques to transform your images.
From the versatile Background Eraser Tool to the advanced power of Layer Masks, each method unravels a unique approach to achieving transparent backgrounds. Get ready to explore the world of image editing and unlock endless possibilities for your designs.
Understanding Image Transparency: How To Make An Image Background Transparent: 7 Different Ways
Image transparency is a crucial concept in image editing, allowing designers to control the visibility of specific image areas. It refers to the degree to which an image allows light to pass through it, creating a see-through or partially visible effect.
Transparency levels range from 0% (fully opaque) to 100% (completely transparent). Opaque images completely block light, while transparent images allow light to pass through unimpeded. Semi-transparent images fall between these extremes, allowing varying degrees of light transmission.
Applications of Image Transparency
- Creating overlays: Transparent images can be layered over other images or backgrounds to add depth and visual interest.
- Masking: Transparency enables the selective masking of image areas, allowing for precise editing and isolation of specific elements.
- Watermarking: Watermarks are often added to images with transparency to maintain visibility while subtly protecting copyright.
- Special effects: Transparency can be used to create unique special effects, such as fades, transitions, and ghosting.
Method 1: Using a Background Eraser Tool
Leveraging a background eraser tool in image editing software empowers you to eliminate the background from your images with precision. This method is particularly effective when dealing with complex backgrounds or images with intricate details.
To commence, select the background eraser tool from the software’s toolbox. Adjust the tool settings to suit your needs. The brush size determines the width of the area being erased, while the hardness controls the sharpness of the edges. Experiment with different settings to achieve the desired effect.
Knowing how to make an image background transparent can be a valuable skill for any creative project. But what if you encounter a “Connection Problem or Invalid MMI Code” error on your Android device? Don’t worry, because we’ve got you covered with our comprehensive guide on fixing this issue: How to Fix the “Connection Problem or Invalid MMI Code” Error on Android . Once you’ve resolved the error, you can return to exploring the various techniques for making image backgrounds transparent.
Choosing the Right Tool Settings
- Brush Size:A larger brush size allows for quicker erasing, but may result in less precision. Conversely, a smaller brush size provides greater control, but the process may be slower.
- Hardness:A hard brush creates sharp, defined edges, while a soft brush produces softer, more gradual transitions. Choose the hardness based on the desired effect.
- Tolerance:This setting determines the range of colors that will be erased. A higher tolerance will remove a wider range of colors, while a lower tolerance will be more selective.
Effective Erasing Techniques
- Zoom In:For intricate details, zoom in on the image to achieve greater precision.
- Use a Steady Hand:Maintain a steady hand while erasing to avoid jagged edges.
- Erase in Layers:Erase the background in multiple layers to gain finer control and prevent accidentally erasing important parts of the image.
Method 2: Using the Magic Wand Tool
The Magic Wand tool is another effective way to select and remove backgrounds. It works by selecting contiguous areas of similar color or tone, making it useful for removing simple, uniform backgrounds.
To use the Magic Wand tool:
Adjusting Tolerance Levels
- Select the Magic Wand tool from the toolbar.
- Click on the background area you want to remove.
- Adjust the Tolerance setting in the Options bar to control the range of colors that will be selected. A higher tolerance will select a wider range of colors, while a lower tolerance will select a narrower range.
Feathering Options, How to Make an Image Background Transparent: 7 Different Ways
- Enable the Feather option in the Options bar to soften the edges of the selection. This can help to prevent sharp, jagged edges when removing the background.
- Adjust the Feather Radius setting to control the amount of feathering. A higher radius will create a softer, more gradual transition between the selected area and the background, while a lower radius will create a sharper, more defined transition.
Method 3: Using the Quick Selection Tool
The Quick Selection tool in image editing software provides a user-friendly and efficient method for isolating image backgrounds. Unlike the Magic Wand tool, which selects based on color, the Quick Selection tool uses a brush-like interface to manually paint over the desired background area.
Knowing how to make an image background transparent can come in handy for various projects. But what if you need to manage a large number of emails? Check out our guide on How to Delete Multiple Emails in Outlook Desktop, Mobile, and Web to streamline your email management.
Once you’ve cleared out your inbox, you can return to learning about the different ways to make an image background transparent.
Advantages:
- Precise Selection:Allows for more precise and detailed background selection compared to other automated tools.
- Edge Refinement:Provides options to refine the selection edges, ensuring a clean and natural-looking transparency.
Limitations:
- Time-Consuming:Can be more time-consuming than other automated methods, especially for complex backgrounds.
- Skill Required:Requires some level of skill and practice to achieve accurate and satisfactory results.
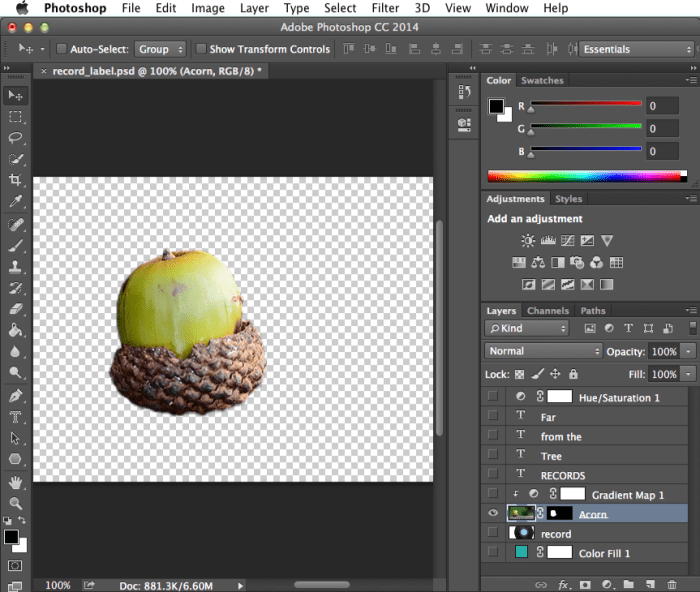
Method 4: Using Layer Masks
Layer masks provide a non-destructive way to make image backgrounds transparent. They allow you to selectively hide or reveal parts of a layer without permanently altering the original image.
Creating a Layer Mask
To create a layer mask:
- Select the layer you want to make transparent.
- Click the “Add Layer Mask” button at the bottom of the Layers panel.
- A white mask thumbnail will appear next to the layer thumbnail.
Method 5: Using Clipping Paths

Clipping paths offer a precise method for defining transparent areas in an image. This technique involves creating a vector path that Artikels the desired transparent area. The path can be created using pen tools or other techniques that ensure accurate path creation.
Creating Clipping Paths
To create a clipping path, follow these steps:
- Select the Pen tool or other path creation tool from the toolbar.
- Click on the image to create anchor points that define the path.
- Adjust the path by dragging the anchor points or using the Direct Selection tool.
- Once the path is complete, right-click and select “Make Selection” to create a selection based on the path.
- Invert the selection by pressing Ctrl+Shift+I (Windows) or Cmd+Shift+I (Mac).
- Delete the inverted selection to remove the unwanted area and make it transparent.
Method 6: Using Online Tools
For those seeking a convenient and accessible solution, online tools offer a range of options for making image backgrounds transparent. These tools provide user-friendly interfaces and often cater to beginners and occasional users.
Let’s explore some popular online tools and compare their features:
Background Remover by Freepik
- Ease of Use: Highly user-friendly with an intuitive drag-and-drop interface.
- Features: Automatic background removal, option to fine-tune transparency, and various file format support.
- Output Quality: Generally produces high-quality transparent backgrounds with minimal artifacts.
Remove.bg
- Ease of Use: Similar to Background Remover, it offers a simple and straightforward interface.
- Features: Advanced AI-powered background removal, batch processing, and image editing capabilities.
- Output Quality: Known for producing exceptional transparent backgrounds with accurate edge detection.
Clipping Magic
- Ease of Use: Slightly more complex than the previous tools, requiring some understanding of image editing concepts.
- Features: Advanced tools for fine-tuning transparency, creating layer masks, and adjusting image colors.
- Output Quality: Capable of producing high-quality transparent backgrounds, but requires manual adjustments for complex images.
Method 7: Using Dedicated Background Removal Software
For complex images with intricate details, specialized background removal software offers advanced features that can simplify the process and produce high-quality results.
With “How to Make an Image Background Transparent: 7 Different Ways”, you’ll master transparency techniques for your images. If you encounter network credential issues on Windows, don’t worry! Our guide on How to Fix a Persistent “Enter Network Credentials” Message on Windows has you covered.
Back to our image editing adventures, “How to Make an Image Background Transparent: 7 Different Ways” empowers you to enhance your visuals like a pro!
These software programs typically provide a range of tools tailored for background removal, such as intelligent object recognition, edge detection algorithms, and color correction capabilities.
Features and Capabilities
- Intelligent Object Recognition:Automatically identifies the subject of the image, making it easier to isolate and remove the background.
- Edge Detection Algorithms:Accurately detects the edges of the subject, ensuring precise background removal without leaving unwanted artifacts.
- Color Correction:Allows fine-tuning of colors and tones to enhance the subject and remove any color contamination from the background.
- Batch Processing:Enables the simultaneous removal of backgrounds from multiple images, saving time and effort.
- Transparency Control:Provides options to adjust the level of transparency, allowing for partial background removal or the creation of transparent backgrounds.
Concluding Remarks
With these seven methods at your fingertips, you now possess the tools to make any image background vanish into thin air. Whether you’re creating stunning social media graphics, designing eye-catching website banners, or simply enhancing your personal photos, transparent backgrounds will elevate your creations to new heights.
Embrace the power of image transparency and let your imagination soar.
Expert Answers
What’s the easiest way to make a background transparent?
Using the Quick Selection Tool is a great option for beginners due to its simplicity and effectiveness in isolating image backgrounds.
Can I make a background transparent without Photoshop?
Absolutely! There are several online tools and dedicated background removal software that allow you to achieve transparency without the need for Photoshop.
What’s the best method for complex images?
For images with intricate details and challenging backgrounds, specialized background removal software offers the most precise and efficient results.