How To Install Samba Into Mac Os X Lion?
How to Install Samba Into Mac OS X Lion? Ever wished you could easily share files between your Mac and Windows computers? Samba makes that dream a reality. This powerful software allows you to set up a file sharing network, bridging the gap between different operating systems and giving you the freedom to access your files from anywhere on your network.
This guide will walk you through the process of installing and configuring Samba on your Mac OS X Lion system. From downloading the necessary packages to setting up shared folders and user permissions, we’ll cover everything you need to know to get started with Samba and enjoy the benefits of seamless file sharing.
Introduction to Samba
Samba is a powerful software suite that enables file and print sharing across networks. It’s particularly relevant to Mac OS X Lion users as it bridges the gap between Apple’s macOS and Windows-based systems, allowing seamless file sharing between these operating systems.
Benefits of Using Samba for File Sharing
Samba offers a range of advantages for file sharing on a Mac network, including:
- Cross-platform compatibility:Samba allows Mac users to access files on Windows machines and vice versa, fostering collaboration between users with different operating systems. This eliminates the need for complex file transfer methods and simplifies sharing documents, images, and other files.
- Simplified file sharing:Samba simplifies the process of sharing files within a network, allowing users to easily access and manage shared resources. Users can access shared folders and files from their Macs, as if they were directly on their own computers, without the need for complex configurations.
- Improved network security:Samba offers robust security features, such as password protection and user authentication, to protect shared files and resources from unauthorized access. This ensures that sensitive data is only accessible to authorized users, enhancing the security of your network.
System Requirements: How To Install Samba Into Mac OS X Lion?
Before installing Samba on your Mac OS X Lion system, it’s important to ensure your machine meets the necessary system requirements. This will help prevent potential compatibility issues and ensure a smooth installation process.
Samba Compatibility with Mac OS X Lion Versions
Samba is generally compatible with all versions of Mac OS X Lion. However, specific versions may have minor differences in compatibility or require additional configuration steps. It’s always a good idea to consult the official Samba documentation for the latest compatibility information and any version-specific instructions.
Minimum System Requirements
- Operating System:Mac OS X Lion (10.7) or later.
- Processor:Intel-based Mac.
- RAM:At least 1 GB of RAM is recommended, but 2 GB or more is ideal for optimal performance.
- Hard Disk Space:At least 500 MB of free disk space is required for the Samba installation.
- Network Connection:A stable network connection is necessary for downloading and installing Samba.
Configuring Samba
The Samba configuration file, smb.conf, is where you define the settings for Samba on your Mac. It’s a plain text file that contains all the necessary information for Samba to function correctly. You’ll need to edit this file to configure your file sharing settings.
Location of the Samba Configuration File
The smb.conf file is located in the following directory:
/private/etc/smb.conf
You can open this file using a text editor like TextEdit or nano.
Configuring Samba for File Sharing
To share folders using Samba, you need to make the following configurations in the smb.conf file:
Creating Shared Folders
- [share name]– This is the name of the shared folder. For example, you could name it “Documents” or “Public”.
- path = /path/to/your/folder– This specifies the location of the folder you want to share on your Mac. Replace “/path/to/your/folder” with the actual path to the folder.
- valid users = @users– This allows all users on your Mac to access the shared folder. You can also specify individual usernames separated by commas.
- read only = no– This allows users to both read and write files to the shared folder. If you want to make the folder read-only, set this to “yes”.
- guest ok = yes– This allows anonymous users to access the shared folder. This is useful if you want to allow anyone on your network to access the folder. However, it is generally considered insecure to allow anonymous access.
Setting User Permissions
- create mask = 0664– This sets the default permissions for new files created in the shared folder. This gives the owner of the file read and write access, and the group and everyone else read-only access.
- directory mask = 0775– This sets the default permissions for new folders created in the shared folder. This gives the owner of the folder read, write, and execute permissions, and the group and everyone else read and execute permissions.
- force user = username– This forces all connections to the shared folder to be made under the specified username. This can be useful for security reasons.
Example smb.conf Configuration
Here is an example of how you might configure smb.conf to share a folder named “Documents” on your Mac:
[Documents]path = /Users/yourusername/Documentsvalid users = @usersread only = noguest ok = yescreate mask = 0664directory mask = 0775
Remember to replace “yourusername” with your actual username.
Setting up Samba on Mac OS X Lion can be a bit of a pain, but it’s totally doable. You’ll need to install some packages and make some tweaks, but the process is pretty straightforward. If you’re looking to expand your Cydia sources, check out this guide on how to Add More Sources To Cydia – it’s super helpful.
Once you’ve got Samba running, you can easily share files between your Mac and other devices on your network.
Accessing Shared Folders
Now that Samba is set up, you can access the shared folders from other computers on your network. You can use different methods to access these folders, each offering unique advantages and approaches.
Accessing Shared Folders Using the Finder
The Finder is the most intuitive way to access shared folders on a Mac. It provides a graphical interface that makes navigating and interacting with files easy.Here’s how to access shared folders using the Finder:
- Open the Finder on your Mac.
- In the Finder window, click on the “Go” menu in the menu bar.
- Select “Connect to Server…” from the dropdown menu.
- In the dialog box that appears, enter the address of the Samba server. The address will typically be in the format “smb://servername” or “smb://IPaddress”.
- If the server requires authentication, enter your username and password.
- Click “Connect” to establish a connection to the server.
- The shared folders on the server will appear in the Finder window. You can now access, browse, and manage files within these folders.
Accessing Shared Folders Using Command-Line Tools
For more advanced users, accessing shared folders using command-line tools offers greater flexibility and control. The command-line tools provide a powerful way to interact with Samba servers and manage files.Here’s how to access shared folders using command-line tools:
- Open a terminal window on your Mac.
- Use the “smbclient” command to connect to the Samba server. The command will typically be in the format “smbclient //servername/sharename”.
- If the server requires authentication, you will be prompted to enter your username and password.
- Once connected, you can use various commands to manage files within the shared folder. For example, you can use the “ls” command to list files, the “cd” command to change directories, and the “get” and “put” commands to download and upload files.
Accessing Shared Folders Using Network Drives
Mapping network drives allows you to access shared folders as if they were local drives on your Mac. This method provides seamless integration and simplifies file access.Here’s how to access shared folders using network drives:
- Open the Finder on your Mac.
- In the Finder window, click on the “Go” menu in the menu bar.
- Select “Connect to Server…” from the dropdown menu.
- In the dialog box that appears, enter the address of the Samba server. The address will typically be in the format “smb://servername” or “smb://IPaddress”.
- If the server requires authentication, enter your username and password.
- Click “Connect” to establish a connection to the server.
- Select the shared folder you want to map as a network drive.
- Click the “Mount” button to map the shared folder as a network drive.
- The mapped network drive will appear on your desktop or in the “Finder” sidebar, allowing you to access files as if they were local drives.
Troubleshooting Common Issues
Installing and configuring Samba on Mac OS X Lion can sometimes present challenges. You might encounter a few common issues, but don’t worry, there are solutions! Let’s explore some of the most common problems and how to fix them.
Samba Service Not Starting
If you find that the Samba service isn’t starting after installation, it’s likely due to a configuration error. To diagnose this, check your Samba configuration file. The file is usually located at `/private/etc/smb.conf`. Look for any syntax errors, typos, or incorrect settings.
Here are some common errors to look for:
- Missing or Incorrect Settings:Ensure that all the necessary settings are present and correctly configured. For example, you need to specify the shared folders, their access permissions, and the workgroup name.
- Permissions Issues:Double-check that the Samba service has the appropriate permissions to access the shared folders. You might need to adjust the file permissions using the `chmod` command in Terminal.
- Firewall Blocking:The Mac OS X firewall might be blocking Samba’s access to the network. You can temporarily disable the firewall or configure it to allow Samba traffic.
Unable to Access Shared Folders
If you can’t access the shared folders from other computers on the network, there are a few potential reasons:
- Incorrect Network Settings:Ensure that the network settings on the client computer are correct. Double-check the IP address, subnet mask, and workgroup name.
- Firewall Blocking:The firewall on the client computer might be blocking access to the shared folders. You can temporarily disable the firewall or configure it to allow access.
- Samba Service Not Running:Verify that the Samba service is running on your Mac. You can check the status of the service using the `smbstatus` command in Terminal.
- Incorrect Usernames and Passwords:Make sure you are using the correct username and password to access the shared folders.
Performance Issues
If you experience slow performance or lag when accessing shared folders, you might need to optimize Samba’s configuration:
- Network Bandwidth:Ensure that you have sufficient network bandwidth for your needs. Consider upgrading your internet connection or reducing the amount of data being transferred.
- Samba Settings:Adjust Samba’s settings to improve performance. For example, you can increase the buffer size or enable network caching.
- Disk Performance:If the disk containing the shared folders is slow, it can impact Samba’s performance. Consider upgrading your hard drive or using a faster storage solution.
Advanced Samba Features
Samba offers a plethora of advanced features beyond basic file sharing, enabling more sophisticated network interactions. These features can enhance security, improve performance, and unlock new possibilities for your network.
Printer Sharing
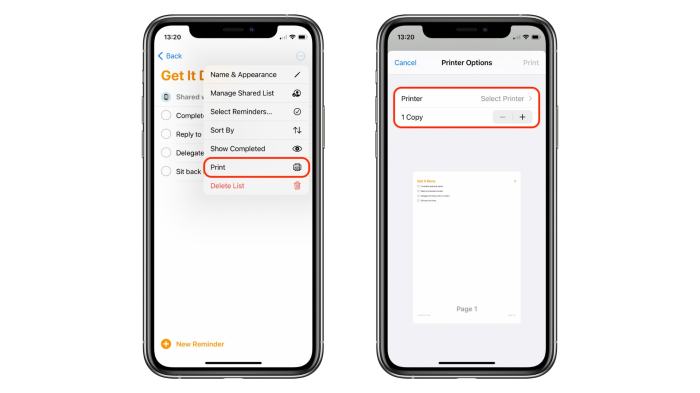
Sharing printers on your network is a common need. Samba simplifies this process, allowing you to easily share your Mac’s printers with Windows clients. To enable printer sharing, you need to configure the `printcap` and `smb.conf` files.
The `printcap` file maps printer names to device names.
The `smb.conf` file defines the printer’s share name and other settings.
To configure printer sharing, follow these steps:
1. Edit the `printcap` file
Open the `printcap` file in a text editor.
Add a line for each printer you want to share.
The line should include the printer name, device name, and other relevant information.
For example
`lp0: /dev/usb/lp0 :1200:300:1000:1000:400:400`
2. Edit the `smb.conf` file
Open the `smb.conf` file in a text editor.
Installing Samba on Mac OS X Lion can be a bit tricky, but once you’ve got it set up, you’ll be able to easily share files between your Mac and other devices on your network. If you’re also using iOS Mail, you might want to check out 7 hidden tips and tricks every iOS Mail user should know to make your email experience even smoother.
Back to Samba, make sure you’ve got the right version of the software for your operating system, and you should be good to go!
Add a new section for the printer share.
Installing Samba on Mac OS X Lion can be a bit tricky, especially if you’re not familiar with command-line tools. But once you get it set up, it’s super useful for sharing files between your Mac and other devices.
You might even find that you need to reorganize your Control Center to make your favorite tools easier to find, like the Reorganize Control Center to make favorite tools easier to find guide suggests, to get to the terminal quicker.
Once you’ve got your Control Center in order, you can jump back to that Samba install and start sharing your files!
The section should include the share name, path to the printer, and other settings.
For example
“` [printers] path = /var/spool/samba printable = yes valid users = @users read only = no “`
3. Restart the Samba service
Restart the Samba service to apply the changes.
You can restart the service using the following command
`sudo /etc/init.d/samba restart`Once you have configured printer sharing, Windows clients can access your shared printers from the network.
User Authentication, How to Install Samba Into Mac OS X Lion?
Samba provides various user authentication methods, ensuring that only authorized users can access shared resources.
- Local Users:This method uses the local users on the Mac to authenticate users. This is the simplest method, but it may not be suitable for large networks or networks with multiple servers.
- Active Directory:Samba can integrate with Active Directory, allowing you to use Active Directory users and groups to authenticate users. This is a good option for networks that already use Active Directory.
- LDAP:Samba can also use LDAP to authenticate users. LDAP is a directory service that can store user information in a central location.
- NIS:Network Information Service (NIS) is another option for user authentication. NIS is a distributed directory service that can be used to manage user accounts and other network resources.
Security Settings
Samba offers several security settings to protect your shared resources.
- Password Complexity:You can configure password complexity requirements to enforce strong passwords for Samba users.
- Access Control Lists (ACLs):ACLs provide fine-grained control over access to shared resources. You can specify which users or groups have read, write, or execute permissions on specific files or folders.
- Encryption:Samba supports encryption to protect data in transit. You can configure Samba to use TLS/SSL to encrypt communication between clients and servers.
- Authentication Level:You can set the authentication level to require users to provide a username and password before accessing shared resources.
Security Considerations
Samba, like any file-sharing protocol, is susceptible to security vulnerabilities. It’s crucial to implement security measures to protect your data and prevent unauthorized access to your shared files. Think of it like this: Imagine your computer is a house, and your shared files are the valuable items inside.
You wouldn’t leave your front door unlocked, would you? The same logic applies to your Samba server.
Strong Passwords
Strong passwords are the first line of defense against unauthorized access. Here are some tips for creating strong passwords:
- Use a combination of uppercase and lowercase letters, numbers, and symbols.
- Avoid using common words or personal information.
- Create passwords that are at least 12 characters long.
- Use a password manager to generate and store your passwords securely.
Encryption
Encryption adds an extra layer of security by scrambling your data, making it unreadable to anyone who doesn’t have the decryption key. Samba supports encryption using the following protocols:
- SMB signing: This protocol ensures that data packets are not tampered with during transmission. It’s like having a digital signature that verifies the authenticity of the data.
- SMB encryption: This protocol encrypts the entire data stream between the client and the server. This is like putting your data in a locked box that only you can open.
Alternative File Sharing Options
While Samba is a powerful and versatile solution for file sharing, it’s not the only option available for Mac OS X Lion users. Apple offers its own built-in file sharing features, and cloud storage services have become increasingly popular. Let’s explore these alternatives and compare them to Samba.
Apple’s Built-in File Sharing
Apple’s built-in file sharing features provide a straightforward way to share files and folders within your local network. This option is accessible through the Sharing pane in System Preferences.
Features and Benefits
- Simplicity:Apple’s file sharing is incredibly easy to set up and use, making it ideal for basic file sharing needs.
- Security:Apple’s file sharing uses encryption and user authentication to secure shared resources.
- Integration:It seamlessly integrates with other Apple devices and applications, making it convenient for sharing files between Macs, iPhones, and iPads.
Comparison with Samba
- Functionality:Apple’s file sharing is less feature-rich than Samba. It lacks advanced features like user permissions and access control.
- Platform Compatibility:While Samba works with various operating systems, Apple’s file sharing is primarily designed for Apple devices.
Cloud Storage Services
Cloud storage services like Dropbox, Google Drive, and iCloud provide a convenient way to store and share files across multiple devices and locations.
Features and Benefits
- Accessibility:Files stored in the cloud are accessible from anywhere with an internet connection.
- Synchronization:Changes made to files are automatically synchronized across all devices.
- Collaboration:Cloud storage services often offer collaboration features, allowing multiple users to work on files simultaneously.
- Backup and Recovery:Cloud storage provides a backup solution for your files, ensuring data recovery in case of device failure.
Comparison with Samba
- Security:Cloud storage services generally employ robust security measures, but data privacy concerns may arise due to the reliance on third-party providers.
- Performance:File access speeds can be affected by network connectivity and server load, potentially leading to slower performance compared to local file sharing.
- Cost:While some cloud storage services offer free plans, larger storage needs may require paid subscriptions.
Example Scenarios
Samba offers a variety of use cases for Mac OS X Lion users, enabling seamless file sharing and network management. This section explores common scenarios and provides guidance on configuring Samba for each.
Sharing Files with Windows Computers
Sharing files between Mac OS X Lion and Windows computers is a common requirement. Samba simplifies this process, allowing users to access files on their Mac from Windows machines and vice versa.
Configuration
- Create a shared folder:In Finder, navigate to the folder you want to share and right-click to select “Get Info.” In the “Sharing & Permissions” section, check the “Shared” box. You can then set permissions for different users and groups.
- Edit the Samba configuration file:Open the “smb.conf” file in a text editor. Add a new section for the shared folder:
[SharedFolderName]path = /path/to/shared/folder valid users = @users read only = no
Replace “SharedFolderName” with the name you want to use for the shared folder, “/path/to/shared/folder” with the actual path to the folder, and “@users” with the user group that has access to the folder.
- Restart the Samba service:After making changes to the configuration file, restart the Samba service using the following command:
sudo smbcontrol-S -r
Backing Up Data
Samba can be used to back up data from a Mac to a Windows computer or a NAS device running Samba. This provides an alternative to cloud-based backup solutions and allows for local storage of backups.
Configuration
- Create a shared folder on the backup destination:This could be a folder on a Windows computer, a NAS device, or even another Mac. Make sure the folder is accessible to the Mac that you want to back up.
- Configure Samba on the backup destination:Follow the steps Artikeld in the “Sharing Files with Windows Computers” section to create a shared folder on the backup destination. Ensure the user account on the Mac has read/write access to the shared folder.
- Set up a backup schedule:Use a backup utility like Time Machine or Carbon Copy Cloner to schedule regular backups to the shared folder on the backup destination.
Creating a Home Network
Samba can be used to create a home network where multiple computers can share files, printers, and other resources. This is a cost-effective alternative to using a dedicated NAS device.
Configuration
- Configure Samba on each computer:Follow the steps Artikeld in the “Sharing Files with Windows Computers” section to create shared folders on each computer in the network.
- Set up a workgroup:Ensure all computers in the network are part of the same workgroup. This allows them to discover and access each other’s shared resources.
- Enable file and printer sharing:On each computer, enable file and printer sharing in the “Sharing & Permissions” settings. This allows other computers on the network to access the shared resources.
Resources and Documentation
You’ve successfully installed Samba on your Mac OS X Lion system, but there’s always more to learn. This section will guide you to valuable resources and documentation that can help you further explore Samba’s capabilities and troubleshoot any issues you might encounter.
Official Samba Documentation
The official Samba website is the ultimate source for comprehensive information about Samba. You’ll find detailed documentation covering various aspects of Samba, including configuration options, advanced features, and troubleshooting guides.
- Samba Website: https://www.samba.org/ – This is the central hub for all things Samba, including documentation, news, and community forums.
- Samba Documentation: https://www.samba.org/samba/docs/ – This section provides a wealth of documentation, including the Samba User’s Guide, the Samba Administrator’s Guide, and various technical papers.
Community Forums
Engaging with the Samba community is a great way to get help, share knowledge, and stay updated on the latest developments. These forums are filled with experienced users who can assist you with your Samba-related questions and challenges.
- Samba Mailing Lists: https://www.samba.org/samba/community/ – Subscribe to these lists to participate in discussions and receive announcements.
- Samba Forums: https://www.samba.org/samba/forums/ – Search for existing threads or post your own questions and seek advice from the community.
Online Tutorials
Numerous online tutorials offer step-by-step instructions and practical examples to guide you through various aspects of Samba configuration and usage. These resources can be particularly helpful for beginners and those seeking specific solutions.
- Samba Tutorial: https://www.howtoforge.com/tutorial/samba-server-configuration/ – This comprehensive tutorial covers various aspects of Samba configuration and administration.
- Samba for Beginners: https://www.linux.com/news/samba-for-beginners/ – This article provides a gentle introduction to Samba for newcomers.
Concluding Remarks
With Samba installed and configured, you’ll be able to access your files from any device on your network, regardless of the operating system. Whether you’re sharing documents with colleagues, backing up your data, or simply managing your files across multiple devices, Samba provides a reliable and user-friendly solution.
So, dive in, explore the world of Samba, and unlock the full potential of file sharing on your Mac OS X Lion system.
Top FAQs
What are the system requirements for installing Samba on Mac OS X Lion?
You’ll need a Mac running Mac OS X Lion or later, with a stable internet connection to download the Samba package.
Can I use Samba to share printers on my network?
Yes, Samba supports printer sharing. You can configure it to share printers connected to your Mac with other devices on your network.
What are some alternative file sharing options for Mac OS X Lion?
Besides Samba, you can explore Apple’s built-in file sharing features, cloud storage services like iCloud or Dropbox, or other network protocols like FTP.

