How to Install Windows 11 Offline: A Step-by-Step Guide
How to Install and Set Up Windows 11 Without an Internet Connection – Need to install Windows 11 without an internet connection? Don’t worry, we’ve got you covered. This comprehensive guide will walk you through the entire process, from creating a bootable USB drive to configuring your settings.
Whether you’re setting up a new computer or troubleshooting a connection issue, this guide will provide you with all the information you need to get Windows 11 up and running offline.
Introduction
This article provides a step-by-step guide on how to install and set up Windows 11 without an internet connection. This is useful in scenarios where an internet connection is unavailable or limited, such as during a system recovery or when installing on a remote computer.
Installing Windows 11 offline requires some preparation, including obtaining the Windows 11 ISO file and creating a bootable USB drive. Once the necessary preparations are complete, you can proceed with the offline installation process.
Preparations
Before starting the offline installation, you need to prepare the following:
- Windows 11 ISO file:Download the Windows 11 ISO file from Microsoft’s official website.
- USB flash drive:Prepare a USB flash drive with at least 8GB of storage space.
- Rufus or other bootable USB creator:Use a tool like Rufus to create a bootable USB drive from the Windows 11 ISO file.
Prerequisites
Before you embark on the offline installation journey, ensure you have the necessary hardware and software components at your disposal.
First and foremost, you will require a bootable USB drive or DVD. This trusty companion will serve as the vessel carrying the Windows 11 installation files, ready to be unleashed upon your system.
Hardware Requirements
- Processor: 1 gigahertz (GHz) or faster processor or System on a Chip (SoC)
- RAM: 4 gigabytes (GB)
- Storage: 64 GB or larger storage device
- System firmware: UEFI, Secure Boot capable
- TPM: Trusted Platform Module (TPM) version 2.0
- Graphics card: DirectX 12 or later with WDDM 2.0 driver
- Display: 9-inch (diagonal) or larger display with 8 bits per color channel
- Internet connection: Required for initial setup and updates (not necessary for offline installation)
Software Requirements, How to Install and Set Up Windows 11 Without an Internet Connection
- Windows 11 ISO file: Downloadable from Microsoft’s official website
- Rufus or similar tool: For creating a bootable USB drive
- Diskpart: Command-line utility for managing disks and partitions
Creating a Bootable USB Drive: How To Install And Set Up Windows 11 Without An Internet Connection
To create a bootable USB drive, you’ll need a USB drive with at least 8GB of storage space and the Windows Media Creation Tool.
Once you have the necessary materials, follow these steps:
Downloading the Windows Media Creation Tool
- Visit the Microsoft website and download the Windows Media Creation Tool.
- Run the tool and accept the license terms.
Creating the Bootable USB Drive
- Select the option to create installation media for another PC.
- Choose the language, edition, and architecture (64-bit or 32-bit) for the Windows installation.
- Select the USB drive as the destination for the installation media.
- Click on the “Next” button and wait for the tool to create the bootable USB drive.
Once the bootable USB drive is created, you can use it to install Windows 11 on your computer without an internet connection.
Preparing the Computer for Installation

Before beginning the installation process, you need to prepare your computer to boot from the USB drive containing the Windows 11 installation files. This involves accessing your computer’s BIOS or UEFI settings and changing the boot order.
The specific steps for accessing the BIOS or UEFI settings vary depending on your computer’s manufacturer and model. Typically, you need to press a specific key (such as F2, F10, or Delete) during the computer’s startup process. Consult your computer’s documentation or the manufacturer’s website for specific instructions.
Changing the Boot Order
Once you have accessed the BIOS or UEFI settings, you need to change the boot order so that your computer boots from the USB drive first. This typically involves navigating to the “Boot” or “Boot Order” section of the BIOS or UEFI settings and moving the USB drive to the top of the boot order list.
Save the changes to the BIOS or UEFI settings and exit. Your computer will then restart and begin the Windows 11 installation process.
Once you’ve got Windows 11 up and running offline, you can dive into advanced coding techniques like concurrency and parallelism to optimize your Python code. Check out this guide on How to Enhance Your Python Code With Concurrency and Parallelism to learn how to improve performance and scalability.
Then, you can return to your offline Windows 11 installation and continue customizing it to your liking.
Beginning the Installation
The Windows 11 installation process begins with selecting the language, time and currency format, and keyboard input method. After this, you’ll need to accept the license terms to proceed.
There are two main installation options: custom installation and upgrade installation. Custom installation allows you to choose which partitions to install Windows on, while upgrade installation preserves your existing files and settings.
Custom Installation
Custom installation is recommended if you want to install Windows on a new hard drive or if you want to start with a clean slate. To perform a custom installation, select “Custom: Install Windows only (advanced)” on the “Which type of installation do you want?” screen.
Once you’ve gotten Windows 11 up and running without an internet connection, you might want to take a break and discover some new tunes. Check out How to Discover New Songs Using Apple Music Playlists and Stations for some great tips on finding new music.
Then, come back here to finish setting up your Windows 11 installation.
Upgrade Installation
Upgrade installation is recommended if you want to upgrade your existing Windows installation to Windows 11. To perform an upgrade installation, select “Upgrade: Install Windows and keep files, settings, and apps” on the “Which type of installation do you want?” screen.
Partitioning the Hard Drive
Partitioning the hard drive is the process of dividing it into separate sections, each of which can be formatted with a different file system and used for a different purpose. This is useful for organizing your data and keeping different types of files separate.
When installing Windows 11, you will need to create at least one partition for the operating system.
There are two main partitioning schemes: MBR (Master Boot Record) and GPT (GUID Partition Table). MBR is the older scheme and can only support drives up to 2 TB in size. GPT is the newer scheme and supports drives up to 9.4 ZB in size.
GPT is also more flexible than MBR, allowing you to create more than four partitions on a single drive.
Choosing a Partitioning Scheme
If you are installing Windows 11 on a drive that is larger than 2 TB, you will need to use the GPT partitioning scheme. If you are installing Windows 11 on a drive that is smaller than 2 TB, you can use either the MBR or GPT partitioning scheme.
If you’re setting up Windows 11 offline, you might also want to check out How to Disable the Yellow Flashing Light on Your Amazon Echo Device for some home tech tips. Getting Windows 11 up and running without an internet connection can be a bit tricky, but it’s definitely doable with the right steps.
Creating Partitions
To create partitions, you can use the Disk Management utility in Windows. To open Disk Management, press Windows key + R, type “diskmgmt.msc”, and then press Enter.
- In Disk Management, right-click on the drive that you want to partition and select “Shrink Volume”.
- In the “Shrink Volume” dialog box, enter the amount of space that you want to shrink the volume by and then click “Shrink”.
- Once the volume has been shrunk, right-click on the unallocated space and select “New Simple Volume”.
- In the “New Simple Volume Wizard”, specify the size of the new partition, the drive letter, and the file system. Then click “Next” and “Finish”.
You can repeat these steps to create additional partitions.
Installing Windows 11

Copying Windows 11 Files
Once the hard drive has been partitioned, the Windows 11 installation files will be copied to the hard drive. This process may take some time, depending on the speed of the computer and the size of the installation files.
A progress bar will be displayed on the screen, indicating the progress of the file copy. The estimated installation time will also be displayed, giving an idea of how long the installation will take.
Configuring Settings
Once the installation is complete, you’ll need to configure some basic settings to get your system up and running. This includes setting up a user account, creating a password, and connecting to a local network if necessary.
User Account
The first step is to create a user account. This will be the account you use to log in to Windows 11. You can choose to use a Microsoft account or a local account. If you choose to use a Microsoft account, you’ll need to provide your email address and password.
If you choose to use a local account, you’ll need to create a username and password.
Password
Once you’ve created a user account, you’ll need to create a password. Your password should be strong and unique. It should contain a mix of upper and lower case letters, numbers, and symbols.
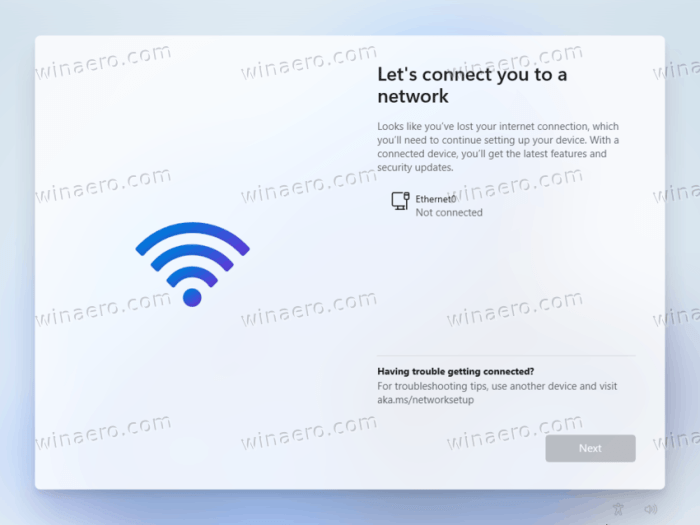
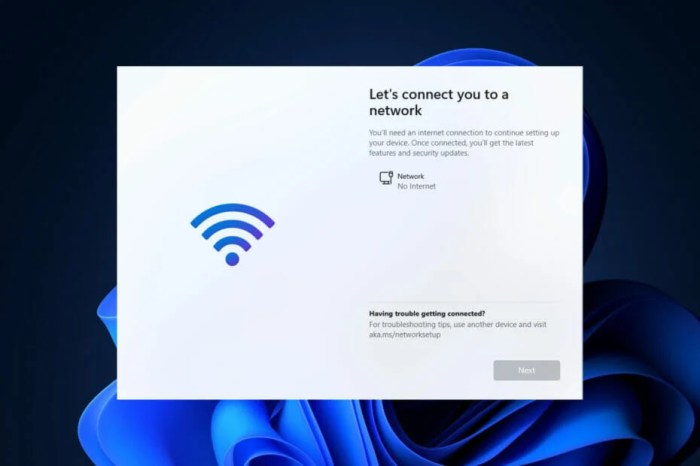
Network Connection
If you need to connect to a local network, you can do so by clicking on the network icon in the taskbar. You’ll then need to select the network you want to connect to and enter the password if necessary.
Troubleshooting Common Issues
The offline installation process of Windows 11 can occasionally encounter problems. Here are some common issues and their potential solutions:
If you encounter any of these issues, try the corresponding solutions to resolve them and continue with the installation process.
Error: “Windows cannot be installed to this disk. The selected disk has an MBR partition table. On EFI systems, Windows can only be installed to GPT disks.”
- Convert the disk to GPT using the following steps:
- Press Shift + F10 to open Command Prompt.
- Type diskpart and press Enter.
- Type list disk and press Enter to list all disks.
- Type select disk and press Enter to select the disk you want to convert.
- Type clean and press Enter to delete all partitions on the disk.
- Type convert gpt and press Enter to convert the disk to GPT.
- Type exit and press Enter to exit Diskpart.
Error: “A required CD/DVD drive device driver is missing.”
- Ensure that the bootable USB drive is properly inserted into the computer.
- If the issue persists, try using a different USB drive or burning the ISO file to a DVD and booting from it.
Error: “The computer restarted unexpectedly or encountered an unexpected error. Installation cannot proceed. To install Windows, restart the installation.”
- Restart the computer and try the installation again.
- If the issue persists, try disconnecting any unnecessary peripherals (e.g., external hard drives, printers) and restarting the installation.
Conclusive Thoughts
With a little preparation and these step-by-step instructions, you’ll be able to install Windows 11 offline with ease. So, gather your materials, follow the steps carefully, and enjoy your newly installed Windows 11 system.
Essential FAQs
Do I need a special USB drive to create a bootable drive?
No, you can use any USB drive with at least 8GB of storage space.
What if I don’t have a DVD drive?
You can still create a bootable USB drive using the Windows Media Creation Tool.
Can I upgrade my existing Windows 10 installation to Windows 11 offline?
Yes, you can, but you’ll need to have a valid Windows 10 license.