How To Easily Erase All Content And Settings In Macos Monterey
How to easily erase all content and settings in macOS Monterey is a process that can feel daunting, but it’s actually pretty straightforward. Think of it like hitting the “reset” button on your Mac, giving you a fresh start and a chance to start with a clean slate.
Maybe you’re selling your Mac, or you’re experiencing performance issues, or you just want to get rid of all the clutter and start fresh. Whatever your reason, erasing your Mac can be a great way to get back to the basics and enjoy a smooth, fast experience.
This guide will walk you through the entire process, from backing up your data to reinstalling macOS, and even troubleshooting any potential problems along the way. So, grab a cup of coffee, get comfortable, and let’s get started!
Understanding the Need for a Clean Slate: How To Easily Erase All Content And Settings In MacOS Monterey
Sometimes, you might need to start fresh with your Mac. A clean installation of macOS Monterey erases everything on your hard drive, including your apps, files, and settings. This is a big step, but it can be necessary for several reasons.
Reasons for a Clean Installation
A clean installation can be a great way to fix problems or start with a fresh system. Here are some common scenarios where it might be beneficial:
- Troubleshooting:If you’re experiencing persistent problems with your Mac, a clean installation can often solve them. This is because it removes any corrupted files or settings that might be causing the issue.
- Performance Issues:If your Mac is running slowly or sluggishly, a clean installation can help to improve its performance. This is because it removes any unnecessary files or programs that might be slowing down your system.
- Selling or Giving Away Your Mac:Before selling or giving away your Mac, you’ll want to erase all of your personal data. A clean installation is the best way to do this, as it completely wipes your hard drive.
- Upgrading to a New Version of macOS:While macOS updates are generally seamless, some users prefer a clean installation when upgrading to a new version of macOS. This ensures that there are no compatibility issues with older files or settings.
Benefits of a Clean Installation
A clean installation can offer several advantages:
- Improved Performance:A clean installation can help to improve your Mac’s performance by removing unnecessary files and programs.
- Enhanced Security:A clean installation can help to improve your Mac’s security by removing any malware or other threats that might be lurking on your system.
- Fresh Start:A clean installation allows you to start fresh with your Mac, giving you a chance to customize your settings and install only the apps you need.
Drawbacks of a Clean Installation
While a clean installation can be beneficial, there are also some drawbacks:
- Time-Consuming:A clean installation can be time-consuming, as you’ll need to reinstall all of your apps and transfer your files.
- Data Loss:A clean installation will erase all of the data on your hard drive, so make sure you have a backup of your important files before you proceed.
- Configuration:After a clean installation, you’ll need to reconfigure your Mac and install all of your apps, which can be a tedious process.
Real-World Examples
Here are some real-world examples of when a clean installation might be beneficial:
- A user experiencing constant crashes and freezes:A clean installation could potentially resolve these issues by removing any corrupted files or settings.
- A user upgrading from macOS Big Sur to macOS Monterey:A clean installation could ensure that there are no compatibility issues with older files or settings.
- A user selling their Mac:A clean installation would erase all of their personal data, ensuring that their privacy is protected.
Backup
Before you erase everything on your Mac, it’s crucial to make a backup of all your important data. This ensures you can restore your files, apps, and settings if something goes wrong during the process or if you decide you need them back later.
Time Machine
Time Machine is Apple’s built-in backup solution for macOS. It’s designed to be user-friendly and automatically creates regular backups of your entire system. To use Time Machine, you’ll need an external hard drive that’s formatted as Mac OS Extended (Journaled).
You can connect the drive to your Mac and then open Time Machine preferences in System Preferences.
Time Machine will automatically back up your files, applications, and system settings.
External Hard Drives
You can also create backups manually using an external hard drive. This method gives you more control over what you back up and how often you back up your data.You can use any external hard drive, but it’s recommended to use a drive with enough storage space for your entire system.
You can use a third-party backup software like Carbon Copy Cloner or SuperDuper! to create a bootable backup of your entire system.
Cloud Services
Cloud services like iCloud, Google Drive, and Dropbox offer an alternative to local backups. These services store your data online, allowing you to access it from any device with an internet connection.
Cloud backups are convenient, but they may not be suitable for large files or if you need to restore your entire system quickly.
Testing Your Backup
After creating a backup, it’s important to test it to ensure that it works correctly. This involves restoring your data from the backup to a separate location and verifying that all your files are intact.You can test your Time Machine backup by restoring a specific file or folder.
To test your external hard drive backup, you can boot your Mac from the backup drive and check if your files are accessible. For cloud backups, you can download a few files and verify their contents.
The Erase and Reinstall Process
This section will guide you through the process of erasing all content and settings in macOS Monterey, essentially giving you a clean slate. We’ll walk you through the steps involved in accessing macOS Recovery mode and using its tools to erase your disk and reinstall macOS.
Accessing macOS Recovery Mode
macOS Recovery Mode is a built-in tool that allows you to troubleshoot and repair your Mac. You can access it by restarting your Mac and holding down specific keys. To access macOS Recovery Mode, follow these steps:
- Shut down your Mac completely.
- Turn your Mac back on and immediately press and hold the Command (⌘) + Rkeys. Continue holding these keys until you see the Apple logo.
- You will be presented with the macOS Utilities window.
Erasing Your Disk
Once in macOS Recovery Mode, you can erase your disk. This will remove all data and settings from your Mac, effectively wiping it clean.
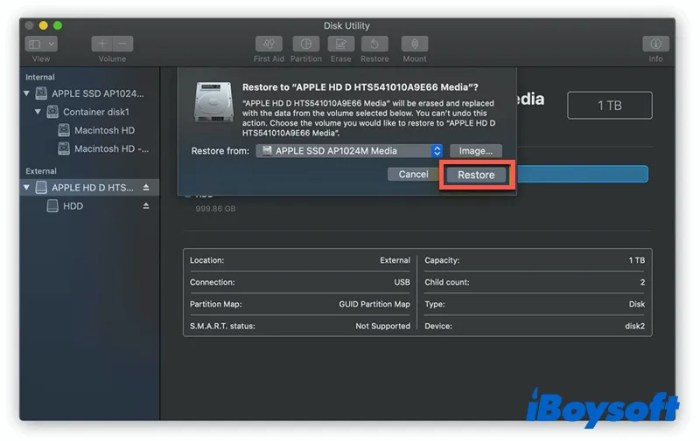
- From the macOS Utilities window, select Disk Utility.
- In Disk Utility, select the disk you want to erase. This is usually the main drive, often labeled “Macintosh HD”.
- Click the Erasebutton.
- In the Erase window, choose a name for your disk (e.g., “Macintosh HD”).
- Select APFSas the format. This is the recommended format for macOS Monterey.
- Click Erase. This will erase all data on the selected disk.
Reinstalling macOS
After erasing your disk, you can reinstall macOS. This will restore your Mac to its original state, giving you a fresh operating system.
So, you’re looking to wipe your Mac clean? That’s a big decision, but it can be super useful for getting rid of old files or if you’re planning on selling it. Before you start erasing everything, though, check out this awesome trick for organizing your app wish list using Shortcuts! How to make a slick App Store wish list with Shortcuts Once you’re done with that, head back to your Mac and follow the steps to erase all your content and settings.
It’s a quick and easy process, and your Mac will be ready for a fresh start!
- From the macOS Utilities window, select Reinstall macOS.
- Follow the onscreen instructions to download and install macOS.
- This process may take some time, depending on your internet connection and the size of the macOS download.
Choosing the Right Reinstallation Method
You’ve decided to wipe your Mac clean and start fresh with macOS Monterey. But before you dive into the process, you need to choose the right reinstallation method. There are two main options: using a bootable USB drive or downloading macOS directly.
Both methods have their own advantages and disadvantages, and the best choice for you will depend on your specific situation.
Comparing Reinstallation Methods
The choice between using a bootable USB drive and downloading macOS directly depends on your internet connection, storage space, and preference for a more controlled installation.
- Bootable USB Drive: This method involves creating a bootable USB drive with the macOS Monterey installer. This allows you to install macOS from the USB drive, even if your Mac’s hard drive is corrupted or inaccessible. It’s a good option for users with slow internet connections or limited storage space, as you only need to download the installer once.
- Downloading macOS Directly: This method involves downloading the macOS Monterey installer directly to your Mac. You can then run the installer from your Mac’s hard drive. This method is generally faster and more convenient, especially for users with fast internet connections and sufficient storage space.
Advantages and Disadvantages
Here’s a table summarizing the pros and cons of each method:
| Method | Advantages | Disadvantages |
|---|---|---|
| Bootable USB Drive |
|
|
| Downloading macOS Directly |
|
|
Recommended Methods for Different Scenarios
Here are some recommendations based on your specific situation:
- Slow internet connection or limited storage space: Use a bootable USB drive. This will allow you to install macOS without relying on a fast internet connection or consuming a large amount of storage space.
- Fast internet connection and ample storage space: Download macOS directly. This is the fastest and most convenient option.
- Need to install macOS on multiple Macs: Use a bootable USB drive. This will allow you to install macOS on multiple Macs without having to download the installer each time.
Post-Reinstallation Setup
Okay, you’ve just wiped your Mac clean and reinstalled macOS Monterey. You’re ready to set up your system and get back to work, but where do you begin? This section will guide you through the steps of setting up your Mac after a clean install, including configuring user accounts, installing essential applications, and restoring your data.
User Account Configuration
After the installation, you’ll be prompted to create a user account. This account will be your primary gateway to the system. You can choose to create a standard user account or an administrator account. An administrator account has full control over the system, while a standard account has limited privileges.
Here are the steps for setting up your user account:
- Choose a username and password:Select a memorable username and a strong password. A strong password includes a mix of uppercase and lowercase letters, numbers, and symbols.
- Select a user type:Choose between “Standard” or “Administrator.”
- Enable or disable automatic login:If you want to skip the login screen, enable automatic login.
- Set up your Apple ID:If you have an Apple ID, you can use it to sync your data across your devices, access iCloud services, and download apps from the App Store.
Application Installation
With your user account set up, you can start installing the applications you need. You can download applications from the Mac App Store or install them directly from the developer’s website.
- Install essential applications:Start with essential applications like a web browser (Chrome, Safari, Firefox), a text editor (TextEdit, Sublime Text), and a productivity suite (Microsoft Office, Google Workspace).
- Install your favorite applications:Install any other applications you regularly use, such as a photo editor, video editor, music player, or a game.
- Use package managers:Consider using a package manager like Homebrew to automate the installation of applications and their dependencies.
Data Restoration
Once you have your essential applications installed, you can start restoring your data. The best way to do this is to restore from a backup you created before the clean install.
- Restore from Time Machine:If you used Time Machine to back up your data, you can restore your entire system to a previous state.
- Restore from other backup solutions:You can also restore your data from other backup solutions, such as iCloud, Google Drive, or Dropbox.
- Manually transfer data:If you don’t have a backup, you can manually transfer your data from an external drive or another computer.
Personalization
After setting up your applications and restoring your data, you can personalize your macOS experience to your liking.
- Change your desktop background:You can choose from a variety of default backgrounds or use your own images.
- Customize your Dock:You can add or remove icons, change the size of the Dock, and set it to autohide.
- Adjust your system preferences:You can customize a wide range of settings, such as the appearance of your menus, the behavior of your keyboard, and the way your system handles notifications.
- Install themes and widgets:You can install third-party themes and widgets to further customize your macOS experience.
Troubleshooting Common Issues
Erasing and reinstalling macOS Monterey can be a smooth process, but sometimes hiccups can occur. This section covers common issues and provides solutions to help you overcome any obstacles you might encounter.
Error Messages During Erase and Reinstall
Understanding common error messages is essential for navigating the erase and reinstall process. These messages often indicate specific problems, and knowing what they mean can help you troubleshoot effectively.
- “The disk you selected cannot be erased.”This message usually appears when the disk you’re trying to erase is either locked or protected.
- “The disk you selected is not a bootable volume.”This indicates that the selected disk cannot be used to boot your Mac. Ensure you’re choosing the correct disk for installation.
- “An error occurred while erasing the disk.”This generic error can be caused by various factors, including hardware issues, corrupted data, or software conflicts.
Issues During the Installation Process
The installation process can also present challenges. Recognizing these issues and implementing appropriate solutions can help you complete the installation successfully.
- “The installation cannot continue.”This message suggests a problem with the installation files or the disk you’re installing to.
- “The installation has failed.”This error message indicates that the installation process could not be completed.
- “The installer cannot be opened.”This issue might arise from a corrupted installation file or a problem with the disk.
Post-Installation Problems
After the installation, you might encounter some problems with your newly installed macOS. Understanding these issues and knowing how to resolve them is important for a smooth post-installation experience.
- Missing or corrupted files.This can occur if the installation process was interrupted or if the installation files were corrupted.
- Software compatibility issues.Some applications might not be compatible with the new version of macOS.
- Hardware incompatibility issues.Certain hardware components might not be compatible with the new macOS version.
Alternative Solutions for Selective Data Removal
Sometimes, you might not need to erase everything on your Mac. Maybe you just want to remove specific files or settings, or you’re trying to troubleshoot a problem. Fortunately, macOS provides several ways to selectively remove data without resorting to a full erase.
Here are some alternative methods for removing specific data or settings:
Disk Utility
Disk Utility is a powerful tool built into macOS that allows you to manage your storage drives. You can use it to erase specific partitions or files, or even repair disk errors. Here’s how to use Disk Utility to erase specific partitions or files:
Open Disk Utility by searching for it in Spotlight.
Select the drive or partition you want to erase.
Click the “Erase” button.
Choose the format you want to use.
Click “Erase.”
You can also use Disk Utility to erase specific files. To do this, select the file you want to erase and then click the “Erase” button. However, it’s important to note that erasing a file using Disk Utility does not permanently delete it.
The file is still recoverable using data recovery software.
Resetting Specific System Preferences
System preferences are settings that control how your Mac works. If you’re experiencing problems with your Mac, resetting specific system preferences can sometimes help.To reset specific system preferences, follow these steps:
Open System Preferences.
Click on the preference pane you want to reset.
Look for a “Reset” or “Restore Defaults” button.
Click the button to reset the preferences.
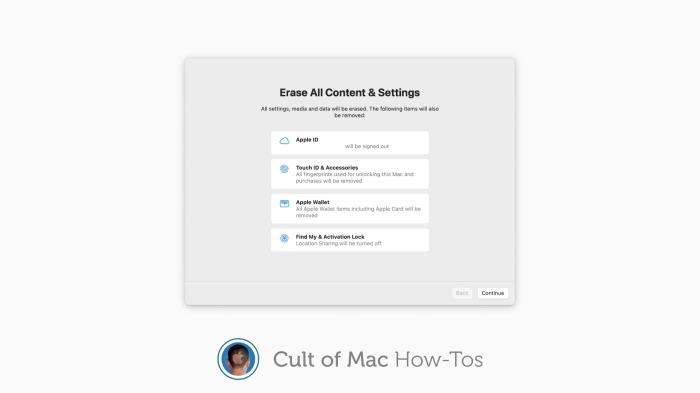
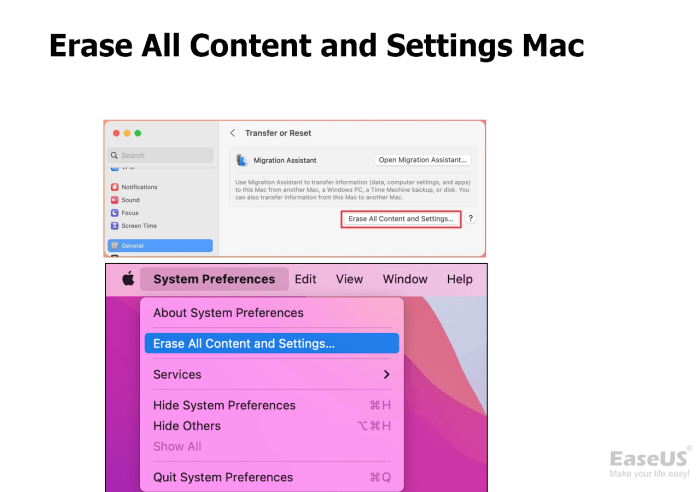
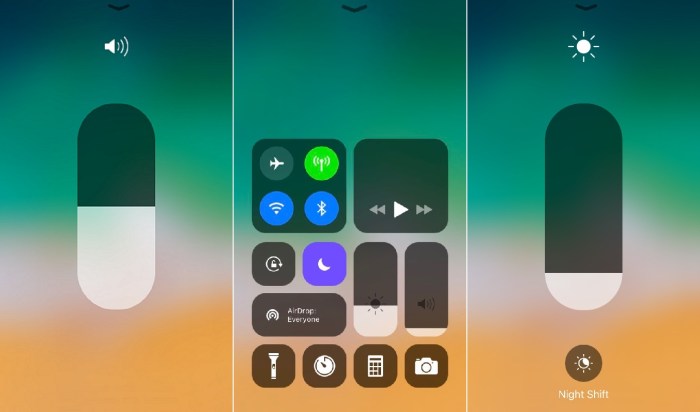
So you want to wipe your Mac clean? That’s easy, just go to “Erase All Content and Settings” in the System Preferences. You’ll want to back up your data first, though, and if you’re looking to squeeze a little more life out of your battery, you can try enabling Low Power Mode, which you can find in the Control Center.
Extend battery life by using Low Power Mode in Control Center. Once your Mac is wiped clean, you can start fresh with a clean slate and enjoy the extra battery life that comes with Low Power Mode.
Here are some common system preferences that you can reset:
Desktop & Dock
This resets the desktop background, icon arrangement, and Dock settings.
Keyboard
This resets the keyboard shortcuts and input settings.
Trackpad
This resets the trackpad settings, such as the speed and sensitivity.
Security & Privacy
This resets the security and privacy settings, such as the firewall and password requirements.
Network
This resets the network settings, such as the Wi-Fi password and VPN settings.
Printers & Scanners
This resets the printer and scanner settings.
Bluetooth
This resets the Bluetooth settings, such as the pairing list and device settings.
Security Considerations
Erasing your macOS system isn’t just about getting rid of old files; it’s also about protecting your sensitive data from falling into the wrong hands. Even after deleting files, traces can remain on your hard drive, potentially making them recoverable by someone with the right tools.
Understanding the importance of secure data erasure is crucial for protecting your privacy and ensuring that your information stays confidential.
Secure Data Erasure Methods
Secure data erasure methods employ techniques that overwrite the entire drive with random data, making it virtually impossible to recover deleted files. There are several ways to achieve secure data erasure, each with its own level of security and complexity.
- Overwriting with Random Data:This involves writing random data over the entire drive multiple times, effectively destroying any traces of previous data. Several tools are available for this purpose, including Disk Utility’s “Erase Disk” function with the “Secure Erase” option.
- Low-Level Formatting:This is a more intense process that involves erasing the entire drive at a lower level, essentially resetting it to its factory state. This method is generally considered the most secure but can be time-consuming.
- Physical Destruction:For the most absolute security, physically destroying the hard drive is the most effective way to prevent data recovery. However, this should be a last resort and should be done with proper safety precautions.
Protecting Your Privacy After a Clean Install, How to easily erase all content and settings in macOS Monterey
Once you’ve erased your macOS system, it’s important to take steps to protect your privacy going forward. This includes configuring your system settings and being mindful of the information you share online.
So, you wanna wipe your Mac clean? That’s a pretty big step, but before you do, make sure you’ve backed up all your important stuff. You can also grab some screenshots of any settings you might need to remember later.
Check out How To Easily Take Screenshots In Mac OS X for a quick tutorial. Once you’re all set, head to the “Erase All Content and Settings” option in macOS Monterey, and you’re good to go.
- Disable Unnecessary Services:Review your system settings and disable any services you don’t need, such as location services, microphone access, or camera access, unless absolutely necessary.
- Use Strong Passwords:Choose strong and unique passwords for all your accounts and use a password manager to keep track of them.
- Be Cautious with Online Information:Be mindful of the information you share online, especially on social media platforms. Avoid sharing personal details or sensitive information that could be used to compromise your privacy.
Performance and Optimization
A clean install of macOS Monterey can significantly improve your system’s performance by eliminating unnecessary files, outdated software, and lingering configurations that can slow down your Mac. This fresh start allows your system to run smoothly and efficiently, providing a more enjoyable user experience.
Optimizing macOS Monterey
After reinstalling macOS Monterey, there are several steps you can take to further optimize your system’s performance.
Disk Space Management
Managing disk space is crucial for maintaining a responsive and efficient macOS system. Regularly check your disk space usage and identify files or applications that are consuming excessive storage.
- Delete unnecessary files:Regularly clean up your Downloads folder, empty the Trash bin, and remove any unused or duplicate files.
- Move large files to external storage:If you have large files like videos, music, or photos, consider moving them to an external hard drive or cloud storage service to free up space on your Mac’s internal drive.
- Use Disk Utility:macOS’s built-in Disk Utility provides tools to analyze and manage disk space. You can use it to identify large files, view disk usage, and even erase and format your drives.
System Responsiveness
Optimizing system responsiveness involves minimizing the number of applications running in the background and ensuring your system has enough resources to function smoothly.
- Close unnecessary applications:Quit any applications you’re not actively using. This reduces the load on your system’s resources, allowing it to run more efficiently.
- Disable startup items:Applications that launch automatically at startup can consume system resources. Use the System Preferences to disable any unnecessary startup items.
- Manage background processes:Use Activity Monitor to view and manage background processes. Identify and quit any processes that are consuming excessive CPU or memory.
Closing Notes
Erasing your Mac and reinstalling macOS is a powerful tool that can help you troubleshoot issues, improve performance, or simply start fresh. By following the steps Artikeld in this guide, you can confidently erase your Mac and enjoy a clean, optimized system.
Remember to back up your data before you begin, and don’t hesitate to consult Apple’s support resources if you encounter any problems. Now go forth and conquer that fresh start!
Question Bank
Will erasing my Mac delete all my files?
Yes, erasing your Mac will delete all files and settings. Make sure to back up your data before you proceed.
What if I don’t have a backup?
If you don’t have a backup, you’ll lose all your data. It’s strongly recommended to create a backup before erasing your Mac.
Can I just erase specific files instead of everything?
Yes, you can use Disk Utility to erase specific partitions or files. However, a clean install is a more thorough way to remove everything.
How long does it take to erase and reinstall macOS?
The time it takes to erase and reinstall macOS depends on the size of your hard drive and your internet connection. It can take anywhere from 30 minutes to a few hours.

