Delete Multiple Emails Across Outlook Desktop, Mobile, and Web
How to Delete Multiple Emails in Outlook Desktop, Mobile, and Web? It’s a common task that can be done in several ways, depending on your preferred platform and the number of emails you need to delete. Whether you’re using Outlook on your desktop, mobile device, or via the web, this guide will provide you with step-by-step instructions to help you quickly and efficiently delete multiple emails.
Deleting Multiple Emails in Outlook Desktop
In Outlook desktop, selecting and deleting multiple emails is a straightforward process. Here’s a step-by-step guide:
Selecting Multiple Emails
To select multiple emails, hold down the “Ctrl” key while clicking on each email you want to delete. You can also use the “Shift” key to select a range of emails. For example, if you want to delete emails 5 to 10, click on email 5, hold down the “Shift” key, and then click on email 10.
Selecting All Emails
If you want to delete all emails in a folder, you can use the “Select All” option. Click on the “Edit” menu at the top of the Outlook window, and then select “Select All.” This will select all emails in the current folder.
Keyboard Shortcuts
You can also use keyboard shortcuts to select multiple emails:
- Ctrl + A: Select all emails
- Shift + Space: Select all emails in the current view
- Ctrl + Shift + <: Select all emails before the current email
- Ctrl + Shift + >: Select all emails after the current email
Deleting Multiple Emails in Outlook Mobile
Deleting multiple emails in Outlook mobile is a simple process that can be done in a few steps.
Selecting Multiple Emails
To select multiple emails in Outlook mobile, you can use the “Edit” mode or the “Select All” option.In “Edit” mode, you can tap on the checkbox next to each email you want to delete. You can also swipe left on an email to reveal the checkbox.To
use the “Select All” option, tap on the three dots in the top-right corner of the screen and then tap on “Select All”.
Deleting Multiple Emails in Outlook Web
Outlook Web provides various options to select and delete multiple emails efficiently. Let’s explore these methods:
Selecting Multiple Emails
To select multiple emails, hold down the “Ctrl” key on Windows or the “Command” key on Mac while clicking on each email you want to select. You can also use the “Shift” key to select a range of emails.
Select All Option
If you want to select all emails in the current folder, click the “Select All” checkbox located above the email list.
Keyboard Shortcuts
Outlook Web offers keyboard shortcuts to select multiple emails:
- Ctrl + A:Selects all emails in the current folder.
- Shift + Space:Selects all emails in the current view.
- Ctrl + Shift + Space:Selects all emails in the current folder and its subfolders.
Using the Delete Button
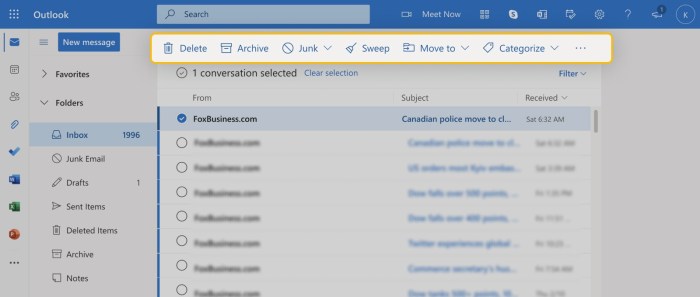
The Delete button is a powerful tool in Outlook that allows you to quickly and easily remove unwanted emails from your inbox. It’s located in the toolbar at the top of the Outlook window, next to the Reply and Forward buttons.
To delete multiple emails using the Delete button, simply select the emails you want to delete by clicking on the checkboxes next to them. You can select multiple emails by holding down the Ctrl key while clicking on the checkboxes.
Once you’ve selected the emails you want to delete, click on the Delete button. The selected emails will be moved to the Deleted Items folder.
Using the Delete Button in Different Outlook Platforms
The Delete button is available in all Outlook platforms, including the desktop, mobile, and web versions. The location of the Delete button may vary slightly depending on the platform you’re using, but it’s always located in a prominent position.
- In Outlook desktop, the Delete button is located in the toolbar at the top of the Outlook window.
- In Outlook mobile, the Delete button is located in the bottom toolbar.
- In Outlook web, the Delete button is located in the top toolbar.
Using the “Shift” Key for Consecutive Selection
The “Shift” key is a convenient way to select a range of consecutive emails in Outlook.
To select consecutive emails using the “Shift” key, follow these steps:
Click the First Email
- Click on the first email in the range you want to select.
Hold Shift and Click the Last Email
- Hold down the “Shift” key on your keyboard.
- Click on the last email in the range you want to select.
Example, How to Delete Multiple Emails in Outlook Desktop, Mobile, and Web
- To select the first five emails in your inbox, click on the first email, hold down “Shift,” and click on the fifth email.
- To select all emails between the second and eighth emails, click on the second email, hold down “Shift,” and click on the eighth email.
Using the “Ctrl” Key for Non-Consecutive Selection: How To Delete Multiple Emails In Outlook Desktop, Mobile, And Web
Selecting non-consecutive emails in Outlook is a useful technique for managing your inbox efficiently. The “Ctrl” key provides a convenient way to do this.
Step-by-Step Instructions
To select non-consecutive emails using the “Ctrl” key, follow these steps:
- Open Outlook and navigate to your inbox.
- Click on the first email you want to select.
- Hold down the “Ctrl” key and click on the other emails you want to select.
- Release the “Ctrl” key once you have selected all the desired emails.
Example, How to Delete Multiple Emails in Outlook Desktop, Mobile, and Web
Suppose you want to select emails from your inbox dated January 1st, 5th, and 10th. To do this, click on the email dated January 1st, hold down the “Ctrl” key, and then click on the emails dated January 5th and 10th.
All three emails will be selected, even though they are not consecutive in the inbox list.
Using the “Delete All” Option
The “Delete All” option is a powerful tool that allows you to quickly delete all emails in a specific folder or search result in Outlook. However, it’s important to use this option with caution, as it cannot be undone.
To use the “Delete All” option, simply select the folder or search result you want to delete, then click the “Delete All” button in the ribbon. You can also use the keyboard shortcut Ctrl + A to select all emails in the current view, then press Delete.
Consequences of Using the “Delete All” Option
Using the “Delete All” option can have several consequences, including:
- All emails in the selected folder or search result will be permanently deleted.
- Deleted emails cannot be recovered, so make sure you’re absolutely certain you want to delete them before using this option.
- If you’re using a shared mailbox, other users may be affected by the deletion of emails.
Recovering Deleted Emails
Outlook provides options to recover deleted emails, preventing permanent loss of important messages.
Deleted Items Folder
The “Deleted Items” folder stores deleted emails until they are permanently purged. To recover a deleted email:
- Navigate to the “Deleted Items” folder in your Outlook account.
- Select the email you want to recover.
- Right-click and select “Move to” > “Inbox” or the desired folder.
Preventing Accidental Deletion
To minimize accidental email deletion:
- Use the “Shift” key for consecutive email selection and “Ctrl” for non-consecutive selection.
- Double-check the emails selected before clicking “Delete.”
- Consider setting up email rules to automatically move specific emails to designated folders.
Customizing the Delete Confirmation Dialog Box
Customizing the delete confirmation dialog box in Outlook enhances the user experience by providing control over the confirmation process. By modifying the settings, users can streamline their workflow and prevent accidental email deletions.
Changing the Confirmation Level
Outlook offers three confirmation levels:
- Never prompt for confirmation: Disables the confirmation dialog box.
- Ask for confirmation before deleting items: Prompts the user before deleting any email.
- Only show this message when deleting multiple items: Only displays the confirmation dialog box when multiple emails are selected.
Modifying the Confirmation Message
The confirmation message can be customized to include additional information or warnings. To edit the message:
- Go to File > Options > Mail.
- Under the “Delete items” section, click on the “Confirmation” button.
- In the “Delete Confirmation” dialog box, modify the text in the “Message text” field.
Benefits of Customizing the Delete Confirmation Dialog Box
Customizing the delete confirmation dialog box provides several benefits:
- Increased efficiency:Eliminating unnecessary confirmation prompts saves time and effort.
- Reduced risk of accidental deletion:Customizing the confirmation message with warnings helps prevent accidental deletions.
- Tailored user experience:Users can adjust the settings to suit their individual preferences and workflows.
Creating Rules for Automatic Deletion
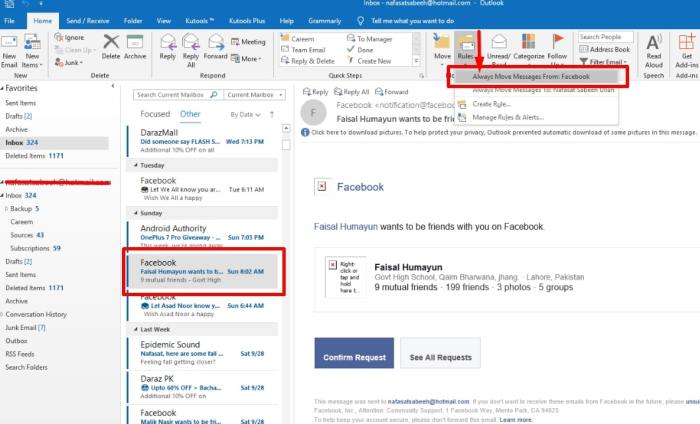
Outlook allows you to create rules that automatically delete emails based on specific criteria. This can be useful for managing large volumes of emails and keeping your inbox organized.
To create a rule for automatic deletion:
- Click on the “Rules” tab in the Outlook ribbon.
- Click on the “New Rule” button.
- In the “New Rule” wizard, select the criteria for the rule. For example, you can choose to delete emails from a specific sender, with a specific subject line, or that are larger than a certain size.
- Click on the “OK” button to save the rule.
Here are some examples of rules for automatic deletion:
- Delete all emails from a specific sender.
- Delete all emails with a subject line that contains a certain .
- Delete all emails that are larger than 10 MB.
- Delete all emails that have been in the inbox for more than 30 days.
Troubleshooting Common Deletion Issues
Encountering difficulties while deleting emails in Outlook? This section addresses common deletion issues and provides practical solutions to resolve them.
To prevent deletion issues, ensure your Outlook is up-to-date and free of any corrupted files. Regularly back up your emails to prevent data loss in case of accidental deletion.
Resolving Common Deletion Issues
- Unable to delete specific emails:Check if the emails are locked or protected. Unlock or remove protection before attempting to delete.
- “Cannot delete folder” error:Ensure you have sufficient permissions to delete the folder. Contact your administrator if necessary.
- Emails reappear after deletion:Verify if the emails are being moved to a different folder instead of being deleted. Check the “Deleted Items” folder.
- Deleted emails are permanently lost:If the “Deleted Items” folder is emptied, the emails are permanently deleted. Consider using a data recovery tool to restore them.
Last Point
Now that you know how to delete multiple emails in Outlook across different platforms, you can manage your inbox more efficiently. Remember to use the “Shift” and “Ctrl” keys for quick selection, customize the delete confirmation dialog box to prevent accidental deletion, and create rules for automatic deletion to save time.
If you encounter any issues, refer to the troubleshooting tips provided. With these techniques, you can keep your inbox organized and clutter-free.
Essential Questionnaire
Can I recover deleted emails in Outlook?
Yes, you can recover deleted emails from the “Deleted Items” folder. If the folder is empty, you can try using a data recovery tool.
How do I create a rule for automatic email deletion?
Go to “Settings” > “Rules” and click “New Rule.” Set the conditions and actions for the rule, such as deleting emails from a specific sender or with a particular subject line.
What should I do if I accidentally deleted an important email?
Check the “Deleted Items” folder first. If the email is not there, try using a data recovery tool. You can also contact your email provider for assistance.

