Automate Your Home’s Climate with Temperature and Humidity Control in Apple Home App
How to Create Temperature and Humidity Automation in the Apple Home App – Step into the realm of home automation with our comprehensive guide to creating temperature and humidity automations in the Apple Home App. Unlock the power of smart home technology to enhance your comfort and energy efficiency.
In this guide, we’ll delve into the basics of the Home app, compatible sensors, and the art of crafting automations that cater to your specific needs. Whether you’re a seasoned smart home enthusiast or just starting your journey, we’ve got you covered.
Apple Home App Basics
The Apple Home app is a powerful tool for automating and controlling your smart home devices. With the Home app, you can control lights, thermostats, locks, and other devices from your iPhone, iPad, or Apple Watch.
Adding Devices to the Home App
To add a device to the Home app, open the app and tap the “+” button in the top-right corner. Then, scan the QR code on the device or enter the device’s serial number. Once the device is added, you can assign it to a room and give it a name.
Controlling Devices with the Home App
Once you’ve added devices to the Home app, you can control them using the app’s interface. To control a device, tap on it in the Home app. You’ll then see a list of controls that you can use to adjust the device’s settings.
Creating Automations with the Home App
In addition to controlling devices manually, you can also create automations that will automatically control your devices based on certain triggers. For example, you can create an automation that turns on your lights when you arrive home or that adjusts your thermostat when you go to bed.
Temperature and Humidity Sensors: How To Create Temperature And Humidity Automation In The Apple Home App
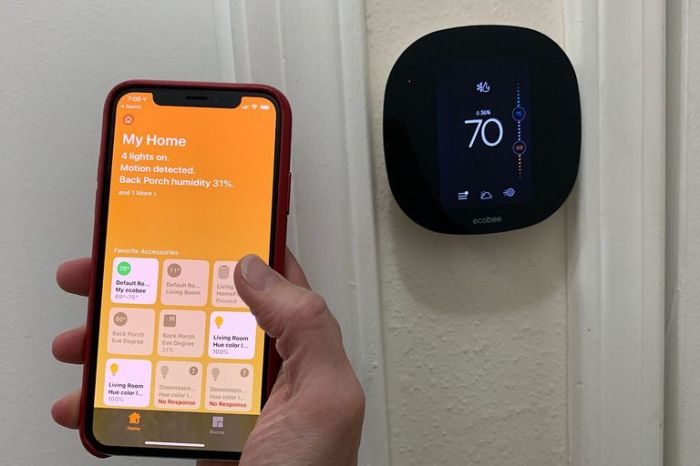
Temperature and humidity sensors allow you to monitor the climate conditions in your home and trigger automations based on specific readings. Here’s a list of compatible sensors and how to connect them to the Home app:
- Eve Room
- Netatmo Smart Indoor Module
- Aqara Temperature and Humidity Sensor
- iDevices Indoor Climate Monitor
- Ecobee SmartSensor
To connect a sensor, open the Home app, tap the “+” icon, select “Add Accessory,” and follow the on-screen instructions. Once connected, you can configure the sensor’s settings in the Home app.
Placement Considerations
For accurate readings, place the sensor in an area with good airflow and away from direct sunlight or heat sources. It’s also important to ensure that the sensor is within range of your Home Hub (e.g., HomePod, Apple TV).
Creating Automations
Automations allow you to set up your HomeKit devices to perform specific actions based on triggers, like time of day, sensor readings, or your location. This can help you automate tasks like turning on lights when you arrive home or adjusting the thermostat when you go to bed.
Types of Automations
There are two main types of automations in the Home app: personaland home.
- Personal automationsare triggered by your location or actions, such as when you arrive or leave home, or when you open a specific app.
- Home automationsare triggered by events in your home, such as when a sensor detects motion, a door is opened, or a certain time of day is reached.
Automating Temperature Control
To create an automation that adjusts the temperature based on specific conditions, follow these steps:
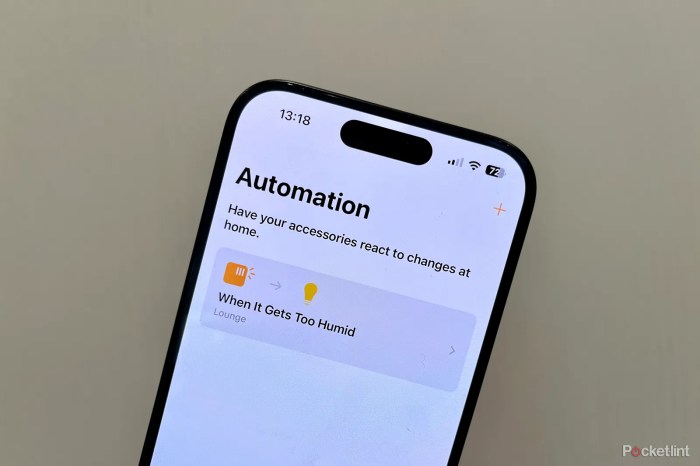
- Open the Home app and tap the “Automations” tab.
- Tap the “+” button in the top-right corner and select “Create New Automation.”
- Under “When,” select “Temperature Changes.”
- Choose the room or zone you want to automate.
- Set the temperature threshold that will trigger the automation.
- Under “Do,” select “Set Temperature.”
- Choose the target temperature you want the automation to set.
- Tap “Done” to save the automation.
You can also use scenes to automate temperature control. A scene is a collection of actions that you can trigger with a single command. To create a scene that adjusts the temperature, follow these steps:
- Open the Home app and tap the “Scenes” tab.
- Tap the “+” button in the top-right corner and select “Create New Scene.”
- Give the scene a name.
- Tap the “Add Action” button.
- Select “Set Temperature” from the list of actions.
- Choose the room or zone you want to automate.
- Set the target temperature you want the scene to set.
- Tap “Done” to save the scene.
Once you have created a scene, you can trigger it by saying the scene’s name to Siri or by tapping the scene in the Home app.
Automating Humidity Control
Adjusting the humidity levels in your home can be crucial for comfort and well-being. The Apple Home App allows you to automate this process, ensuring your home maintains optimal humidity levels at all times.
Setting Humidity Thresholds
To automate humidity control, you’ll need to set humidity thresholds that trigger specific actions. For example, you could set a threshold that triggers a humidifier when humidity drops below 40% or a dehumidifier when it exceeds 60%.
Creating Scenes for Humidity Control, How to Create Temperature and Humidity Automation in the Apple Home App
Scenes allow you to group multiple actions and trigger them with a single command. When automating humidity control, you can create scenes that adjust the humidity levels and activate other related devices, such as fans or air purifiers.
Advanced Automation Options
HomeKit triggers and actions provide a powerful way to create more complex automations. Triggers define the conditions that will cause an automation to run, while actions specify the tasks that will be performed. By combining multiple triggers and actions, you can create automations that respond to a wide range of conditions and perform a variety of tasks.
Using HomeKit Triggers and Actions
HomeKit triggers can be based on a variety of conditions, including the state of HomeKit accessories, the time of day, or your location. Actions can be used to control HomeKit accessories, send notifications, or run other automations.
For example, you could create an automation that turns on your lights when you arrive home. This automation would use a location trigger to detect when you are within a certain distance of your home, and an action to turn on your lights.
Examples of Advanced Automations
Here are some examples of advanced automations that you can create using HomeKit triggers and actions:
- Turn on your lights when you arrive home and turn them off when you leave.
- Adjust your thermostat based on the temperature outside.
- Send a notification when your door is opened or closed.
- Run a specific scene when you say a certain phrase to Siri.
- Create a custom automation that meets your specific needs.
Using HomeKit Scenes
HomeKit scenes are a powerful way to control multiple devices at once. They can be used to create a specific atmosphere in your home, such as a “Movie Night” scene that dims the lights, turns on the TV, and sets the thermostat to a comfortable temperature.
Scenes can also be used to automate tasks, such as turning on the lights when you arrive home or turning off the TV when you leave.
Creating a Scene
To create a scene, open the Home app and tap the “+” button in the top-right corner. Then, select “New Scene.” Give your scene a name and choose the devices you want to control. You can then adjust the settings for each device, such as the brightness of the lights or the temperature of the thermostat.
Using a Scene
Once you have created a scene, you can use it by tapping on it in the Home app. You can also assign a scene to a button on your HomeKit-compatible device, such as the Siri Remote or the HomePod. When you press the button, the scene will be activated and all of the devices in the scene will be controlled according to your settings.
Troubleshooting Automation Issues
When your temperature and humidity automations aren’t working as expected, troubleshooting can help identify and resolve the issue. Here are some common troubleshooting tips:
Connectivity Problems
* Ensure that all devices involved in the automation are powered on and connected to the same Wi-Fi network.
- Check your router or modem for any connection issues.
- Restart your HomeKit hub (e.g., Apple TV, HomePod) to refresh the connection.
Sensor Malfunctions
* Verify that the temperature and humidity sensors are functioning properly.
- Check if the sensors are placed in appropriate locations, away from direct sunlight or heat sources.
- Replace the batteries in the sensors if necessary.
Other Potential Issues
* Ensure that the automation is enabled and set up correctly in the Home app.
- Check for any software updates available for your devices or the Home app.
- If the automation involves multiple triggers or actions, test each component individually to isolate the issue.
Example Automations
In this section, we will provide practical examples of temperature and humidity automations that you can implement in your own home. These examples will cover a range of scenarios, from simple tasks to more complex automations.
Here is a table that Artikels some of the most common temperature and humidity automations:
| Scenario | Trigger | Action | Expected Outcome |
|---|---|---|---|
| Turn on the AC when the temperature rises above 75 degrees Fahrenheit | Temperature sensor detects a temperature above 75 degrees Fahrenheit | AC unit turns on | The AC unit will cool down the room to a more comfortable temperature |
| Turn on the humidifier when the humidity drops below 30% | Humidity sensor detects a humidity level below 30% | Humidifier turns on | The humidifier will add moisture to the air, making it more comfortable to breathe |
| Send a notification when the temperature drops below 40 degrees Fahrenheit | Temperature sensor detects a temperature below 40 degrees Fahrenheit | Notification is sent to the user’s phone | The user will be alerted that the temperature has dropped below a safe level |
| Turn off the lights when the humidity rises above 60% | Humidity sensor detects a humidity level above 60% | Lights turn off | The lights will turn off to conserve energy |
Advanced Features and Integrations
Beyond the basic automation options, the Apple Home App offers advanced features to enhance temperature and humidity control in your smart home.
Geofencing
Geofencing allows you to trigger automations based on your location. For example, you can set your thermostat to automatically adjust when you leave or return home.
Notifications
Automations can send you notifications when certain conditions are met. This can be useful for staying informed about temperature or humidity changes in your home.
Siri Integration
You can use Siri to control your temperature and humidity automations with voice commands. This makes it easy to adjust settings or activate automations on the go.
Closing Notes
Mastering temperature and humidity automation in the Apple Home App empowers you to create a truly personalized and responsive living space. By harnessing the power of technology, you can effortlessly maintain optimal comfort levels while minimizing energy consumption. Embrace the future of home automation and transform your living environment into a haven of comfort and efficiency.
FAQ Overview
Can I use any temperature or humidity sensor with the Home App?
No, only sensors compatible with Apple’s HomeKit framework are supported by the Home App.
How do I create an automation that turns on my AC when the temperature rises above a certain threshold?
In the Home App, create an automation with a temperature trigger set to the desired threshold. Then, add an action to turn on your AC.
Can I control multiple devices with a single automation?
Yes, you can create scenes in the Home App that group multiple devices and control them simultaneously with a single automation.

