How To Clean Your Gross, Waxy Airpods
How to clean your gross, waxy AirPods? It’s a question we’ve all pondered, especially after those long, sweaty gym sessions or those ear-budding commutes. We’ve all been there – you reach for your AirPods, only to find a disgusting layer of earwax clinging to the delicate speaker mesh.
It’s not just aesthetically unappealing, it can also affect the sound quality and potentially even damage your precious earbuds. Don’t worry, though, because we’re here to equip you with the knowledge and tools to conquer this gross, waxy challenge.
We’ll break down the steps to cleaning your AirPods, from gathering the right tools to addressing the stubborn wax buildup. We’ll even touch on prevention techniques so you can keep those earbuds sparkling clean for longer. By the end of this guide, you’ll be a pro at tackling even the most stubborn wax build-up, ensuring your AirPods stay in top shape and sound amazing.
Understanding the Problem
We’ve all been there—you reach for your AirPods, eager to listen to your favorite playlist, only to discover they’re coated in a layer of something sticky and gross. This, my friends, is the dreaded earwax buildup, and it’s a common problem for AirPod users.
Causes of Wax Buildup
Earwax buildup in AirPods is a natural phenomenon that occurs when earwax, a protective substance produced by the ear canal, accumulates on the AirPods’ speaker mesh and other parts. This buildup can be caused by several factors:
- Frequent Use:The more you use your AirPods, the more likely you are to experience earwax buildup.
- Ear Canal Shape:Some people have ear canals that are more prone to producing excess earwax.
- Earwax Type:Earwax can be dry or wet, and wet earwax is more likely to accumulate on AirPods.
- Lack of Cleaning:Regular cleaning of your AirPods is crucial to prevent wax buildup.
Potential Health Concerns
While earwax buildup in AirPods is generally not a serious health concern, it can lead to:
- Sound Distortion:Earwax can block the speaker mesh, causing muffled or distorted sound.
- Reduced Battery Life:Earwax can interfere with the charging contacts, reducing battery life.
- Ear Infections:If earwax is trapped in the AirPods, it can create a breeding ground for bacteria and lead to ear infections.
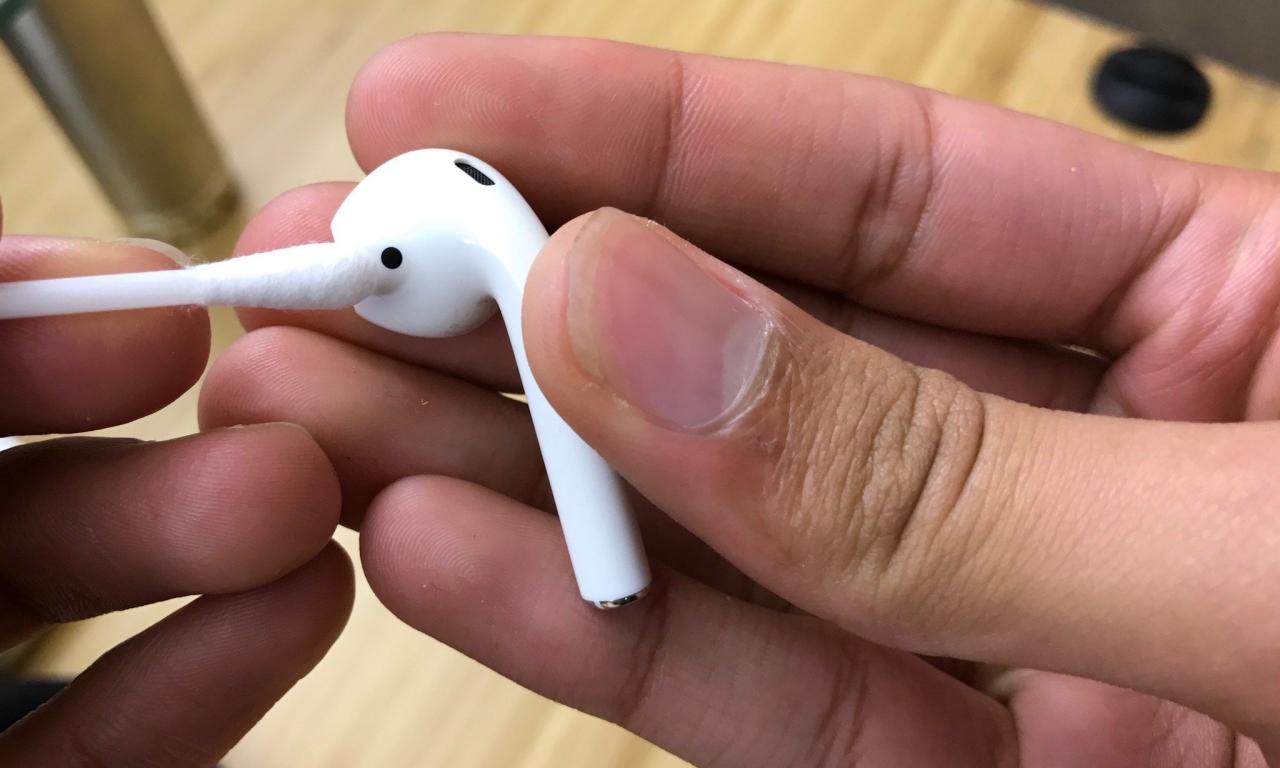
Appearance of a Waxy AirPod
A waxy AirPod is easily recognizable. The speaker mesh will be covered in a sticky, yellowish-brown substance that may be difficult to remove. The AirPods may also have a faint odor.
Gathering the Necessary Tools and Materials
Cleaning your AirPods requires a few basic tools and materials that you likely already have at home. These items are designed to gently remove dirt and debris without damaging the delicate components of your AirPods.
Tools and Materials for Cleaning AirPods
Here is a list of tools and materials that you’ll need to clean your AirPods:
| Item | Description | Purpose |
|---|---|---|
| Microfiber Cloth | A soft, lint-free cloth specifically designed for cleaning delicate surfaces. | Gently wipes away dust, smudges, and fingerprints from the AirPods and charging case. |
| Isopropyl Alcohol (70%) | A common disinfectant and cleaning agent that evaporates quickly, leaving no residue. | Used to disinfect the AirPods and charging case, effectively removing bacteria and grime. |
| Cotton Swabs (Q-tips) | Small, absorbent cotton swabs with a pointed tip. | Used to clean the crevices and hard-to-reach areas of the AirPods, such as the speaker grills and microphone openings. |
| Toothpick (Optional) | A thin, pointed wooden stick. | Used to gently remove stubborn debris from the charging port and other small openings. |
Preparation
Before diving into the cleaning process, it’s crucial to prepare your AirPods for a thorough scrub. This step ensures that you’re not only cleaning the AirPods effectively but also protecting them from potential damage.
Removing the AirPods from the Case
It’s essential to start by taking your AirPods out of their case. This allows you to access all surfaces of the AirPods for cleaning.
- Gently open the charging case and remove the AirPods.
- Place the case aside, as you’ll need to clean it separately later.
Disconnecting the AirPods from any Device
Before you begin cleaning, it’s essential to disconnect the AirPods from any device they’re connected to. This step prevents any accidental damage to the AirPods or your device.
Cleaning your AirPods can be a pain, especially if they’re covered in earwax. But don’t worry, there are tons of helpful guides online! If you’re having trouble with your Mario Kart Tour game, you might want to check out this guide on fixing ‘805’ error codes.
It might be just what you need to get back to racing. Once you’re done with your gaming session, remember to give those AirPods a good cleaning so you can enjoy your next gaming session without any earwax interruptions.
- On your device, open the Bluetooth settings.
- Locate your AirPods in the list of connected devices.
- Tap the “i” icon next to your AirPods.
- Select “Forget This Device” to disconnect the AirPods.
Cleaning the AirPod Housing
Now that we’ve got our tools and prepped our AirPods, let’s dive into the main event – cleaning the AirPod housing. This is where we tackle the surface dirt, grime, and wax that can accumulate over time.
Cleaning the AirPod Housing: Removing Surface Dirt, How to clean your gross, waxy AirPods
There are several methods you can use to clean the exterior of your AirPod housing. The best method for you will depend on the level of dirt and grime on your AirPods. Here are a few popular methods:
- Using a Microfiber Cloth: This is the gentlest and safest method for cleaning your AirPods. Simply dampen a microfiber cloth with water and gently wipe down the surface of your AirPods. This method is effective for removing dust and light grime.
- Using a Q-tip: Q-tips are great for reaching into the nooks and crannies of your AirPods, such as the charging port. Dip a Q-tip in a solution of rubbing alcohol and water (50/50) and gently clean the surface of your AirPods.
- Using a Toothbrush: If your AirPods are particularly dirty, you can use a soft-bristled toothbrush to scrub away dirt and grime. Dip the toothbrush in a solution of rubbing alcohol and water (50/50) and gently scrub the surface of your AirPods. Be careful not to use too much pressure, as you could damage the AirPods.
Addressing the Wax Buildup

Now that your AirPods are prepped and ready, it’s time to tackle the real culprit: the wax buildup. This section focuses on the delicate process of cleaning the speaker mesh, ensuring you get a thorough clean without damaging your AirPods.
Targeted Cleaning
The speaker mesh is a delicate component, and using sharp or abrasive tools can cause irreversible damage. This can lead to muffled sound, reduced audio quality, or even a complete malfunction of your AirPods. It’s crucial to use the right tools and techniques to avoid damaging this sensitive area.
- Avoid using sharp objects like needles, toothpicks, or paper clips. These tools can scratch or puncture the mesh, leading to permanent damage.
- Avoid using abrasive materials like cotton swabs or tissues. These can leave behind fibers that can get trapped in the mesh and further obstruct the sound.
Instead, a soft-bristled brush is the ideal tool for this task. You can use a dedicated cleaning brush for electronics or even a clean, dry toothbrush. The bristles should be gentle enough to dislodge the wax without damaging the mesh.
- Gently insert the brush into the speaker mesh, making sure not to apply too much pressure.
- Use a circular motion to dislodge the wax buildup.
- Repeat this process until you have removed most of the visible wax.
- If the wax is stubborn, you can try using a damp cloth or a cotton swab dipped in rubbing alcohol. However, be extremely careful not to get any liquid inside the AirPod housing.
Remember, patience is key. Don’t try to force the wax out, as this can damage the mesh. Take your time and gently work the wax out using the soft-bristled brush.
Be gentle! Remember, you’re working with a delicate component. A little patience goes a long way.
Cleaning the AirPod Case

You might not think about cleaning your AirPod case regularly, but it’s just as important as cleaning your AirPods themselves. Your case can harbor dirt, grime, and even bacteria, which can be transferred to your AirPods and potentially your ears.
Regular cleaning helps keep your AirPods and case fresh and hygienic.
Methods for Cleaning the AirPod Case
Cleaning your AirPod case is simple and straightforward. You’ll want to start by gathering a few supplies. A microfiber cloth is ideal for wiping away dust and debris. A mild cleaning solution, like a diluted dish soap or rubbing alcohol, can be used to tackle tougher stains.
Avoid harsh chemicals or abrasive cleaners, as they can damage the case.
- Using a Microfiber Cloth:A microfiber cloth is great for removing dust, lint, and other loose debris. Gently wipe down the exterior and interior of the case, paying attention to the charging port and the area around the lid.
- Using a Mild Cleaning Solution:For stubborn stains or grime, you can use a mild cleaning solution. Mix a few drops of dish soap or rubbing alcohol with a cup of water. Dip a microfiber cloth into the solution and gently wipe down the case.
Make sure to avoid getting any liquid inside the charging port.
Drying the AirPod Case
After cleaning, it’s important to dry the AirPod case completely. Moisture can damage the case and interfere with charging. Use a dry microfiber cloth to wipe away any excess moisture. You can also allow the case to air dry for a few minutes.
Make sure the case is completely dry before putting your AirPods back in.
Cleaning those gross, waxy AirPods can be a real pain, but it’s totally worth it to keep them sounding fresh. And while you’re at it, why not add a little organization to your life? Check out Use Launch Center Pro For Lightning Fast OmniFocus Task Creation On iOS to streamline your workflow and get those cleaning tasks checked off your list in a flash.
Once you’ve got your AirPods sparkling clean, you’ll be ready to blast your favorite tunes with crystal-clear sound.
Maintaining Clean AirPods
You’ve conquered the wax buildup, but the battle isn’t over! Keeping your AirPods clean requires ongoing effort, and prevention is your best weapon. By implementing a few simple strategies, you can minimize the need for future deep cleans and keep your AirPods functioning smoothly.
Okay, so your AirPods are looking a little… gross. You know, that waxy build-up that just happens? Well, before you chuck them in the washing machine (don’t do that!), check out this handy guide on how to autofill passwords, email addresses, and more on iPhone.
Seriously, it’ll save you a ton of time when you’re finally ready to tackle those grimy buds.
Preventing Wax Buildup
Regular cleaning is essential, but proactive measures can significantly reduce the amount of wax that accumulates in your AirPods. Here are some effective strategies:
- Clean Your Ears Regularly:The first line of defense is a clean ear canal. Make a habit of cleaning your ears gently with a cotton swab or earwax removal tool before using your AirPods. Avoid pushing the swab too deep into your ear canal, as this can damage your eardrum.
- Use Earplugs or Ear Covers:Consider wearing earplugs or ear covers specifically designed for AirPods. These accessories create a barrier between your ear canal and the AirPods, preventing wax from directly contacting the speaker mesh. You can find a variety of options, from silicone tips to foam covers, that offer different levels of noise reduction and comfort.
- Store Your AirPods Properly:After use, store your AirPods in their case to protect them from dust, debris, and accidental drops. The case provides a safe and enclosed environment that helps minimize the risk of wax buildup.
Benefits of Earplugs or Ear Covers
Beyond preventing wax buildup, using earplugs or ear covers can offer several additional benefits:
- Noise Reduction:Ear covers can help reduce ambient noise, enhancing your listening experience, especially in noisy environments. This is particularly helpful for individuals who are sensitive to background sounds or want to focus on their audio content.
- Enhanced Comfort:Some individuals find that using earplugs or ear covers improves the comfort of wearing AirPods, especially during extended periods of use. These accessories can create a more secure fit and reduce pressure on the ear canal.
- Hygiene:Ear covers can act as a barrier between your ear canal and the AirPods, reducing the transfer of bacteria and other microorganisms. This is especially important for individuals with sensitive ears or who are prone to ear infections.
Recognizing When Professional Help is Needed
Sometimes, even the most dedicated cleaning efforts might not be enough to tackle stubborn grime or potential damage to your AirPods. Knowing when to seek professional help is crucial to prevent further issues and ensure the longevity of your beloved earbuds.
While most cleaning tasks can be handled at home, certain situations demand the expertise of professionals.
Potential Consequences of Attempted DIY Cleaning
Attempting to clean your AirPods beyond a basic level can lead to several potential consequences. Here are some of the risks involved:
- Damage to internal components:Probing too deeply into the AirPods with tools can damage delicate internal components, leading to malfunction or even permanent damage.
- Water damage:Using excessive water or moisture during cleaning can seep into the AirPods, causing irreparable damage to the electronics.
- Voiding the warranty:Many manufacturers’ warranties may be voided if the AirPods are tampered with or improperly cleaned, leaving you responsible for repair costs.
Reputable Professional Cleaning Services
If you’ve exhausted your DIY cleaning options or suspect your AirPods need a more specialized approach, consider seeking professional cleaning services. Here are some reputable options:
- Apple Authorized Service Providers:Apple offers a network of authorized service providers who can perform professional cleaning and repairs for AirPods. They are trained to handle repairs and cleaning without voiding the warranty.
- Specialized Electronics Repair Shops:Many electronics repair shops specialize in cleaning and repairing audio devices, including AirPods. Research local options and check customer reviews before entrusting your AirPods to any service provider.
Final Touches
Now that your AirPods are sparkling clean, it’s time to put them back together and make sure they’re ready for another round of listening pleasure. This final step is crucial to ensure that your AirPods function properly and last longer.
Reassembling the AirPods
After cleaning your AirPods, reassemble them carefully. First, make sure all the components are completely dry. Then, align the speaker mesh with the housing, ensuring it’s flush and secure. Next, gently press the AirPod back into its charging case, ensuring a snug fit.
If you’re using a third-party charging case, double-check the alignment and secure connection.
Checking for Complete Cleanliness and Functionality
Once reassembled, it’s time to check if your AirPods are truly clean and working perfectly. Here’s a checklist to help you:
- Visual Inspection:Look closely at the speaker mesh, charging contacts, and any other visible areas for any remaining debris. If you notice anything, repeat the cleaning process as needed.
- Sound Test:Play some music or a podcast through your AirPods to ensure the sound quality is clear and free of distortion. This will help identify any lingering issues with the speaker mesh or internal components.
- Charging Test:Place your AirPods in their charging case and check that they’re charging properly. The charging light should indicate that the charging process has started. If you’re using a third-party charging case, ensure the case itself is fully charged.
- Functionality Check:Test the touch controls on your AirPods. Tap, double-tap, and press to ensure they’re responding correctly. This ensures the sensors are not clogged or damaged.
Regular Inspections
The key to keeping your AirPods clean and functional is regular inspections. Aim to inspect your AirPods at least once a week for signs of wax buildup. Pay close attention to the speaker mesh, as this is the most common area for wax accumulation.
If you notice any buildup, clean the AirPods immediately using the methods discussed earlier.
Last Word

Cleaning your AirPods is a crucial step in maintaining their performance and longevity. By following these simple steps, you can keep your earbuds free of earwax, dirt, and grime. Remember, a clean AirPod is a happy AirPod, and a happy AirPod means a happy you.
So, grab your cleaning supplies, get ready to banish the wax, and enjoy your pristine, crystal-clear audio experience.
FAQ Guide: How To Clean Your Gross, Waxy AirPods
Can I use rubbing alcohol to clean my AirPods?
It’s best to avoid rubbing alcohol as it can damage the delicate components of your AirPods. Stick to gentle cleaning solutions like soap and water.
How often should I clean my AirPods?
Cleaning your AirPods regularly, every week or two, will help prevent wax buildup and keep them in top condition.
What if I can’t remove the wax myself?
If you’re struggling to remove stubborn wax buildup, it’s best to seek professional cleaning services to avoid damaging your AirPods.