How To Change Mountain Lion’S Save Default Away From Icloud
How to Change Mountain Lion’s Save Default Away From iCloud is a question that pops up for many users, especially those who want more control over their files. You might be tired of iCloud filling up, or maybe you just want to keep your files organized on your local drive.
Whatever the reason, changing your default save location is a simple process that can make a big difference in your workflow.
This guide will walk you through the steps of changing your default save location, as well as provide some helpful tips for managing your iCloud storage and keeping your files organized. Whether you’re a seasoned Mac user or just starting out, this guide will equip you with the knowledge to master your file management in Mountain Lion.
Understanding the Default Save Location
Mountain Lion, like many operating systems, uses a default save location for your files. This location is where your computer automatically saves new files when you don’t specify a different location. Understanding this default location is crucial for file management and ensuring your files are saved in the most convenient and secure place.
Understanding the Default Save Location in Mountain Lion
Mountain Lion uses iCloud as its default save location. This means that when you save a file, it is automatically saved to your iCloud account and synced across all your Apple devices. This approach offers several benefits, including:
- Accessibility:Your files are available on all your Apple devices, regardless of where you saved them.
- Backup:iCloud automatically backs up your files, providing a safety net in case of data loss.
- Collaboration:iCloud makes it easy to share files with others, enabling seamless collaboration on projects.
However, using iCloud as the default save location also comes with drawbacks:
- Storage limitations:iCloud offers a limited amount of free storage. If you exceed your storage limit, you’ll need to pay for additional storage.
- Performance issues:Saving files to iCloud can be slower than saving them locally, especially if you have a slow internet connection.
- Privacy concerns:Your files are stored on Apple’s servers, raising concerns about data privacy and security.
Finding the Default Save Location
To determine the current default save location in Mountain Lion, follow these steps:
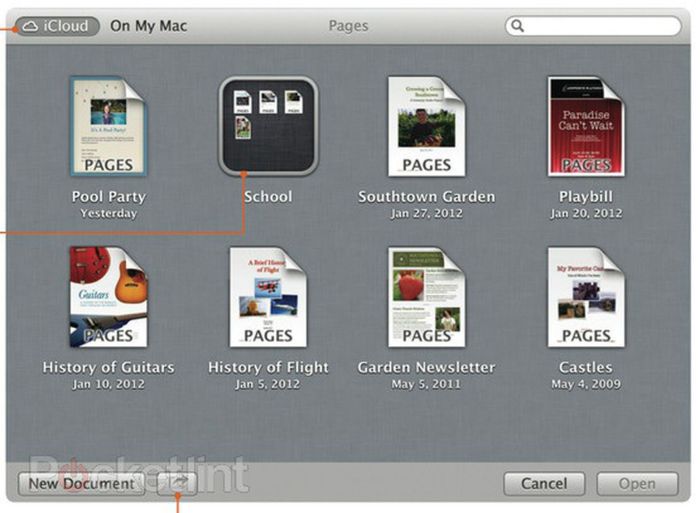
- Open any application that allows you to save files, such as TextEdit or Pages.
- Click on the “File” menu.
- Select “Save As…”.
- The “Save As” dialog box will appear, displaying the default save location. This will typically be your iCloud Drive folder.
Changing the Default Save Location
Now that you understand where Mountain Lion stores your files by default, let’s shift gears and learn how to change that location to a local drive. This will give you more control over your data and potentially free up space on your iCloud Drive.
Changing the Default Save Location to a Local Drive
The process of changing the default save location involves two key steps: creating a new folder on your local drive and then designating it as the new default save location within Mountain Lion’s settings. Let’s walk through the steps.
Creating a New Folder on Your Local Drive
Before you can change the default save location, you’ll need a folder on your local drive where Mountain Lion can store your files. Here’s how to create one:
- Open Finder. You can access it from the Dock or by pressing Command + Spacebarand typing “Finder.”
- Navigate to the location on your local drive where you want to create the new folder. For example, you might choose your Desktopor Documentsfolder.
- Right-click (or Control + Click) anywhere in the Finder window and select New Folder.
- Give your new folder a descriptive name, such as “My Documents” or “Local Files.”
Setting the New Folder as the Default Save Location
Once you’ve created your new folder, it’s time to tell Mountain Lion to use it as the default location for saving files. Here’s how:
- Open System Preferencesby clicking the Apple iconin the top-left corner of your screen and selecting System Preferences.
- Click on General.
- Look for the Default Save Locationsetting. It’s usually located near the bottom of the window.
- Click on the “Choose…”button next to the setting.
- Navigate to the new folder you created on your local drive and select it.
- Click Choose.
From this point on, Mountain Lion will automatically save your files to the new folder you’ve designated.
Managing iCloud Storage: How To Change Mountain Lion’s Save Default Away From ICloud
iCloud is a powerful tool for storing your files and syncing them across your Apple devices. However, iCloud storage isn’t limitless. It’s important to understand how iCloud storage works, its limitations, and how to optimize it for efficient file management.
Understanding iCloud Storage
iCloud storage is a cloud-based service that allows you to store files and data online. This data is accessible from any of your Apple devices, including your iPhone, iPad, Mac, and Apple Watch. When you save a file to iCloud, it’s actually stored on Apple’s servers, not on your device.
This means you can access your files from anywhere, even if you lose or damage your device.
Monitoring iCloud Storage Usage
Monitoring your iCloud storage usage is crucial to avoid exceeding your storage limit. Exceeding your storage limit can lead to reduced functionality, such as the inability to back up your devices or store new files. Here are some tips for monitoring your iCloud storage:
- Check your iCloud storage usage regularly. You can do this by going to Settings > [Your Name] > iCloud > Manage Storage on your iPhone, iPad, or Mac. You can also access your iCloud storage information on the web at iCloud.com.
- Identify large files or data that you can remove. This might include old photos, videos, or documents that you no longer need. You can delete these files directly from your device or from the iCloud website.
- Consider using third-party apps to manage your iCloud storage. These apps can help you identify large files and duplicate data that you can delete. They can also help you optimize your iCloud storage by compressing files or moving them to other storage services.
Optimizing iCloud Storage
There are a number of ways to optimize your iCloud storage and make sure you’re getting the most out of it.
- Disable iCloud backups for apps that you don’t use frequently.Some apps, like games, can take up a lot of iCloud storage space. You can disable iCloud backups for these apps to save space. To do this, go to Settings > [Your Name] > iCloud > Manage Storage on your iPhone, iPad, or Mac and then select the app you want to disable iCloud backups for.
- Use iCloud Drive to store your files.iCloud Drive is a cloud-based storage service that’s integrated with macOS and iOS. It’s a great way to store files that you need to access from multiple devices. iCloud Drive is included with your iCloud storage plan, so you don’t have to pay extra to use it.
- Use a third-party cloud storage service.If you need more storage space than iCloud offers, you can use a third-party cloud storage service like Google Drive, Dropbox, or OneDrive. These services offer a variety of storage plans, so you can choose one that fits your needs and budget.
Troubleshooting Save Location Issues

After making changes to your default save location, you might encounter some hiccups. It’s important to understand why these issues might arise and how to fix them. This section will guide you through common problems and provide solutions for troubleshooting save location errors in Mountain Lion.
Troubleshooting Save Location Errors
Sometimes, even after changing your default save location, files might still be saved in the old location. This could be due to a variety of reasons. Here are some common issues and solutions:* Permissions:If you don’t have the right permissions to access the new location, Mountain Lion might revert to the old one.
Solution
Make sure you have read and write permissions for the new location. You can adjust permissions in the “Get Info” window for the folder.
Application Preferences
Switching your Mountain Lion save defaults away from iCloud can be a pain, but it’s worth it for a smoother workflow. While you’re tackling tech issues, you might as well check out How to use Threads, the new new new Twitter replacement , which could be a great way to stay connected.
Once you’ve got those tech woes sorted, you can finally get back to saving files on your local drive, free from the cloud’s whims.
Some applications have their own preferences for saving files, which may override your system settings.
Solution
Check the preferences of the application you are using to ensure the “Save To” location is set to your new default location.
Temporary Files
If your computer is using temporary files to store data, these might be saved in the old location, even if your default save location is changed.
Solution
Restart your computer to clear any temporary files.
Conflicting Software
Some software might interfere with your system settings, leading to unexpected save locations.
Solution
Consider temporarily disabling any third-party software that might be affecting your file saving behavior.
System Issues
In rare cases, system issues might cause your default save location to revert.
Solution
If other troubleshooting steps don’t work, you might need to restart your computer or try a system repair.
Troubleshooting Flowchart
To help you navigate through these issues, here’s a simple flowchart to guide you:
1. Check Permissions
Yes
Proceed to step 2.
No
Adjust permissions for the new location and restart the computer.
2. Check Application Preferences
Changing Mountain Lion’s save default away from iCloud is super easy! Just go to System Preferences, click on “Save,” and then uncheck “iCloud.” While we’re on the topic of preferences, check out this Pro tip: Adjust mouse and trackpad scroll speed in iPadOS – it’s a game-changer for navigating on your iPad! Once you’ve got your settings dialed in, you can save your files wherever you want, including your local hard drive, external drives, or even a network location.
Yes
Proceed to step 3.
No
Adjust the “Save To” location in the application’s preferences and try saving a file again.
3. Restart Computer
Yes
Proceed to step 4.
No
Restart your computer and try saving a file again.
4. Disable Third-Party Software
Yes
Proceed to step 5.
No
Temporarily disable any third-party software that might be affecting your file saving behavior and try saving a file again.
5. System Repair
Yes
Proceed to step 6.
No
Try a system repair or contact Apple Support.
6. Contact Apple Support
Yes
Contact Apple Support for further assistance.
Exploring Alternative Save Options

Sometimes, iCloud might not be the best solution for storing your files. Maybe you need more storage space, have concerns about security, or simply prefer a different way of managing your data. This section will explore some alternative save options and help you determine which one might be best for you.
Using External Drives
External drives offer a physical way to store your files. They come in various forms, including hard disk drives (HDDs), solid-state drives (SSDs), and flash drives.
- Advantages:
- Large storage capacity:External drives can offer significantly more storage space compared to iCloud’s standard plans. This is particularly useful for storing large files like videos, photos, and music.
- Offline access:You can access your files even without an internet connection.
- Faster transfer speeds:SSDs offer significantly faster data transfer speeds compared to HDDs, making them ideal for large files.
- Cost-effective:External drives are generally more affordable than cloud storage services, especially for larger storage needs.
- Disadvantages:
- Physical storage:You need to physically carry the drive and ensure its safety.
- Limited accessibility:You cannot access your files remotely without the physical drive.
- Risk of damage or loss:External drives are susceptible to physical damage, theft, or accidental deletion.
- Backup required:It’s crucial to back up your external drive to prevent data loss.
Comparing Cloud Storage Services
There are many cloud storage services besides iCloud, each with its unique features and pricing plans. Here’s a comparison of some popular options:
| Service | Free Storage | Paid Plans (Monthly) | Features |
|---|---|---|---|
| Google Drive | 15 GB | $1.99 (100 GB), $9.99 (1 TB), $19.99 (10 TB) | File sharing, collaboration, version history, Google Workspace integration |
| Dropbox | 2 GB | $9.99 (2 TB), $16.99 (3 TB), $19.99 (5 TB) | File syncing, version history, folder sharing, team collaboration |
| OneDrive | 5 GB | $1.99 (100 GB), $6.99 (1 TB), $9.99 (2 TB) | File sharing, collaboration, version history, Microsoft Office integration |
| Mega | 20 GB | $9.99 (200 GB), $19.99 (1 TB), $29.99 (2 TB) | End-to-end encryption, file sharing, folder sharing, cloud storage |
Optimizing File Management
Managing your files effectively is crucial for productivity and peace of mind. A well-organized file system allows you to quickly find what you need, reduces clutter, and prevents accidental deletion. This section will guide you through strategies for organizing your files, making them easily accessible and manageable.
Using Folders and Subfolders
Folders are the foundation of a structured file system. Folders allow you to group related files together, creating a logical hierarchy that makes navigation and retrieval a breeze. Here’s how to use them effectively:
- Create a Main Folder:Begin by creating a main folder for your most important files. For example, you might have a folder named “Documents” or “Projects.” This folder acts as a central hub for your files.
- Organize by Category:Within your main folder, create subfolders based on categories. For instance, within the “Documents” folder, you could create subfolders for “Work,” “Personal,” “School,” or “Finance.”
- Use Nested Folders:For more complex organization, you can nest folders within each other. For example, you could have a “Work” folder, then within it, create subfolders for “Projects,” “Clients,” and “Reports.”
- Keep Folders Clear and Concise:Use descriptive folder names that are easy to understand and remember. Avoid using generic names like “Folder 1” or “New Folder.”
Naming Files
File names play a significant role in organization. Clear and consistent naming conventions make it easier to locate files and avoid confusion. Here are some tips for naming files:
- Use Descriptive Names:Your file names should clearly indicate the content of the file. For example, instead of “Document1.pdf,” use “Sales Report Q1 2023.pdf.”
- Use Consistent Formatting:Develop a consistent naming format for your files. For example, you might use “Year-Month-Day_Description.filetype.” This helps maintain order and makes it easier to sort files chronologically.
- Avoid Spaces and Special Characters:Spaces and special characters can cause problems with some applications and operating systems. Use underscores or hyphens instead of spaces.
- Keep File Names Concise:While descriptive names are important, try to keep them relatively short and to the point.
Security Considerations
While changing your default save location might seem like a simple tweak, it’s essential to consider the security implications of your chosen location. Choosing the right place to store your files can significantly impact their safety and accessibility.
Backing Up Files Regularly
Regularly backing up your files is crucial for data protection. It creates a copy of your data, ensuring that you can recover it if your original files are lost or damaged. This is especially important when storing files on your local drive, as these files can be vulnerable to hardware failures, accidental deletion, or malware attacks.
Here are some ways to back up your files:
- External Hard Drives:External hard drives provide a convenient and affordable way to back up your files. They offer ample storage space and can be easily connected to your Mac.
- Cloud Storage Services:Cloud storage services like Dropbox, Google Drive, and OneDrive allow you to store your files online, making them accessible from any device. They also offer automatic syncing, ensuring that your backups are always up-to-date.
- Time Machine:Apple’s Time Machine is a built-in backup solution that automatically creates incremental backups of your entire Mac, including your files, applications, and system settings.
Storing Sensitive Information in iCloud
While iCloud offers convenience for storing and syncing files, it’s essential to be mindful of the security risks associated with storing sensitive information in the cloud.
- Data Breaches:Cloud services are not immune to data breaches, which could expose your sensitive information to unauthorized access.
- Privacy Concerns:Storing sensitive information in the cloud raises privacy concerns, as it means that your data is being stored and potentially accessed by third-party companies.
To mitigate these risks, consider using iCloud for less sensitive files and explore alternative options for storing sensitive information.
Securing Files on Local Drives
To ensure the security of your files stored on local drives, consider these recommendations:
- Strong Passwords:Use strong and unique passwords to protect your Mac and any external drives you use for backups.
- File Encryption:Encrypting your files adds an extra layer of security by scrambling the data, making it unreadable without the correct decryption key. You can use built-in encryption tools like FileVault for your Mac or third-party encryption software for your external drives.
- Antivirus Software:Install and keep up-to-date antivirus software to protect your Mac from malware that could steal or damage your files.
Understanding File Formats

Mountain Lion supports a wide range of file formats, each designed for specific purposes. Understanding these formats is crucial for ensuring compatibility when saving and sharing files.
File Format Compatibility
File format compatibility refers to the ability of different software applications to open and interpret the same file. When you save a file in a specific format, you are essentially defining how that data will be structured and interpreted by other applications.
Changing Mountain Lion’s save default away from iCloud can be a pain, but it’s definitely possible! You just need to go into your system preferences and tweak a few settings. It’s kind of like how you can’t change Animoji characters after you’ve already recorded a video, which is super frustrating, but you can check out this guide if you’re curious.
Anyway, once you’ve figured out the iCloud settings, you’ll be good to go.
For example, a document saved as a .doc file can be opened by Microsoft Word, while a .pdf file can be opened by Adobe Acrobat Reader.
Common File Formats in Mountain Lion
- Text Files (.txt):Plain text files contain only text characters, without any formatting. They are widely compatible and can be opened by most text editors.
- Rich Text Format (.rtf):RTF files allow for basic formatting, such as bold, italics, and font changes. They are generally compatible across different word processors.
- Microsoft Word Documents (.doc, .docx):Word documents support extensive formatting options and are the standard format for Microsoft Word.
- PDF Files (.pdf):PDF files are designed for document sharing and printing. They preserve the formatting and layout of the original document, making them suitable for archival purposes.
- Image Files (.jpg, .png, .gif):These formats are used for storing digital images. JPG files are known for their high compression, while PNG files offer lossless compression, preserving image quality. GIF files are commonly used for animated images.
- Spreadsheet Files (.xls, .xlsx):These formats are used for creating and managing spreadsheets, supporting calculations and data analysis.
- Presentation Files (.ppt, .pptx):Presentation files are designed for creating slideshows and presentations. They support various visual elements, such as images, text, and animations.
- Audio Files (.mp3, .wav):These formats are used for storing and playing audio files. MP3 files offer high compression, while WAV files provide uncompressed audio.
- Video Files (.mp4, .mov):These formats are used for storing and playing video files. MP4 files are commonly used for video sharing, while MOV files are associated with Apple products.
Advanced File Management Techniques
Mastering advanced file management techniques can significantly enhance your workflow and efficiency on your Mac. By understanding and utilizing these tools, you can organize your files more effectively, access them quickly, and maintain a secure and organized system. This section will explore three key techniques: symbolic links, Spotlight search, and file permissions.
Symbolic Links
Symbolic links, also known as symlinks, are powerful tools for creating shortcuts or pointers to files and folders located elsewhere on your system. They allow you to access files from different locations without physically copying them, saving storage space and simplifying file organization.
Think of a symbolic link as a shortcut that points to the actual file or folder. When you open a symbolic link, your Mac accesses the original file or folder, making it appear as if the linked file is located in the directory where the symlink resides.Here’s how to create a symbolic link using the Terminal:
`ln
s /path/to/original/file /path/to/new/location`
For instance, to create a symbolic link named “My Documents” on your desktop that points to the actual “Documents” folder in your user directory, you would use the following command:
`ln
s /Users/your_username/Documents /Users/your_username/Desktop/My Documents`
After creating the symbolic link, you can access your Documents folder by opening the “My Documents” folder on your desktop. Symbolic links are useful for:
- Creating shortcuts to frequently accessed files or folders.
- Centralizing files from multiple locations.
- Managing large projects by linking to project folders from different directories.
- Maintaining consistent access to files even after moving or renaming them.
Spotlight Search
Spotlight is a powerful search tool built into macOS that allows you to quickly find files, applications, emails, contacts, and other data on your Mac. Spotlight uses indexing to create a searchable database of your system’s content, enabling efficient and accurate search results.To use Spotlight, simply click the magnifying glass icon in the menu bar or press Command + Space.
Then, type your search query. Spotlight will display relevant results as you type, including file names, contents, metadata, and even applications.Here are some tips for maximizing Spotlight’s search capabilities:
- Use specific s to refine your search.
- Combine s using logical operators like “AND” or “OR” to narrow down your results.
- Utilize file type filters (e.g., “pdf” or “doc”) to find specific file formats.
- Use the “kind:” modifier to specify the type of file you are searching for (e.g., “kind:image”).
- Take advantage of Spotlight’s advanced search operators for more precise results.
File Permissions, How to Change Mountain Lion’s Save Default Away From iCloud
File permissions control who can access and modify files and folders on your Mac. They provide a layer of security to protect your data from unauthorized access. By default, macOS grants specific permissions to each user account and group. For example, the owner of a file typically has full read, write, and execute permissions, while other users might have limited access.File permissions are crucial for:
- Protecting sensitive data from unauthorized access.
- Maintaining system stability by preventing accidental modifications to system files.
- Controlling user access to specific files and folders.
You can manage file permissions using the Get Info window or the Terminal. For instance, to change the permissions of a file using the Get Info window:
- Right-click the file and select “Get Info.”
- Click the “Sharing & Permissions” section.
- Click the lock icon to unlock the settings.
- Adjust the permissions for each user or group.
Understanding and utilizing file permissions effectively is essential for maintaining a secure and organized file system.
Future Considerations
File management is constantly evolving, and as macOS continues to develop, so too will its file management capabilities. It’s important to consider how future advancements might impact your current file saving practices and how you can adapt to these changes.
The Evolution of File Management
The future of file management is likely to be heavily influenced by the increasing adoption of cloud storage and the rise of new technologies like artificial intelligence (AI). As cloud storage becomes more prevalent, users will increasingly rely on cloud-based services for file storage and sharing.
This shift will likely lead to a decrease in the importance of traditional file systems and a greater emphasis on cloud-based file management tools.
The Impact of Cloud Storage Trends
Cloud storage trends are expected to continue to have a significant impact on file saving practices. Here are some key trends to watch:
- Increased Cloud Storage Adoption:As cloud storage services become more affordable and reliable, more users are expected to adopt them as their primary file storage solution. This will likely lead to a decline in the use of local hard drives for storing personal files.
- AI-Powered File Management:AI-powered file management tools are becoming increasingly sophisticated, offering features such as automatic file organization, intelligent search, and personalized recommendations. These tools will likely become more prevalent in the future, simplifying file management for users.
- Integration with Other Devices:Cloud storage services are becoming increasingly integrated with other devices, such as smartphones, tablets, and smart home devices. This integration will make it easier for users to access their files from any device, regardless of location.
A Timeline of Significant Changes in File Management Technology
File management technology has evolved significantly over the years. Here is a timeline of some key milestones:
| Year | Milestone | Description |
|---|---|---|
| 1981 | Introduction of the Macintosh computer | The Macintosh introduced a graphical user interface (GUI) and a hierarchical file system, making file management more user-friendly. |
| 1993 | Release of Windows 3.1 | Windows 3.1 popularized the use of file managers, making it easier for users to organize and manage their files. |
| 2007 | Launch of the iPhone | The iPhone introduced a new era of mobile computing, making it possible to access and manage files from anywhere. |
| 2008 | Introduction of Dropbox | Dropbox popularized cloud storage, making it easier for users to share and synchronize files across multiple devices. |
| 2011 | Launch of iCloud | Apple’s iCloud service provided a platform for storing and syncing files, photos, and other data across Apple devices. |
| 2016 | Release of macOS Sierra | macOS Sierra introduced a new file system, APFS, which offered improved performance, security, and reliability. |
Final Thoughts
Changing your default save location in Mountain Lion is a simple yet powerful step towards taking control of your file management. By understanding the benefits and drawbacks of using iCloud and local storage, you can make informed decisions about where to save your files.
Remember to keep your iCloud storage in check and organize your files effectively to ensure smooth and efficient workflow. Now you can confidently navigate the world of file management in Mountain Lion, knowing that you have the power to tailor your experience to your needs.
Questions Often Asked
What happens to my files already saved in iCloud if I change the default save location?
Changing your default save location won’t automatically move your existing iCloud files. They will remain in iCloud, and you can still access them from any device.
Can I change the default save location back to iCloud later?
Yes, you can easily change the default save location back to iCloud by following the same steps in the guide but selecting iCloud Drive as your desired location.
Is there a way to automatically back up my files to iCloud after changing the default save location?
While changing the default save location doesn’t automatically back up your files to iCloud, you can manually select files to upload to iCloud Drive. You can also set up automatic backups of specific folders to iCloud using third-party apps.