How To Use Os X Yosemite To Send Texts From Your Mac
How to use OS X Yosemite to send texts from your Mac – Tired of switching between your iPhone and Mac to respond to texts? OS X Yosemite introduced a game-changing feature that lets you send and receive messages directly from your Mac, making it easier than ever to stay connected. This guide will walk you through the process of setting up your Mac for texting, linking your iPhone, and mastering the art of sending messages from your computer.
Whether you’re a student juggling multiple group chats or a busy professional needing to keep track of important conversations, this guide will equip you with the knowledge and skills to seamlessly integrate texting into your Mac workflow. So, ditch the phone and embrace the convenience of texting directly from your Mac!
Introduction: How To Use OS X Yosemite To Send Texts From Your Mac

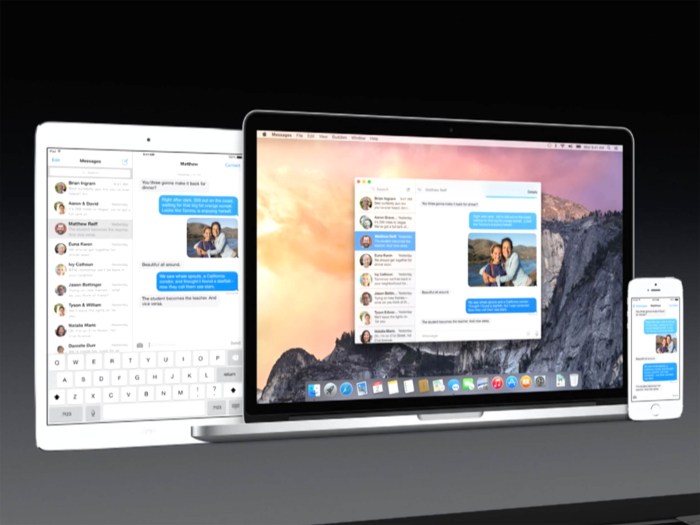
OS X Yosemite is a powerful and user-friendly operating system designed for Apple computers. It boasts a sleek design, improved performance, and a variety of innovative features. One such feature is the ability to send text messages directly from your Mac.
Sending texts from your Mac can be a game-changer for anyone who spends a lot of time on their computer. It allows you to easily stay connected with friends and family without having to constantly switch between devices. This guide will walk you through the steps of setting up and using this feature.
Requirements, How to use OS X Yosemite to send texts from your Mac
You’ll need a few things to send texts from your Mac:
- A Mac running OS X Yosemite or later
- An iPhone or iPad with iOS 8 or later
- An Apple ID
- A cellular data plan for your iPhone or iPad
System Requirements
To send texts from your Mac using OS X Yosemite, you’ll need to meet a few system requirements. These requirements ensure your Mac is compatible and has the necessary resources to run the software smoothly.
Operating System
You’ll need a Mac running OS X Yosemite 10.10 or later. This version of OS X introduced the Continuity features that allow you to send and receive text messages from your Mac.
So, you’re trying to figure out how to send texts from your Mac using OS X Yosemite, right? Well, while you’re at it, you might want to check out 8 reasons you should ditch Spotify for Apple Music.
It’s a game-changer for music lovers, and you can easily integrate it into your Mac’s ecosystem. Once you’ve got that sorted, you’ll be texting like a pro in no time!
Hardware
Here are the minimum hardware specifications your Mac should meet:
- Processor: Intel Core 2 Duo or later
- Memory: 2 GB of RAM
- Storage: 8 GB of available storage space
- Graphics: Intel HD Graphics 3000 or later
While these are the minimum requirements, a newer Mac with more powerful hardware will offer a smoother experience.
Additional Software
No additional software is required to send texts from your Mac using OS X Yosemite. The feature is built into the operating system.
Setting Up Your Mac for Texting
Once you have the necessary hardware and software, you’re ready to set up your Mac for texting. This involves enabling iMessage on your Mac and configuring its settings.
Enabling iMessage on Your Mac
To enable iMessage on your Mac, you’ll need to sign in with your Apple ID. This is the same Apple ID you use for other Apple services like iCloud, the App Store, and iTunes.
- Open the Messages app on your Mac. You can find it in the Applications folder.
- Click on the Messages menu in the menu bar at the top of the screen and select “Preferences.”
- In the Preferences window, click on the “Accounts” tab.
- Click on the “Sign in to iMessage” button.
- Enter your Apple ID and password.
- Click on the “Sign In” button.
Once you’ve signed in, iMessage will be enabled on your Mac. You can now send and receive text messages from your Mac.
Configuring iMessage Settings
After enabling iMessage, you can configure its settings to customize your texting experience. You can change your notification settings, adjust the appearance of the Messages app, and more.
- Open the Messages app on your Mac.
- Click on the Messages menu in the menu bar at the top of the screen and select “Preferences.”
- In the Preferences window, you can adjust the following settings:
General
- Show read receipts: This setting allows recipients to see when you’ve read their messages. If you’re concerned about privacy, you can disable this setting.
- Send read receipts: This setting allows you to see when recipients have read your messages.
- Show typing indicators: This setting allows you to see when recipients are typing a message.
- Show previews: This setting allows you to see a preview of messages in your notifications.
- Send as SMS: This setting allows you to send messages to people who don’t have iMessage as SMS messages. However, this will incur charges from your mobile carrier.
Accounts
- Start new conversations from: This setting allows you to choose whether new conversations start from your Mac or your iPhone.
- Allow messages to be sent from: This setting allows you to choose which devices can send messages on your behalf. For example, you can allow your Mac, iPhone, and iPad to send messages.
Notifications
- Play sound for new messages: This setting allows you to choose whether you want to hear a sound when you receive a new message.
- Display alerts: This setting allows you to choose whether you want to see a notification on your screen when you receive a new message.
- Show message previews: This setting allows you to choose whether you want to see a preview of the message in your notification.
Verifying Your Apple ID
When you enable iMessage on your Mac, you may be asked to verify your Apple ID. This is a security measure that helps to prevent unauthorized access to your account. To verify your Apple ID, you will need to enter a verification code that is sent to your iPhone.
- Open the Messages app on your Mac.
- Click on the Messages menu in the menu bar at the top of the screen and select “Preferences.”
- In the Preferences window, click on the “Accounts” tab.
- If you see a verification code prompt, enter the code that was sent to your iPhone.
Once you have verified your Apple ID, you will be able to send and receive text messages from your Mac.
Linking Your iPhone to Your Mac
To send texts from your Mac, you need to establish a connection between your iPhone and your Mac. This connection is facilitated through Bluetooth and Wi-Fi, allowing your Mac to access your iPhone’s messages and send them from your computer.
Connecting Your iPhone to Your Mac
To connect your iPhone to your Mac, you need to enable Bluetooth on both devices and ensure they are within range.
- On your iPhone:Open the Settings app, tap Bluetooth, and turn Bluetooth on.
- On your Mac:Open System Preferences, click Bluetooth, and make sure Bluetooth is turned on.
Your Mac will scan for nearby Bluetooth devices, and your iPhone should appear in the list. Click on your iPhone’s name to pair it with your Mac. You may be prompted to enter a passcode on your iPhone to confirm the pairing.
Once paired, your iPhone will appear in the list of connected devices on your Mac.
The Role of Bluetooth and Wi-Fi in the Connection Process
Bluetooth and Wi-Fi play different but essential roles in connecting your iPhone to your Mac for texting.
- Bluetooth:Bluetooth is used to establish an initial connection between your iPhone and Mac. It enables the devices to communicate with each other and share information. However, Bluetooth is not ideal for sending large amounts of data, such as text messages with attachments.
- Wi-Fi:Once the Bluetooth connection is established, your Mac will use Wi-Fi to send and receive text messages. This allows for faster and more reliable data transfer compared to Bluetooth.
For optimal performance, it is recommended to connect both your iPhone and Mac to the same Wi-Fi network. This ensures a stable and fast connection for sending and receiving text messages.
Troubleshooting Connectivity Issues
Sometimes, you may encounter connectivity issues between your iPhone and Mac. Here are some troubleshooting tips:
- Check Bluetooth and Wi-Fi connections:Ensure Bluetooth and Wi-Fi are turned on and working properly on both your iPhone and Mac.
- Restart your devices:Restarting both your iPhone and Mac can resolve temporary connectivity issues.
- Check for software updates:Ensure your iPhone and Mac have the latest software updates installed. Outdated software can cause compatibility issues.
- Forget and re-pair your iPhone:If you are still experiencing issues, try forgetting your iPhone on your Mac and then re-pairing them. This can help resolve pairing issues.
Sending Text Messages from Your Mac

Now that your Mac is set up to send texts, you can finally start using it to communicate with your friends and family. It’s a great way to multitask and keep your hands free, especially if you’re working on your computer.
Using the Messages App
The Messages app is the central hub for all your text messages on your Mac. You can access it by clicking on the Messages icon in your Dock, or by searching for it in Spotlight. The Messages app is a powerful tool for sending and receiving texts, and it comes with a lot of features.
Sending Text Messages
To send a text message, follow these simple steps:
- Open the Messages app.
- Click the “Compose” button in the top-left corner of the window. This will open a new message window.
- In the “To” field, type the phone number or name of the person you want to send a message to. If you’ve previously sent a message to this person, their name will appear in the suggestions list.
- In the message window, type your message. You can use the standard formatting options, such as bold, italics, and underlining.
- Click the “Send” button (the blue arrow icon) to send your message.
Using iMessage Features
iMessage in Yosemite offers a range of features that make communication more engaging and expressive. You can share media files, use emojis and stickers, and participate in group conversations, enriching your communication experience.
Sharing Media Files
You can easily share photos, videos, and other media files with your contacts. To send a media file, simply drag and drop the file from your Mac’s desktop or a folder into the iMessage window. You can also use the “Attach” button to browse for files on your Mac.
Using Emojis, Stickers, and Other Message Features
iMessage includes a variety of emojis, stickers, and other features that let you express yourself in a fun and creative way. To access emojis, click the emoji button in the iMessage window. You can search for specific emojis by typing in the search bar.
Stickers can be added by clicking the sticker button, and you can browse through different sticker packs or add your own. Other features include:
- Tapbacks: Tapbacks allow you to quickly react to messages with a heart, thumbs up, haha, or other reactions.
- Digital Touch: Digital Touch lets you send a variety of animated effects, such as a tap, a kiss, or a heart.
- Audio Messages: You can record and send audio messages directly from iMessage.
Group Messages and Message Threads
iMessage supports group messages, allowing you to communicate with multiple people simultaneously. To start a group message, simply add multiple contacts to the iMessage window. You can also create group names and add or remove participants as needed. iMessage also provides message threads, which keep conversations organized and allow you to easily follow the flow of the discussion.
You can reply to specific messages within a thread, ensuring that your responses are directed to the appropriate person.
Receiving Text Messages on Your Mac

You can receive text messages from your iPhone on your Mac as long as both devices are connected to the internet and signed in with the same Apple ID. Your Mac will mirror the conversations you have on your iPhone.
Notification Settings for Incoming Messages
When you receive a text message on your iPhone, your Mac will also notify you. You can customize how these notifications appear.
- Open System Preferenceson your Mac.
- Click on Notifications.
- Select Messagesfrom the list on the left.
- Here, you can choose how you want to be notified about new messages, such as banners, sounds, and badges.
- You can also choose whether you want to see message previewsin notifications.
Viewing and Replying to Messages from Your Mac
You can view and reply to messages directly from your Mac.
- Open the Messagesapp on your Mac.
- You’ll see a list of your conversations.
- Click on a conversation to view the messages.
- To reply to a message, type your response in the text field at the bottom of the window.
- You can also use the iMessage featuressuch as sending photos, videos, and audio messages.
Managing Text Messages

Once you’ve gotten the hang of sending and receiving texts from your Mac, you might want to organize your messages. This can be useful if you’re looking for a specific message or want to clean up your inbox.
Organizing and Archiving Messages
You can organize your messages in a few ways. You can create new conversations, archive messages, and even create folders to categorize your messages. You can create a new conversation by simply typing in a new contact’s name or number in the Messages app.
Sending texts from your Mac with OS X Yosemite is super easy, especially if you’ve got your Control Center set up right. You can totally customize it to have your most used tools, like the one for sending messages, right at your fingertips.
Check out this guide on how to reorganize your Control Center so you can easily send texts from your Mac without having to hunt through menus. Once you’ve got your Control Center dialed in, you’ll be texting like a pro in no time!
This will create a new conversation thread that you can use to communicate with that person.To archive messages, you can simply click on the “Archive” button in the Messages app. This will move the message to your “Archived” folder. To create a folder, you can click on the “Folders” button in the Messages app and then select “New Folder.” You can then name the folder and drag and drop messages into it.
Deleting and Recovering Messages
Deleting messages is as simple as selecting the message and pressing the “Delete” key. Deleted messages will be moved to the “Trash” folder, where you can recover them if you need to. To recover a deleted message, you can simply open the “Trash” folder and drag and drop the message back into your “Messages” folder.
Searching for Messages
If you’re looking for a specific message, you can use the search bar in the Messages app. This will search through your messages for s or phrases. You can also search for messages by date or sender.You can use the search bar to find messages by:
- Typing in a or phrase
- Typing in a contact’s name or number
- Typing in a date
Security and Privacy
Using iMessage on your Mac to send and receive text messages introduces some security and privacy considerations. While iMessage is generally secure, it’s important to understand the potential risks and how to protect your information.
Protecting Your Text Messages
Protecting your text messages from unauthorized access is crucial. Here are some steps you can take:
- Enable Two-Factor Authentication: This adds an extra layer of security to your Apple ID, making it harder for someone to access your messages even if they know your password. To enable two-factor authentication, go to Apple ID settings on your Mac or iPhone and follow the instructions.
- Use a Strong Password: A strong password is essential for protecting your Apple ID. Avoid using easily guessable passwords like your name or birthday. A strong password includes a combination of uppercase and lowercase letters, numbers, and symbols.
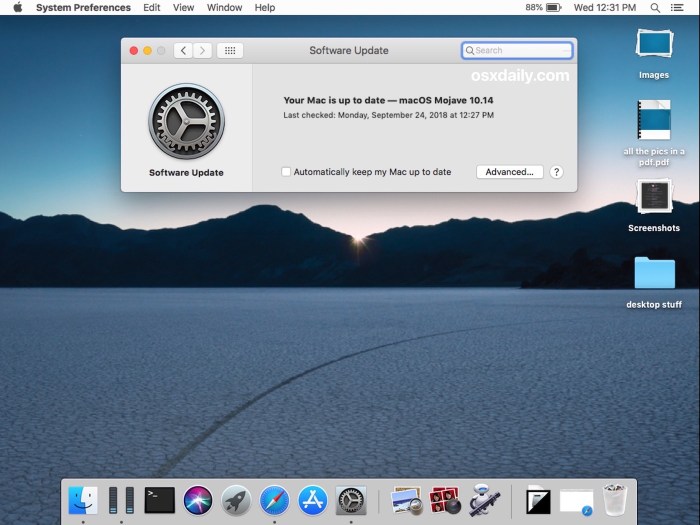
- Keep Your Software Updated: Apple regularly releases software updates that include security patches. Make sure your Mac and iPhone are running the latest versions of macOS and iOS to ensure you have the latest security features.
- Be Careful about Public Wi-Fi: Avoid sending sensitive information over public Wi-Fi networks. Public Wi-Fi can be less secure than your home network, making it easier for someone to intercept your messages. Consider using a VPN when connecting to public Wi-Fi.
Privacy Settings for iMessage
iMessage offers several privacy settings that allow you to control how your messages are shared and who can see them.
- Message Forwarding: You can choose which devices can forward your messages. This setting is important if you use multiple Apple devices. To manage message forwarding, go to Settings > Messages on your iPhone and tap on “Message Forwarding.”
- Read Receipts: Read receipts let senders know when you’ve read their messages. You can turn off read receipts for individual contacts or for all contacts. To disable read receipts, go to Settings > Messages on your iPhone and turn off “Send Read Receipts.”
- Share My Location: You can choose whether to share your location with others through iMessage. This setting can be useful for sharing your location with friends or family, but it’s important to be aware of the privacy implications. To manage location sharing, go to Settings > Privacy > Location Services on your iPhone and adjust the settings for iMessage.
Troubleshooting and Common Issues
It’s normal to run into a few bumps in the road when you’re first setting up text messaging on your Mac. Here are some common issues you might encounter and how to solve them.
iMessage Not Working
If you’re having trouble sending or receiving iMessages on your Mac, here are a few things to check:
- Make sure iMessage is turned on.In the Messages app, go to Messages > Preferences > Accounts, and make sure iMessage is checked.
- Verify your Apple ID is correct.Double-check that the Apple ID associated with your Mac is the same one you use on your iPhone.
- Check your internet connection.iMessage requires a stable internet connection to work.
- Restart your Mac and iPhone.Sometimes a simple restart can fix minor issues.
- Sign out and sign back into iMessage.In the Messages app, go to Messages > Preferences > Accounts, and sign out of iMessage. Then, sign back in using your Apple ID.
- Update your Mac and iPhone.Ensure you’re running the latest versions of macOS and iOS.
Text Messages Not Sending or Receiving
If you’re having trouble sending or receiving regular SMS text messages, here’s what you can do:
- Ensure your iPhone is connected to your Mac.Make sure your iPhone is unlocked and connected to the same Wi-Fi network as your Mac.
- Check your cellular data settings on your iPhone.Go to Settings > Cellular > Cellular Data and ensure Cellular Data is turned on.
- Restart your iPhone.This can sometimes resolve issues with your iPhone’s cellular connection.
- Contact your carrier.If none of the above solutions work, there might be an issue with your carrier’s network.
iMessage Not Syncing with iPhone
If the text messages on your Mac don’t match what’s on your iPhone, here are some steps to try:
- Make sure your iPhone and Mac are connected to the same iCloud account.Go to Settings > iCloud on your iPhone and ensure that Messages is enabled.
- Check your iCloud storage.If your iCloud storage is full, it can affect the syncing of iMessages.
- Turn off iMessage on your iPhone and Mac, then turn it back on.This can sometimes help to reset the syncing process.
Alternative Methods for Sending Texts
If iMessage is not working, you can still send text messages using other methods:
- Use a web-based messaging service.Services like WhatsApp, Facebook Messenger, and Telegram allow you to send text messages from your computer.
- Use a dedicated texting app.Several apps, such as TextFree, allow you to send and receive SMS text messages from your computer.
Additional Tips and Resources
You’ve learned how to send texts from your Mac using iMessage, but there are some additional tips and resources that can help you get the most out of this feature. Here’s a guide to help you optimize your texting experience on your Mac and find more information if needed.
Optimizing Your Texting Experience
There are a few things you can do to make texting on your Mac more convenient and efficient.
Sending texts from your Mac with OS X Yosemite is pretty sweet, but sometimes you need to take a break from the digital world and unplug. If you’re feeling overwhelmed by Amazon’s mass wireless sharing plans, you can always opt out by following the steps outlined here.
Once you’ve taken a moment to breathe, you can get back to sending texts from your Mac – just remember to take care of yourself and disconnect when you need to!
- Use keyboard shortcuts:MacOS offers keyboard shortcuts for many iMessage functions. For example, you can use Command + N to start a new conversation, Command + Enter to send a message, and Command + Shift + K to mute a conversation. Using keyboard shortcuts can speed up your texting process.
- Customize your notification settings:You can adjust how you receive notifications for new messages. You can choose to have notifications appear on your screen, play a sound, or both. You can also set specific notification settings for individual contacts.
- Use emoji and other features:iMessage has a wide variety of emoji, stickers, and other features you can use to personalize your messages. You can access these features by clicking the emoji button in the message compose window.
- Take advantage of group messaging:You can easily create group chats with multiple people. This can be useful for planning events, sharing information, or just staying in touch with a group of friends.
Apple Support Resources
If you have any questions or need further assistance, Apple provides extensive support resources.
- Apple Support Website:The Apple Support website has a wealth of information on a wide range of topics, including iMessage. You can search for specific articles or browse through categories to find what you need.
- Apple Support App:The Apple Support app is available for both iOS and macOS. This app allows you to access support articles, contact Apple support, and get help with troubleshooting issues.
- Apple Community Forums:The Apple Community Forums are a great place to connect with other Apple users and get help with issues. You can search for topics or start a new thread to ask a question.
Alternative Texting Apps
While iMessage is the default texting app on macOS, there are several alternative apps available.
- WhatsApp:WhatsApp is a popular messaging app that offers cross-platform compatibility. You can use WhatsApp to send text messages, make voice and video calls, and share files with friends and family.
- Telegram:Telegram is another popular messaging app that emphasizes privacy and security. Telegram offers end-to-end encryption for all messages, making it a good choice for sensitive communications.
- Signal:Signal is a privacy-focused messaging app that is known for its strong security features. Signal is a non-profit organization that is committed to protecting user privacy.
Concluding Remarks
Texting from your Mac with OS X Yosemite unlocks a whole new level of convenience and productivity. With the ability to send and receive messages directly from your computer, you can stay connected without constantly switching between devices. Whether you’re composing a quick message to a friend or managing a group chat, this feature streamlines your communication and allows you to focus on what matters most.
So, take advantage of this powerful tool and enjoy the ease of texting from your Mac!
Helpful Answers
Can I use iMessage on my Mac if I don’t have an iPhone?
No, you need an iPhone to use iMessage on your Mac. iMessage is an Apple service that relies on an Apple ID and is linked to your iPhone.
What if my iPhone and Mac are not on the same Wi-Fi network?
You can still use iMessage on your Mac even if your iPhone and Mac are not on the same Wi-Fi network, as long as your iPhone has cellular data or is connected to another Wi-Fi network. However, you may experience delays in message delivery.
Can I send SMS messages from my Mac?
No, iMessage on your Mac only allows you to send and receive messages to other Apple devices using iMessage. To send SMS messages, you’ll need to use a third-party app.
How do I block a number from sending me messages on my Mac?
You can block a number from sending you messages on your Mac by going to the Messages app, selecting the conversation with the blocked number, clicking on the “Details” button, and then selecting “Block this Caller”.