How To Take Solar Eclipse Photos With Iphone
How to take solar eclipse photos with iPhone? It’s a question many ask, especially when the celestial spectacle graces our skies. Capturing a solar eclipse isn’t just about pointing your phone at the sun; it’s about understanding the science, preparing your equipment, and knowing the right techniques to get the best shots.
From choosing the right iPhone model and camera settings to using solar filters and mastering composition, this guide will equip you with the knowledge and skills needed to capture stunning photos of this rare astronomical event.
Understanding Solar Eclipses

A solar eclipse occurs when the Moon passes between the Sun and Earth, blocking the Sun’s light from reaching Earth. This can happen because the Moon’s orbit around Earth is slightly tilted, so it doesn’t always line up perfectly with the Sun and Earth.
Snapping a sweet photo of the solar eclipse with your iPhone? Make sure you’ve got the right gear, like a solar filter, and don’t forget to check out your camera settings! You can also use a special app for even better results, but remember to keep your eyes protected.
Oh, and speaking of tools, if you’re using your Apple Pencil to edit your photos, you might need to swap out the tip for a fresh one – check out How to change your Apple Pencil tip for a quick tutorial.
Once you’ve got your gear and editing tools ready, you’ll be all set to capture some amazing eclipse pics!
When the Moon’s shadow falls on Earth, it creates a dark region called the umbra, where the Sun is completely blocked. Outside the umbra, a lighter region called the penumbra is created, where the Sun is partially blocked.
Types of Solar Eclipses
Solar eclipses can be categorized into three main types: total, partial, and annular.
- A total solar eclipse occurs when the Moon completely covers the Sun, creating a total blackout for a few minutes.
- A partial solar eclipse occurs when the Moon only partially covers the Sun, creating a crescent-shaped Sun.
- An annular solar eclipse occurs when the Moon is farther away from Earth, so it doesn’t completely cover the Sun. This leaves a bright ring of sunlight around the Moon, which is called the “ring of fire”.
Safety Tips for Observing Solar Eclipses
It is extremely dangerous to look directly at the Sun during a solar eclipse without proper eye protection. The Sun’s rays can cause serious eye damage, including blindness. Here are some safety tips to keep in mind:
- Never look directly at the Sun, even for a short period of time, without proper eye protection.
- Use certified solar eclipse glasses or handheld solar viewers that meet the ISO 12312-2 international safety standard.
- Do not use regular sunglasses, exposed film, or other homemade filters.
- If you are using a telescope or binoculars, make sure to use a certified solar filter that is specifically designed for this purpose.
- It is important to supervise children and ensure they are wearing proper eye protection.
Preparing Your iPhone
You’ve got the knowledge about solar eclipses, now it’s time to get your iPhone ready for the big event! We’ll cover the best iPhone models for capturing the celestial spectacle, the essential camera settings to use, and some handy apps that can help you take stunning photos.
iPhone Models for Solar Eclipse Photography
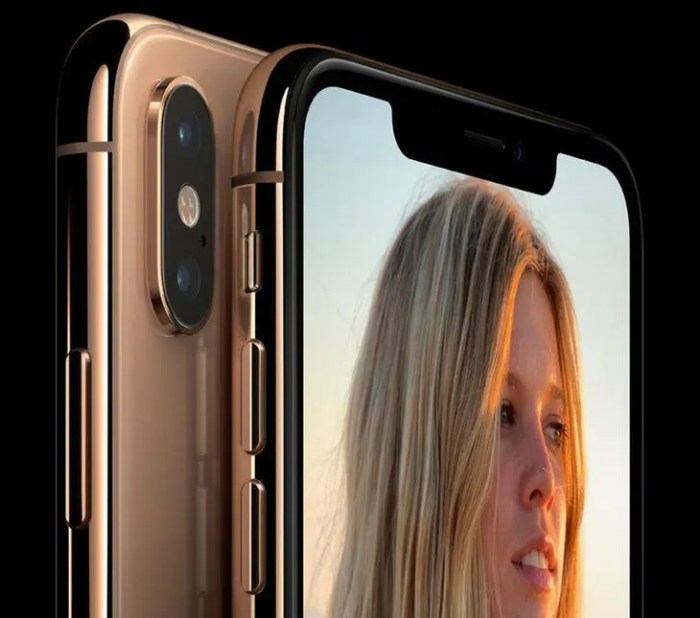
Choosing the right iPhone model can make a big difference in the quality of your eclipse photos. Here are some of the top contenders:
- iPhone 14 Pro Max:This model boasts a powerful 48MP main camera, which is perfect for capturing intricate details of the eclipse. Its advanced image processing capabilities also help to produce stunning images, even in challenging lighting conditions.
- iPhone 13 Pro Max:While not as powerful as the 14 Pro Max, the 13 Pro Max still offers excellent image quality with its 12MP main camera. Its advanced features like ProRes video recording and Photographic Styles make it a solid choice for capturing the eclipse.
- iPhone 12 Pro Max:This model is still a capable option for eclipse photography. Its 12MP main camera, coupled with features like Night Mode and Smart HDR, can deliver impressive results.
iPhone Camera Settings for Solar Eclipses
To capture the eclipse in all its glory, you’ll need to adjust your iPhone’s camera settings. Here’s a guide to the essential settings:
- Exposure:Adjust the exposure to ensure the eclipse is properly exposed, without being too bright or too dark. You can use the exposure slider in the camera app to fine-tune this setting.
- Focus:Tap on the screen to focus on the eclipse. You can also use the manual focus option for more precise control.
- White Balance:Set the white balance to “cloudy” or “shade” to compensate for the low-light conditions. This will help to produce more natural colors in your photos.
- Resolution:Select the highest resolution available for your iPhone model. This will ensure you capture the maximum amount of detail.
Recommended Apps for Solar Eclipse Photography
While the native iPhone camera app is powerful, there are some dedicated apps that can enhance your eclipse photography experience. Here are a few recommendations:
- SkySafari:This app provides a comprehensive guide to the night sky, including information on eclipses. It can help you find the best time and location to capture the eclipse.
- ProCamera:This app offers advanced camera controls, including manual focus, exposure, and white balance. It also provides RAW capture capabilities, which give you more flexibility in post-processing.
- Adobe Lightroom Mobile:This powerful editing app allows you to adjust exposure, contrast, color, and other aspects of your eclipse photos. It also offers a wide range of presets and filters to enhance your images.
Using Solar Filters
You absolutely need to use a solar filter when photographing a solar eclipse with your iPhone. Looking directly at the sun, even during an eclipse, can cause serious eye damage. A solar filter will protect your eyes and your iPhone’s camera lens.
Types of Solar Filters
Solar filters are designed to block out harmful ultraviolet and infrared radiation, allowing only a small amount of visible light to pass through. Here’s a comparison of the most common types:
- Solar Glasses:These are inexpensive and readily available. They are made of a special type of plastic that blocks out most of the sun’s rays. However, they are not designed for use with cameras and may not provide adequate protection for your iPhone’s lens.
- Solar Film:This is a thin sheet of material that can be attached to your iPhone’s lens. It is often used by photographers to create a more professional-looking solar filter. Solar film is available in different densities, with higher densities blocking out more light.
However, it can be difficult to attach securely to your iPhone.
- Dedicated Solar Filters:These are designed specifically for cameras and offer the best protection for your iPhone’s lens. They are typically made of glass or metal and have a threaded mount that attaches to your iPhone’s lens. Dedicated solar filters are more expensive than other types of filters, but they are worth the investment if you are serious about photographing solar eclipses.
Composition and Framing
Okay, so you’ve got your solar filter and your iPhone ready. Now, let’s talk about making your eclipse photos look awesome! Composition is key to creating a visually appealing image, and framing helps you tell a story.
Framing Techniques
Framing is all about using elements in your scene to draw attention to the eclipse. Think of it like a picture frame. Here are a few techniques to try:
- Silhouettes: A classic way to frame the eclipse is to use a silhouette of a tree, building, or other object. This creates a dramatic effect and adds depth to your photo.
- Leading Lines: Look for natural lines in your scene, like roads, fences, or even the branches of a tree, that lead your eye towards the eclipse. This helps create a sense of movement and direction.
- Rule of Thirds: Imagine your iPhone screen divided into a grid of nine equal squares. Place the eclipse at one of the points where the lines intersect. This creates a more balanced and visually interesting composition.
Capturing the Surrounding Environment
Don’t forget about the environment around you! The eclipse will be a spectacular sight, but it’s also a great opportunity to capture the reactions of people around you.
- People Watching: Include a few people in your photo to show the scale of the eclipse and the sense of wonder it evokes.
- Landscapes: If you’re in a beautiful location, try to capture the eclipse against a backdrop of mountains, forests, or other natural elements. This adds context and makes your photo more meaningful.
Capturing the Eclipse
You’ve got your solar filters, your iPhone is ready, and you’re in the path of totality. Now, it’s time to capture the eclipse! The best time to take photos during the eclipse is during the partial phases and the moments leading up to and after totality.
This is when the sun is partially obscured, creating a dramatic silhouette against the sky.
Photographing the Different Stages of the Eclipse
The eclipse progresses through several distinct stages, each offering unique photographic opportunities.
- First Contact:The moment the moon begins to cover the sun. This is a great time to capture the crescent shape of the sun as it starts to be eclipsed.
- Partial Eclipse:The moon continues to cover the sun, creating a variety of interesting shapes and patterns. Experiment with different compositions and exposures to capture the evolving crescent.
- Second Contact:Totality begins, and the sun is completely obscured by the moon. This is the most dramatic moment of the eclipse, and it’s a great time to capture photos of the corona, the sun’s outer atmosphere.
- Totality:The moon completely covers the sun, and the sky darkens significantly. This is the best time to capture photos of the corona, prominences, and other solar features. Use a long exposure to capture the faint details of the corona.
- Third Contact:Totality ends, and the sun begins to reappear. This is another dramatic moment, and it’s a great time to capture photos of the crescent shape of the sun as it emerges from behind the moon.
- Fourth Contact:The moon completely leaves the sun, and the eclipse is over. This is a great time to capture photos of the sun returning to its normal shape.
Things to Consider While Capturing the Eclipse
Here are a few things to keep in mind as you capture the eclipse:
- Exposure:Use a fast shutter speed to freeze the motion of the moon and sun. You may need to adjust your exposure settings to get the right balance of light and shadow.
- Focus:Use manual focus to ensure that the sun is sharp in your photos. You can also use the focus lock feature on your iPhone to ensure that the sun remains in focus.
- Composition:Experiment with different compositions to capture the eclipse in a variety of ways. Try including the landscape or other elements in your photos to add context.
- Safety:Never look directly at the sun without proper eye protection. Always use a solar filter to protect your eyes and your iPhone’s camera lens.
Editing Your Photos
Okay, you’ve captured some awesome shots of the solar eclipse. Now it’s time to give them that extra pop with some editing! Think of it as putting the finishing touches on your masterpiece.Editing your solar eclipse photos can really enhance their impact and bring out the details of the celestial event.
It’s like adding the perfect seasoning to your culinary creation – it can make all the difference!
Adjusting Brightness, Contrast, and Color Balance
First things first, you’ll want to make sure your photos are well-lit and have good contrast. Think of it like finding the perfect balance between light and shadow in your image.You can use your iPhone’s built-in editing tools or a third-party app to adjust the brightness, contrast, and color balance of your photos.
The goal is to make the eclipse stand out, showcasing its details and colors.* Brightness:This controls the overall lightness or darkness of your photo. You might need to brighten up a photo taken in low light or darken one that’s too bright.
Contrast
This adjusts the difference between the lightest and darkest areas of your photo. Increasing contrast can make the eclipse appear more defined and dramatic.
Color Balance
This lets you adjust the overall color temperature of your photo. A warmer color balance might make the eclipse appear more reddish or orange, while a cooler balance might make it appear more bluish.
Think of adjusting brightness, contrast, and color balance like fine-tuning your photo’s mood and atmosphere.
Creating Stunning Visual Effects
Now, let’s get creative and add some extra pizzazz to your photos! There are tons of cool effects you can use to make your eclipse photos even more captivating.Here are some popular techniques:* Cropping:This allows you to remove unwanted areas of your photo and focus on the eclipse.
It’s like framing your artwork.
Sharpening
This enhances the details and edges of your photo, making the eclipse appear more crisp and defined.
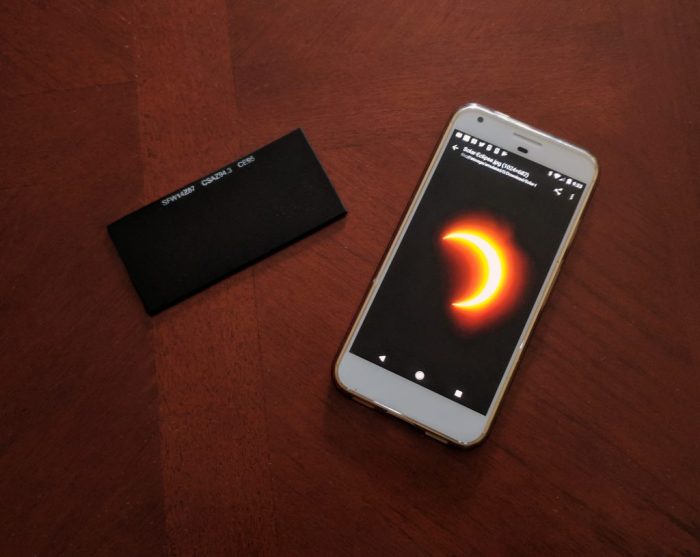
Taking solar eclipse photos with your iPhone is a cool way to capture the moment, but you’ll need to protect your eyes and your phone’s camera. A simple DIY solar filter made from cardboard and a piece of solar viewing film will do the trick.
Speaking of tech, did you know you can get a native M1 Mac version of Microsoft OneDrive? Check out this guide to learn how. Once you’ve got your eclipse photos, you can upload them to OneDrive for safekeeping and easy sharing.
Just remember to use your solar filter for the actual eclipse, okay? Safety first!
Saturation
This controls the intensity of the colors in your photo. Increasing saturation can make the colors of the eclipse appear more vibrant and bold.
Black and White
Sometimes, a simple black and white conversion can create a dramatic and timeless look. It can highlight the shapes and textures of the eclipse.
Vignette
This darkens the edges of your photo, drawing attention to the center where the eclipse is. It creates a sense of depth and focus.
Experiment with different effects and see what works best for your photos. Remember, there’s no right or wrong way to edit, so have fun with it!
Sharing Your Photos

You’ve captured some amazing shots of the solar eclipse with your iPhone. Now, it’s time to share your photos with the world and let everyone experience the awe-inspiring spectacle. Here’s how you can share your eclipse photos online:
Sharing Your Eclipse Photos Online
There are several platforms where you can share your solar eclipse photos. These platforms allow you to reach a wide audience and connect with other astronomy enthusiasts. Here’s a step-by-step guide to sharing your photos:
- Choose a platform:Popular options include Instagram, Facebook, Twitter, Flickr, and Reddit. Consider the audience you want to reach and the features offered by each platform.
- Edit your photos:Enhance the colors, contrast, and brightness of your photos to make them visually appealing. You can use built-in iPhone editing tools or explore third-party apps like Snapseed or Lightroom Mobile.
- Write an engaging caption:Briefly describe the experience of witnessing the solar eclipse and add details about the location and time of the event. You can also mention the camera and equipment used, if you wish.
- Use relevant hashtags:Hashtags help your photos get discovered by others interested in solar eclipses and astronomy. Use a combination of general and specific hashtags, such as #solareclipse, #eclipse2024, #astronomy, #iphonephotography, and #space.
- Tag relevant accounts:Tagging accounts related to astronomy, space exploration, or photography can increase the visibility of your photos and connect you with a wider community.
Best Platforms for Sharing
Here are some of the best platforms for sharing your solar eclipse photos:
- Instagram:Instagram is a popular platform for sharing visual content, making it ideal for showcasing your eclipse photos. Its visual-first approach and strong community of photographers make it a great choice for reaching a wide audience.
- Facebook:Facebook is a social networking platform where you can share your photos with friends and family. It’s a great option for connecting with people you know and sharing your experiences with them.
- Twitter:Twitter is a microblogging platform that’s perfect for sharing quick updates and images. You can use Twitter to share your eclipse photos and engage with other users interested in astronomy.
- Flickr:Flickr is a photo-sharing platform known for its high-quality image hosting and community features. It’s a great place to share your eclipse photos with other photographers and astronomy enthusiasts.
- Reddit:Reddit is a social news and discussion website with a wide range of communities, including r/astronomy and r/photography. You can share your eclipse photos on these subreddits and connect with other users who share your interests.
Engaging Captions and Hashtags
To create engaging captions and hashtags, consider the following tips:
- Tell a story:Share your personal experience of witnessing the solar eclipse, including your emotions, observations, and any interesting facts about the event.
- Use descriptive language:Use vivid language to paint a picture of the eclipse and capture the beauty and wonder of the celestial event.
- Ask questions:Encourage interaction by asking questions about the eclipse or inviting others to share their own experiences.
- Use relevant hashtags:Research popular hashtags related to solar eclipses, astronomy, and photography to maximize the visibility of your photos.
- Tag relevant accounts:Tag accounts related to astronomy, space exploration, or photography to connect with a wider audience.
Troubleshooting

Taking solar eclipse photos with your iPhone can be a fun and rewarding experience, but sometimes things don’t go as planned. Don’t worry, most common issues have easy fixes! Here are some tips to troubleshoot common problems you might encounter.
Blurry Photos
Blurry photos are a common problem in eclipse photography, especially when using a smartphone. There are a few reasons why your photos might be blurry.
- Shaky Hands:Even a slight movement can create blur, especially when using a long exposure.
- Incorrect Focus:Your iPhone might not be focusing properly on the eclipse, resulting in a blurry image.
- Slow Shutter Speed:A slow shutter speed can capture movement, causing blur, especially when the eclipse is moving across the sky.
To prevent blurry photos, use a tripod or a stable surface to hold your iPhone. Make sure you’re focusing on the eclipse by tapping on the screen where you want the focus to be. You can also use a faster shutter speed to freeze the movement of the eclipse.
Overexposed Photos
Overexposed photos are common when photographing the sun, as it’s incredibly bright. The iPhone’s camera might be struggling to capture the detail in the eclipse, leading to a washed-out image.
- Incorrect Exposure Settings:Your iPhone might be overexposing the photo due to automatic settings.
- Lack of Proper Solar Filter:A solar filter is essential for protecting your eyes and your phone’s camera sensor from the sun’s harmful rays. Without a proper filter, the camera sensor can be damaged, and your photos will be overexposed.
To avoid overexposed photos, use a solar filter specifically designed for eclipse photography. This filter will block out most of the sun’s light, allowing you to capture a clear image of the eclipse. You can also adjust the exposure settings on your iPhone to compensate for the brightness of the sun.
Under-Exposed Photos
Under-exposed photos can occur when using a solar filter. This can be frustrating, especially if you’re trying to capture the details of the eclipse.
- Too Dark a Solar Filter:Some solar filters block out too much light, making it difficult to capture a well-exposed image.
- Incorrect Exposure Settings:Your iPhone might be under-exposing the photo due to the dark filter.
To avoid under-exposed photos, use a solar filter that’s specifically designed for eclipse photography. It’s important to choose a filter that allows enough light to pass through so that you can capture a well-exposed image. You can also adjust the exposure settings on your iPhone to compensate for the darkness of the filter.
Technical Issues
Sometimes, you might encounter technical problems with your iPhone during eclipse photography. Here are some common issues and how to troubleshoot them.
- Camera App Freezing:The camera app might freeze due to overheating or software issues. Try closing the app and restarting it. If the problem persists, restart your iPhone.
- Phone Overheating:The iPhone’s camera sensor can overheat, especially during prolonged exposure to the sun. Allow the phone to cool down before taking more photos.
- Storage Full:Make sure you have enough storage space on your iPhone to take photos and videos. Delete unnecessary files to free up space.
Additional Tips
Okay, you’ve got the basics down, but let’s talk about how to really up your solar eclipse photography game! These tips will help you capture unique and memorable shots of this celestial event.
Creative Approaches to Photographing Solar Eclipses, How to take solar eclipse photos with iPhone
Here are some ideas to make your eclipse photos stand out from the crowd:
- Silhouettes:Capture silhouettes of people, trees, or buildings against the eclipsed sun. This technique creates a dramatic and artistic effect, highlighting the shapes and Artikels of the foreground subjects against the darkened sky.
- Time-Lapse Photography:Use your iPhone’s time-lapse feature to create a stunning visual record of the eclipse’s progression. Set your iPhone on a tripod and capture a series of photos over a set period. When played back, you’ll see the moon’s shadow gradually move across the sun, creating a captivating time-lapse video.
- Reflections:Look for reflective surfaces like water, windows, or even sunglasses to capture the eclipse reflected in them. This technique adds a unique perspective and creates interesting compositions.
The Importance of Patience and Practice
Patience is key when photographing a solar eclipse. The event might be brief, but it’s worth taking the time to experiment and find the best angles and compositions. Don’t be afraid to try different techniques and see what works best for you.
Practice beforehand with the solar filter attached to your iPhone to get a feel for the settings and how the camera reacts.
Exploring Different Perspectives and Angles
Don’t be afraid to get creative with your angles. Instead of just pointing your iPhone directly at the sun, try shooting from different perspectives. Look for interesting foreground elements to include in your shots, such as trees, buildings, or even people.
Capturing a solar eclipse with your iPhone is super cool, but you need to be careful! Always use proper solar filters to protect your eyes and your phone’s camera. If you’re looking for a way to play PC games on your Mac, you can check out How to play PC games on your Mac with Steam Link , but remember to take a break from the screen and get outside to see that eclipse!
This will add depth and context to your photos.
Concluding Remarks: How To Take Solar Eclipse Photos With IPhone

With a little preparation, the right tools, and a bit of practice, you can capture breathtaking photos of a solar eclipse with your iPhone. So, grab your phone, put on your solar viewing glasses, and get ready to witness and document this awe-inspiring event.
Remember, it’s about more than just the photos – it’s about experiencing the wonder of a solar eclipse firsthand.
FAQ Overview
What iPhone models are best for solar eclipse photography?
Generally, newer iPhone models with better cameras and processing power will offer the best results. The iPhone 14 Pro, iPhone 13 Pro, and iPhone 12 Pro are excellent choices.
Can I use my iPhone’s regular camera lens for eclipse photography?
No, you absolutely need a solar filter to protect your eyes and your phone’s camera sensor from damage. Never look directly at the sun, even during an eclipse, without proper eye protection.
What are some good apps for solar eclipse photography?
There are many apps that can help you with eclipse photography. Some popular options include: ProCamera, NightCap, and SkySafari.
How do I edit my solar eclipse photos?
Use editing apps like Snapseed, Lightroom Mobile, or VSCO to adjust brightness, contrast, and color balance. You can also experiment with different filters to enhance the visual impact of your photos.