How To Rearrange Photos In Ios 11
How to rearrange photos in iOS 11 can seem like a simple task, but with the many features and organizational tools available, it can be a little overwhelming at first. This guide will walk you through the process of rearranging your photos, from basic selection and dragging to more advanced techniques like using “Moments” and “Years.” Whether you’re trying to organize your photo library chronologically, by theme, or simply want to get rid of those embarrassing selfies, this guide will help you master the art of photo organization.
The Photos app in iOS 11 is a powerful tool for managing your photo library. It offers a variety of ways to organize your photos, including albums, moments, years, and collections. You can also edit your photos, hide them, and even share them with others.
In this guide, we’ll explore the various features of the Photos app and provide tips for rearranging your photos efficiently.
Understanding the Photo App in iOS 11
The Photos app in iOS 11 is your central hub for all your images and videos. It’s designed to be intuitive and user-friendly, allowing you to easily organize, edit, and share your memories. The app features a clean and modern interface that makes it easy to find the photos you’re looking for.
Navigating the Photo Library
The Photos app is organized into several sections, each with its own purpose. The main sections include:
- Library:This is where all your photos and videos are stored. You can view your photos in different ways, such as by date, by album, or by people. The Library section is your primary view for accessing all your photos.
- Albums:Albums allow you to group photos together based on specific themes or events. You can create your own albums or use the pre-defined albums like “Selfies” or “Screenshots”.
- Moments:This section groups photos and videos together based on their location and time. It’s a great way to relive memories from specific trips or events.
- Years:This section displays your photos and videos in a chronological order, grouped by year. It’s a great way to see how your photography has evolved over time.
- People:This section uses facial recognition technology to identify and group photos of people. You can easily find photos of specific individuals.
- Places:This section uses location data to group photos and videos taken at specific places. It’s a great way to revisit your travels or explore different parts of your city.
You can navigate through your Photo library using several methods:
- Swipe left or right:This allows you to scroll through your photos and videos in the Library, Albums, Moments, Years, People, and Places sections.
- Tap on a photo or video:This will open the photo or video in full-screen mode, allowing you to view it in detail. You can also use the controls at the bottom of the screen to zoom, rotate, or share the photo or video.
- Tap on the “Albums” tab:This will open the Albums view, where you can see all your albums. You can tap on an album to view its contents.
- Tap on the “Moments” tab:This will open the Moments view, where you can see your photos and videos grouped by location and time. You can tap on a moment to view its contents.
- Tap on the “Years” tab:This will open the Years view, where you can see your photos and videos grouped by year. You can tap on a year to view its contents.
- Tap on the “People” tab:This will open the People view, where you can see photos of people you’ve identified. You can tap on a person to view their photos.
- Tap on the “Places” tab:This will open the Places view, where you can see photos and videos grouped by location. You can tap on a place to view its contents.
Selecting Photos for Rearrangement

To rearrange your photos, you’ll first need to select them. iOS 11 provides a few different methods for selecting photos, allowing you to pick individual photos, or multiple photos at once.
Selecting Multiple Photos
There are a few ways to select multiple photos in the Photos app. You can use the selection tools, or use gestures to select multiple photos. The selection tools are located at the top of the screen and allow you to select multiple photos in a variety of ways.
The most common way to select multiple photos is by using the selection tools.
Rearranging photos in iOS 11 is a breeze, just like picking out your favorite Messi highlights. You can easily shuffle your photos to your liking, and if you want to catch the latest Messi action, check out How to watch soccer legend Lionel Messi on Apple TV+.
Once you’ve got your photos organized, you can easily share them with your friends and family, just like sharing the latest Messi goal with your soccer buddies.
- To select multiple photos, tap on the photo you want to select, then tap on the “Select” button at the top right corner of the screen. This will bring up a selection bar at the bottom of the screen.
You can then tap on the photos you want to select.
- Once you’ve selected the photos you want, you can tap on the “Done” button at the top right corner of the screen to exit the selection mode.
Using Gestures
You can also select multiple photos by using gestures.
- To select multiple photos, tap on the photo you want to select, then swipe your finger across the screen. This will select all of the photos that your finger passes over.
- You can also use a two-finger tap to select multiple photos. Tap on the photo you want to select, then tap on the screen with two fingers. This will select all of the photos in the current view.
Selecting Photos from Different Albums
You can also select photos from different albums.
- To select photos from different albums, tap on the “Albums” tab at the bottom of the screen.
- Then, tap on the album you want to select photos from.
- You can then use the selection tools or gestures to select the photos you want.
Rearranging Photos within an Album
Now that you’ve got your photos selected, it’s time to rearrange them within your album. iOS 11 provides two main ways to do this: drag-and-drop and the “Move” option.
Rearranging Photos by Drag and Drop
The drag-and-drop method is the most intuitive way to rearrange photos. Simply tap and hold on a photo to select it, then drag it to your desired location. You’ll see a preview of where the photo will be placed as you move it.
Release your finger to drop the photo into its new position.
Using the “Move” Option to Relocate Photos
If you want more control over the positioning of your photos, you can use the “Move” option. Here’s how it works:
- Tap on the photo you want to move.
- In the bottom menu, tap the “Move” icon, which looks like three horizontal lines with an arrow pointing to the right.
- Select the album where you want to move the photo.
- Tap “Done” to confirm the move.
Rearranging Large Numbers of Photos
Rearranging a few photos is easy, but what about when you have hundreds or even thousands of photos to move around? Here are a few tips to make the process smoother:
- Use the “Select All” option:To select all photos in an album, tap the “Select All” button in the top right corner of the screen. This allows you to move multiple photos at once.
- Create a temporary album:If you’re making major changes to your photo library, create a temporary album to hold the photos you’re working with. This way, you can experiment with different arrangements without affecting your main albums.
- Take advantage of the “Move” option:For large-scale rearrangements, the “Move” option can be more efficient than drag-and-drop. You can select multiple photos and move them to a different album in one go.
Rearranging Photos Across Albums
You can move photos between albums to create a more organized photo library. This lets you keep related photos together, even if they were originally saved in different albums. You can also create new albums for specific themes or events.
Moving Photos Between Albums
You can move photos between albums by dragging and dropping them.
- Open the Photos app and select the album that contains the photo you want to move.
- Tap the photo to open it in full-screen mode.
- Tap the Share button (the square with an arrow pointing up) in the bottom left corner.
- Tap the “Add to Album” button.
- Select the album you want to move the photo to.
- Tap the “Add” button.
Creating New Albums, How to rearrange photos in iOS 11
You can create new albums to organize your photos by theme, event, or any other criteria.
- Open the Photos app and tap the “Albums” tab at the bottom of the screen.
- Tap the “+” button in the top right corner.
- Enter a name for the new album.
- Tap the “Create” button.
Deleting Photos From Albums
You can delete photos from albums to remove them from your photo library.
So you wanna rearrange your photos in iOS 11? It’s pretty easy, just tap and hold on a photo and drag it where you want it to go. But if you want to stay up-to-date on your favorite Twitter accounts, you should check out How to get alerts from your favorite Twitter accounts.
Once you’ve got those notifications set up, you can focus on making your photo library look awesome.
- Open the Photos app and select the album that contains the photo you want to delete.
- Tap the photo to open it in full-screen mode.
- Tap the Trash button in the bottom left corner.
- Tap the “Delete Photo” button to confirm.
Using the “Favorites” Feature
The “Favorites” album in iOS 11 allows you to quickly access your most important photos. This feature is particularly helpful for keeping track of cherished memories, important documents, or any images you need to easily locate.
Marking Photos as Favorites
Marking photos as favorites is a simple process. To mark a photo as a favorite, follow these steps:
- Open the Photos app and navigate to the photo you want to mark as a favorite.
- Tap the heart icon located in the bottom-right corner of the screen. The heart icon will turn solid red indicating that the photo is now a favorite.
Accessing and Rearranging Photos within the “Favorites” Album
The “Favorites” album acts as a dedicated space for your marked photos.
- To access the “Favorites” album, open the Photos app and tap the “Albums” tab located at the bottom of the screen.
- Scroll through the list of albums and select “Favorites.” This will open the album containing all the photos you’ve marked as favorites.
- To rearrange photos within the “Favorites” album, simply tap and hold a photo, then drag it to the desired location. This allows you to reorder the photos within the album according to your preference.
Tips for Using Favorites to Quickly Access Important Photos
Favorites can be an efficient tool for managing your photo library. Here are some tips for effectively using the “Favorites” feature:
- Mark photos of important events or milestones as favorites. This allows you to quickly access them for sharing or reminiscing.
- Use favorites to create a visual index of important documents or reference images. This helps you quickly locate them when needed.
- Consider marking photos as favorites that you want to use as wallpapers or profile pictures. This simplifies the process of finding them later.
Creating and Using “Moments”

“Moments” in iOS 11 are a powerful feature that helps you organize your photos into meaningful groups based on time and location. Think of them as automatically created albums that capture specific events or trips, making it easier to find and relive those memories.
How “Moments” Work
“Moments” are automatically generated by iOS 11, using sophisticated algorithms to analyze your photos and group them together based on the date and location they were taken. Photos taken within a specific timeframe and geographical proximity are grouped into a “Moment.” For example, photos taken on a weekend trip to the beach would likely be grouped into a single “Moment,” even if you took photos on different days or at different times during your trip.
Managing “Moments”
You can easily manage your “Moments” by viewing, editing, or deleting them.
- Viewing “Moments”:You can access your “Moments” from the “Photos” app by tapping the “Albums” tab and scrolling down to the “Moments” section. Each “Moment” is displayed with a cover photo and a title that indicates the time and location of the photos within it.
- Editing “Moments”:You can edit the name, cover photo, and location of a “Moment” by tapping on it and then tapping the “Edit” button. You can also add or remove photos from a “Moment” by tapping the “Select” button and then choosing the photos you want to add or remove.
- Deleting “Moments”:You can delete a “Moment” by tapping on it and then tapping the “Delete” button. Keep in mind that deleting a “Moment” will also delete all of the photos within it.
Utilizing “Years” and “Collections”: How To Rearrange Photos In IOS 11
The Photos app in iOS 11 offers two additional views for organizing your photos: “Years” and “Collections”. These views provide alternative ways to browse and navigate your photo library beyond the traditional album structure. “Years” and “Collections” offer a unique way to revisit memories and explore your photos in a more thematic and chronological way.
Rearranging photos in iOS 11 is a breeze, especially if you’re familiar with the basics of photo management. But if you’re looking to access those photos from your Mac, you might need to set up Samba. Check out this guide on How to Install Samba Into Mac OS X Lion?
to get started. Once you have Samba running, you can easily transfer photos from your iPhone to your Mac and even create shared photo albums with your friends.
Let’s explore how these views function and how you can rearrange your photos within them.
Rearranging Photos in “Years”
The “Years” view presents your photos chronologically, grouped by the year they were taken. This provides a visual timeline of your photographic journey, allowing you to easily navigate through your memories by year.You can rearrange photos within a specific “Year” by following these steps:
- Tap on the “Years” tab at the bottom of the screen.
- Select the year you want to rearrange.
- Tap and hold on a photo to enter “Edit Mode”.
- Drag and drop photos to their desired positions within the year.
- Tap “Done” to save the changes.
Rearranging Photos in “Collections”
“Collections” offer a thematic approach to organizing photos. The Photos app automatically generates “Collections” based on similar themes, such as “Selfies,” “Pets,” or “Travel.” This allows you to quickly access photos related to specific interests or events.You can rearrange photos within a “Collection” using the same drag-and-drop method used in “Years”.
- Tap on the “Collections” tab at the bottom of the screen.
- Select the collection you want to rearrange.
- Tap and hold on a photo to enter “Edit Mode”.
- Drag and drop photos to their desired positions within the collection.
- Tap “Done” to save the changes.
Utilizing the “Edit” Feature
The “Edit” feature in the Photos app gives you the power to make adjustments to your photos, enhancing their appearance and correcting imperfections. You can rotate, crop, and adjust the brightness, contrast, and other aspects of your photos.
Rotating and Cropping Photos
To rotate and crop a photo, tap the “Edit” button in the bottom right corner of the screen. You’ll see a variety of editing tools, including the “Rotate” and “Crop” tools.
- To rotate a photo, tap the “Rotate” button. Each tap rotates the photo 90 degrees clockwise.
- To crop a photo, tap the “Crop” button. You can then drag the corners of the cropping frame to adjust the size and shape of the crop. You can also use the “Aspect Ratio” tool to choose a specific aspect ratio for your crop, such as 4:3 or 16:9.
Adjusting Photo Brightness and Contrast
To adjust the brightness and contrast of a photo, tap the “Adjust” button in the editing toolbar. You’ll see a variety of sliders that you can use to make adjustments.
- The “Brightness” slider controls the overall brightness of the photo.
- The “Contrast” slider controls the difference between the light and dark areas of the photo.
- The “Exposure” slider controls the overall exposure of the photo.
- The “Highlights” slider controls the brightness of the highlights in the photo.
- The “Shadows” slider controls the brightness of the shadows in the photo.
These sliders can be adjusted independently to fine-tune the photo’s appearance.
Working with Hidden Photos

Sometimes you might want to keep certain photos private or just out of sight. iOS 11 provides a feature to hide photos, effectively keeping them from your main photo library but still accessible if needed. This is particularly useful if you want to keep sensitive photos away from prying eyes or just want to declutter your photo library.
Hiding Photos
To hide photos, open the Photos app and navigate to the album containing the photos you want to hide. Tap “Select” at the top right corner, then tap the photos you want to hide. Once you’ve selected the photos, tap the “Share” button (the square with an arrow pointing up) in the bottom left corner.
From the share sheet, scroll down and tap “Hide”. A confirmation message will appear, confirming that the selected photos have been hidden.
Accessing Hidden Photos
Hidden photos are not accessible through the main photo library. To access them, open the “Albums” tab in the Photos app and scroll down to the “Hidden” album. This album will contain all your hidden photos. You can view, share, or delete these photos as you normally would.
Rearranging Hidden Photos
Rearranging photos within the “Hidden” album works similarly to rearranging photos in any other album. You can select multiple photos and drag them to their desired positions. You can also use the “Edit” button to delete, share, or make other changes to the hidden photos.
Using Third-Party Apps
While iOS 11’s Photos app offers a robust set of features, you might find that third-party apps provide additional functionalities or a more tailored approach to photo management. These apps often offer advanced editing tools, organizational features, or integration with other services, making them valuable additions to your photo workflow.
Popular Third-Party Apps
Third-party photo management apps come in various flavors, each catering to different needs and preferences. Here are some popular options:
- Adobe Lightroom Mobile:A powerful mobile version of Adobe’s renowned desktop photo editing software. It provides extensive editing tools, including RAW file support, and seamless integration with Adobe Creative Cloud. Lightroom Mobile allows you to organize your photos into collections, apply presets, and sync your edits across devices.
- Google Photos:Google’s free photo storage and sharing service offers unlimited storage for photos and videos at a reduced resolution. It features automatic photo backup, facial recognition, and a smart search function. Google Photos also offers a variety of editing tools and the ability to create photo books and albums.
- VSCO:Known for its film-inspired filters and editing tools, VSCO offers a stylish and intuitive interface. It allows you to create and share your own presets, explore curated content from other users, and manage your photo library with albums and collections.
- Snapseed:A versatile photo editing app developed by Google, Snapseed offers a wide range of editing tools, including selective adjustments, cropping, and blemish removal. It also provides a variety of filters and the ability to create custom presets.
Comparing and Contrasting Features
Third-party apps often excel in specific areas, offering features that might be lacking in the native Photos app.
- Editing Tools:Adobe Lightroom Mobile, Snapseed, and VSCO are known for their comprehensive editing capabilities, including RAW file support, advanced color adjustments, and creative filters.
- Organization:Google Photos stands out with its automatic photo backup, facial recognition, and smart search, making it easy to find specific photos.
- Sharing and Collaboration:Apps like Google Photos and VSCO facilitate seamless photo sharing with friends and family.
Integrating Third-Party Apps with the Photos App
Integrating third-party apps with the Photos app can enhance your photo management workflow.
- Import and Export:Many apps allow you to import photos from your Photos library or export edited photos back into the Photos app. This enables you to utilize the strengths of both platforms.
- Sharing and Collaboration:Some apps allow you to share photos directly from the Photos app or use the Photos app to share photos from other apps. This simplifies the process of sharing your photos with others.
Troubleshooting Common Issues
Rearranging photos in iOS 11 can be a breeze, but occasionally you might encounter some hiccups. Let’s explore common issues and how to fix them.
Photos Not Rearranging
Sometimes, you might try to rearrange photos, but they don’t seem to move. Here’s a breakdown of potential reasons and solutions:
- Check for Updates:Make sure your iOS is up-to-date. Outdated software can lead to unexpected behaviors. Go to Settings > General > Software Update and install any available updates.
- Force Quit and Relaunch:If the Photos app seems frozen or unresponsive, force quit the app and relaunch it. This can often resolve temporary glitches.
- Restart Your Device:A simple restart can often clear up minor software issues. Press and hold the power button until the “slide to power off” slider appears, then slide it to turn off your device. Once off, press and hold the power button again to turn it back on.
- Check for iCloud Issues:If you’re using iCloud Photo Library, ensure it’s working correctly. Go to Settings > Photos and check if iCloud Photo Library is enabled. If it’s disabled, enable it. If it’s already enabled, make sure your internet connection is stable.
- Try a Different Album:Sometimes, a specific album might be acting up. Try rearranging photos in a different album to see if the issue persists.
Final Review

Rearranging photos in iOS 11 is a breeze once you understand the various features and options available. From basic drag-and-drop to using “Moments” and “Years” to organize your photos, there’s a method for every preference. With a little practice, you’ll be able to organize your photo library like a pro, ensuring your precious memories are easily accessible and beautifully displayed.
FAQ Section
How do I delete a photo from an album?
To delete a photo from an album, tap the photo to open it, then tap the trash icon in the bottom left corner. You can also select multiple photos and delete them at once.
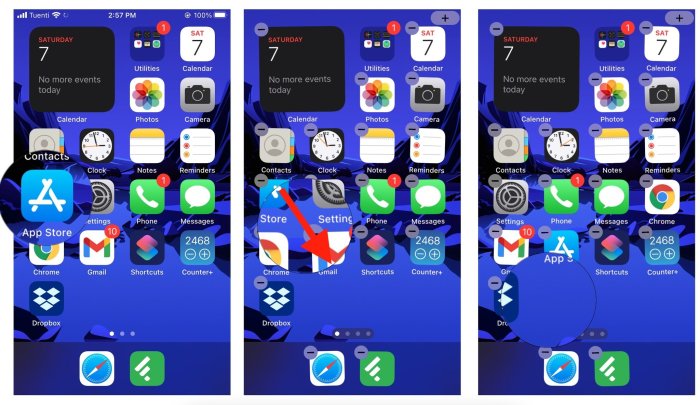
Can I rearrange photos within “Moments”?
While you can’t directly rearrange photos within a “Moment,” you can add or remove photos to adjust its content. You can also create a new album and move photos from a “Moment” to that album for more precise organization.
What are “Hidden” photos and how do I access them?
“Hidden” photos are photos that you’ve chosen to hide from your main photo library. To access hidden photos, go to the Albums tab and scroll down to the “Hidden” album. You can then rearrange or delete these photos as needed.