Pro Tip: Snap A Screenshot Of Your Macbook Pro’S Touch Bar
Pro tip: Snap a screenshot of your MacBook Pro’s Touch Bar, you’ll be able to capture that elusive Touch Bar and its dynamic content, which can be incredibly helpful for troubleshooting, documentation, and even just showing off your cool customizations.
Whether you’re a techie trying to solve a problem or just a creative soul wanting to share your unique Touch Bar setup, knowing how to take a screenshot is a must.
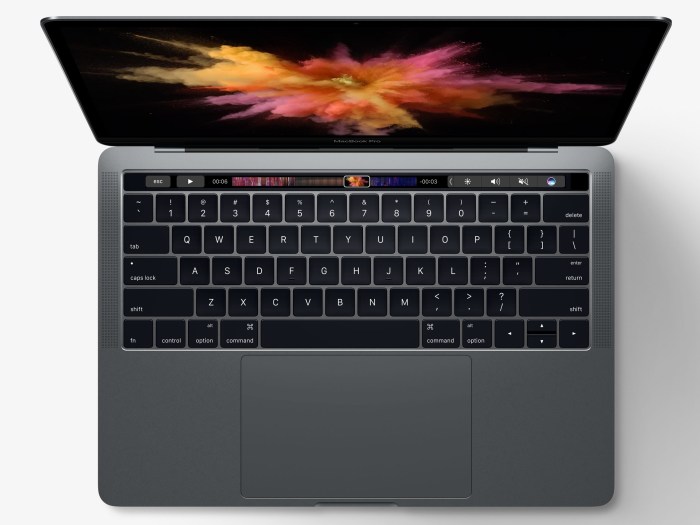
The Touch Bar, a sleek strip of touch-sensitive display, has become a signature feature of the MacBook Pro. It’s not just a pretty face though; it dynamically adapts to the app you’re using, offering quick access to relevant tools and controls.
But capturing the ever-changing content of the Touch Bar can be a bit tricky, especially when you need to show someone else exactly what’s going on.
The Touch Bar
The Touch Bar is a unique feature found on select MacBook Pro models, replacing the traditional function keys with a customizable, context-sensitive display. It’s a thin, OLED touchscreen strip situated above the keyboard, offering a dynamic interface that adapts to the active application.
Touch Bar Design and Functionality
The Touch Bar is a responsive, multi-touch display that reacts to your touch gestures. It features a variety of interactive elements, including buttons, sliders, and touch-sensitive controls, allowing you to perform actions directly on the Touch Bar instead of navigating through menus or using keyboard shortcuts.
The Touch Bar’s design allows for seamless integration with various applications, providing quick access to relevant controls and features.
Touch Bar Customization
The Touch Bar is highly customizable, allowing users to personalize its functionality based on their needs and preferences. Users can create custom Touch Bar controls for specific applications or tasks. Apple also provides a range of pre-configured Touch Bar controls for popular apps like Safari, Mail, and Pages.
Benefits of Using a Touch Bar
Using a Touch Bar offers several advantages:
- Increased Productivity:The Touch Bar provides quick access to frequently used tools and functions, streamlining workflows and improving productivity.
- Context-Sensitive Controls:The Touch Bar adapts to the active application, offering relevant controls and features that change based on the task at hand. This eliminates the need to search through menus or remember keyboard shortcuts.
- Enhanced User Experience:The Touch Bar provides a more intuitive and interactive user experience, making it easier to perform common tasks and access frequently used features.
Drawbacks of Using a Touch Bar
Despite its benefits, the Touch Bar has some drawbacks:
- Learning Curve:Users may need some time to learn how to use the Touch Bar effectively, as it requires a different approach to interacting with the computer.
- Limited Customization:While the Touch Bar is customizable, some users may find its customization options limited compared to other input methods.
- Potential for Distractions:The Touch Bar’s dynamic nature can sometimes be distracting, especially for users who prefer a more traditional interface.
Why Capture a Screenshot of the Touch Bar?
The Touch Bar, a customizable strip of touch-sensitive controls located above the keyboard on certain MacBook Pro models, offers a unique and dynamic way to interact with your Mac. But what happens when you need to share or document how the Touch Bar is configured, or if you encounter an issue with its functionality?
That’s where capturing a screenshot of the Touch Bar comes in handy. Taking a screenshot of your Touch Bar allows you to preserve a visual representation of its current state, which can be incredibly valuable in various situations.
Troubleshooting and Support Requests
Capturing a screenshot of the Touch Bar is particularly helpful when seeking assistance with troubleshooting issues. When reporting a problem to Apple Support or a third-party developer, providing a screenshot of the Touch Bar can offer a clear visual representation of the issue.
This can help support personnel quickly identify the problem and provide more accurate guidance. For example, if the Touch Bar isn’t displaying the expected controls or if it’s behaving erratically, a screenshot can demonstrate the exact behavior you’re experiencing.
Sharing Touch Bar Customization
If you’ve customized your Touch Bar with specific controls and settings, a screenshot can be a great way to share your setup with others. This is especially useful for sharing tips and tricks or showcasing a unique configuration. You can easily share the screenshot with friends, colleagues, or online communities to demonstrate your customization and inspire others.
For instance, you might capture a screenshot of your Touch Bar with custom shortcuts for productivity apps or a specific workflow.
Okay, so you’ve mastered the art of taking a screenshot of your MacBook Pro’s Touch Bar, but what about the dust bunnies and lint hiding in your phone’s nooks and crannies? Don’t worry, you can easily get rid of that grime with a few simple tricks, like using a microfiber cloth and a bit of rubbing alcohol.
Check out this guide for a detailed cleaning routine: How to clean your dirty, lint-stuffed iPhone. Now, back to that Touch Bar screenshot, did you know you can actually capture a specific section of it? Just select the area you want and boom, you’ve got your screenshot.
Methods for Taking Touch Bar Screenshots
Capturing a screenshot of your MacBook Pro’s Touch Bar is a great way to document the appearance of the Touch Bar for a specific application or task. This is especially helpful when sharing instructions, troubleshooting issues, or showcasing custom Touch Bar configurations.
Let’s explore the methods available for taking Touch Bar screenshots.
Using Built-in macOS Tools
The easiest way to capture a screenshot of your Touch Bar is using the built-in macOS tools. This method utilizes keyboard shortcuts and provides a straightforward approach to capturing the Touch Bar display. Here’s how to do it:
- Press Command + Shift + 6simultaneously. This shortcut is specifically designed to capture the Touch Bar’s contents.
- The screenshot will be saved as a PNG file in your Picturesfolder, specifically within the Screenshotssubfolder.
Using Third-Party Apps
While macOS offers a native solution for capturing the Touch Bar, third-party apps can provide more flexibility and advanced features. These apps allow for fine-grained control over the screenshot process, enabling you to customize settings like file format, resolution, and even the inclusion of the entire screen along with the Touch Bar.Here are some popular options:
- Snagit:A powerful screen capture tool that offers extensive editing features, including annotations, cropping, and resizing. It also allows you to capture specific regions of the screen, including the Touch Bar, and save them in various formats.
- Lightshot:A lightweight and user-friendly screen capture tool that lets you capture the entire screen, a selected region, or the Touch Bar. It also offers basic editing features and allows you to upload your screenshots directly to the web for sharing.
- Monosnap:A feature-rich screen capture tool that provides options for capturing the Touch Bar, the entire screen, or a selected region. It offers advanced editing features, including annotations, blurring, and adding text. It also allows you to capture videos of your screen and Touch Bar activities.
Screen Recording Software
Screen recording software can capture the Touch Bar along with the entire screen, providing a more comprehensive recording of your interactions. This is particularly helpful for creating tutorials or demonstrations where you want to showcase the Touch Bar’s dynamic behavior.Popular screen recording software options include:
- QuickTime Player:macOS’s built-in screen recording tool. While it primarily focuses on capturing the entire screen, you can adjust the recording area to include the Touch Bar. However, it doesn’t offer dedicated Touch Bar capture features.
- OBS Studio:A free and open-source screen recording software that provides extensive customization options for capturing the Touch Bar. It allows you to adjust the recording area, frame rate, and resolution, and even add overlays and transitions.
- Camtasia:A professional screen recording software that offers a wide range of features, including advanced editing capabilities, screen capture, and Touch Bar recording. It provides options for capturing the Touch Bar, the entire screen, or a selected region, and allows you to create high-quality video recordings.
Interpreting Touch Bar Screenshots
Touch Bar screenshots offer a visual representation of the interactive elements and functionalities available on your MacBook Pro’s Touch Bar. Analyzing these screenshots can provide insights into the context-specific tools and features available for various applications and tasks.
Understanding Touch Bar Screenshot Content
Understanding the layout and elements within a Touch Bar screenshot is crucial for interpreting its content. The Touch Bar is typically divided into distinct sections, each representing a specific function or set of tools. The sections are visually separated by lines or spaces, making them easily identifiable.
- System Icons:These icons are generally found on the left side of the Touch Bar and represent system-level functionalities, such as volume control, brightness adjustment, and Siri activation. These icons are typically consistent across applications and provide quick access to core system settings.
- Application-Specific Controls:The central portion of the Touch Bar is usually dedicated to application-specific controls, reflecting the current active application. These controls can vary widely depending on the application, ranging from basic editing tools in a photo editor to advanced commands in a professional software suite.
- Contextual Menus:These menus often appear on the right side of the Touch Bar and provide context-sensitive options based on the user’s current activity or selection. For example, when selecting text in a document, the Touch Bar might display options for cutting, copying, and pasting, or when editing a photo, it might display options for cropping, rotating, or applying filters.
Identifying and Interpreting Functionalities
By understanding the layout and elements within a Touch Bar screenshot, you can identify and interpret specific functionalities. Here’s a breakdown of common Touch Bar elements and their functionalities:
- Icons:Icons are visual representations of specific actions or tools. Familiar icons, such as the volume control icon, are easily recognizable. For less familiar icons, refer to the application’s documentation or context clues within the screenshot to understand their functionality.
- Text Labels:Text labels provide clear descriptions of the functionalities represented by icons or buttons. These labels can be particularly helpful for understanding the purpose of less familiar icons or complex functions.
- Sliders:Sliders allow for continuous adjustment of settings, such as volume levels, brightness, or zoom levels. The position of the slider within the screenshot indicates the current setting.
- Buttons:Buttons represent discrete actions or commands. The button’s text label or icon provides clues about its functionality. For example, a button labeled “Play” would likely initiate playback of media.
- Dropdown Menus:Dropdown menus provide a list of options for a specific function. The screenshot will typically show the selected option, providing insight into the current setting or choice.
Utilizing Touch Bar Screenshots
Touch Bar screenshots are a powerful tool for documenting, explaining, and illustrating how the Touch Bar functions in different applications and scenarios. These screenshots can be utilized in a variety of ways to enhance communication and understanding, particularly when discussing or explaining the functionality of the Touch Bar.
Pro tip: Snap a screenshot of your MacBook Pro’s Touch Bar. It’s a quick and easy way to capture those dynamic controls and share them with friends. Need a visual guide on how to use your Apple Watch? Check out Here’s everything the Apple Watch buttons do.
You’ll be surprised at how many features those little buttons pack. Then, go back to your MacBook Pro and try out those Touch Bar shortcuts!
Tutorials and Documentation
Touch Bar screenshots are essential for creating clear and concise tutorials and documentation. They provide visual representations of the Touch Bar’s interface, allowing users to understand the layout, functionality, and interaction of the various controls.
- For example, a tutorial on using the Touch Bar for photo editing in an application like Photoshop could include screenshots that show the specific tools and controls available on the Touch Bar for different tasks, such as adjusting brightness, contrast, or applying filters.
- Similarly, documentation for a new application that utilizes the Touch Bar extensively can incorporate screenshots to illustrate the various functions and interactions available to users.
Presentations and Reports
Incorporate Touch Bar screenshots into presentations or reports to enhance visual appeal and understanding. These screenshots can illustrate the dynamic nature of the Touch Bar and its role in enhancing user experience.
- For example, a presentation on the future of user interface design could use Touch Bar screenshots to demonstrate the potential of contextual controls and personalized interactions.
- A report on the effectiveness of the Touch Bar in improving productivity could include screenshots that highlight the specific tools and functions available in different applications.
Educational Purposes
Touch Bar screenshots can be valuable for educational purposes, particularly in fields like computer science, user interface design, and human-computer interaction.
- These screenshots can be used to demonstrate the concepts of context-sensitive interfaces, dynamic controls, and user-centered design.
- For example, a computer science course on operating systems could use Touch Bar screenshots to illustrate the concepts of system calls and user-level interactions.
Touch Bar Customization and Screenshots

The Touch Bar, a customizable strip on your MacBook Pro, offers a dynamic interface that adapts to your needs. However, this customization can affect the content captured in Touch Bar screenshots. Understanding how Touch Bar customization impacts screenshots is crucial for accurately interpreting and utilizing them.
Touch Bar Customization and Screenshot Content
Customizing your Touch Bar involves adding, removing, or rearranging controls, affecting the content displayed on the Touch Bar and consequently, its screenshot. The Touch Bar’s dynamic nature means its content changes based on the active application or context. Therefore, a screenshot of the Touch Bar might capture different controls depending on the application you are using or the task you are performing.
For example, the Touch Bar in Safari might display navigation controls, while in Photoshop, it might display editing tools.
Examples of Touch Bar Configurations and Screenshots, Pro tip: Snap a screenshot of your MacBook Pro’s Touch Bar
Here are some examples of Touch Bar configurations and their resulting screenshots:
- Default Configuration:The default Touch Bar configuration includes basic controls like volume, brightness, and keyboard brightness. A screenshot of the default Touch Bar would capture these controls.
- Custom Configuration:You can customize the Touch Bar by adding controls like frequently used emojis, app shortcuts, or system controls. A screenshot of a custom Touch Bar would capture these added controls.
- Application-Specific Configuration:Many applications offer their own Touch Bar customizations. For example, in Final Cut Pro, the Touch Bar might display video editing tools, while in Keynote, it might display presentation controls. A screenshot of the Touch Bar in these applications would capture the application-specific controls.
Importance of Consistency in Touch Bar Customization for Screenshot Clarity
Consistent Touch Bar customization is crucial for clear and understandable Touch Bar screenshots.
Maintaining consistent Touch Bar customization across different applications or contexts ensures that your screenshots accurately reflect the intended functionality and are easily interpretable.
For example, if you consistently use a custom Touch Bar configuration with a specific set of controls, your screenshots will always capture those controls, making them consistent and predictable. This consistency is especially important if you are sharing your Touch Bar screenshots with others, as it ensures that they understand the context and functionality of the captured controls.
Troubleshooting Touch Bar Issues

Touch Bar screenshots can be a powerful tool for diagnosing and troubleshooting problems with your MacBook Pro’s Touch Bar. By capturing a visual representation of the Touch Bar’s current state, you can easily identify any inconsistencies, missing elements, or unexpected behavior.
This information can be invaluable for understanding the root cause of the issue and finding a solution.
Using Touch Bar Screenshots to Identify Common Issues
Touch Bar screenshots can help you identify various common Touch Bar issues. For example, you can easily spot problems like:
- Missing or Incorrect Icons:If certain icons are missing from the Touch Bar, or if they are displayed incorrectly, a screenshot can help you identify the specific issue and determine if it’s a software bug or a hardware malfunction.
- Touch Bar Unresponsiveness:If the Touch Bar is not responding to your touch, a screenshot can show if the Touch Bar is completely blank or if it’s displaying a static image, indicating a possible hardware issue.
- Touch Bar Display Problems:If the Touch Bar is displaying distorted or blurry icons, or if the display is flickering or showing artifacts, a screenshot can capture these issues and help you diagnose the problem.
- Incorrect Touch Bar Functionality:If the Touch Bar is not performing as expected, such as showing the wrong controls or not responding to your touch in the way you anticipate, a screenshot can help you identify the specific behavior and understand why it’s happening.
Sharing Touch Bar Screenshots with Support Teams
Sharing Touch Bar screenshots with Apple Support or other technical support teams can significantly expedite the troubleshooting process. A screenshot provides a clear visual representation of the issue, allowing the support team to understand the problem without requiring lengthy descriptions.
This visual evidence can help them quickly identify the cause of the issue and suggest appropriate solutions.
Touch Bar in Context: Pro Tip: Snap A Screenshot Of Your MacBook Pro’s Touch Bar
The Touch Bar, a sleek, interactive display embedded in the MacBook Pro’s keyboard, isn’t just a novelty feature; it’s an integral part of the MacBook Pro’s user experience. It seamlessly integrates with various macOS functions and apps, offering a dynamic and context-sensitive interface that enhances productivity and creativity.The Touch Bar’s interaction with other MacBook Pro elements elevates the overall user experience.
It complements the trackpad, keyboard, and display, creating a unified and intuitive workflow. This integration enhances the functionality of each component, making the MacBook Pro a more powerful and versatile tool.
Touch Bar’s Integration with Other MacBook Pro Features
The Touch Bar interacts with other MacBook Pro features in several ways:
- Keyboard Shortcuts:The Touch Bar displays context-sensitive shortcuts for the active app, allowing users to access frequently used functions quickly. For instance, in Safari, the Touch Bar might display shortcuts for navigating forward and backward, refreshing the page, and bookmarking a website.
- Trackpad Interaction:The Touch Bar can enhance the trackpad’s functionality by providing additional controls. For example, when editing an image in Photoshop, the Touch Bar can display tools like brushes, layers, and adjustment sliders, allowing for precise and intuitive image manipulation.
- Display Extension:The Touch Bar can extend the display area by providing additional controls or information. In apps like Final Cut Pro, the Touch Bar can display a timeline scrubber, allowing users to navigate through video clips with greater precision.
Comparison with Other User Interface Innovations
The Touch Bar can be compared to other user interface innovations, such as touchscreens, voice assistants, and gesture controls. Each of these technologies aims to enhance user interaction with devices.
- Touchscreens:While touchscreens offer direct interaction with the screen, the Touch Bar provides a more focused and context-sensitive experience. It integrates seamlessly with the keyboard and trackpad, creating a more natural and efficient workflow.
- Voice Assistants:Voice assistants, like Siri, provide hands-free control over devices. However, the Touch Bar offers a more visual and tactile approach, allowing users to see and interact with the controls directly.
- Gesture Controls:Gesture controls, like swiping and pinching on a trackpad, provide a more intuitive way to interact with devices. However, the Touch Bar offers a more customizable and context-sensitive approach, providing specific controls tailored to the active app.
The Future of the Touch Bar

The Touch Bar, Apple’s innovative input method, has been a topic of discussion since its introduction. While it initially faced criticism for its limited functionality, the Touch Bar has evolved over time, offering a more streamlined user experience. However, the future of the Touch Bar remains uncertain, with several factors potentially influencing its trajectory.The Touch Bar’s future depends on its ability to adapt to emerging technologies and user needs.
While it currently provides a convenient way to access commonly used functions, the potential for future development and application is vast.
Integration with Emerging Technologies
The Touch Bar could be integrated with emerging technologies like augmented reality (AR) and virtual reality (VR) to create immersive user experiences. Imagine using the Touch Bar to interact with virtual objects in an AR environment or to control VR applications with intuitive gestures.
This integration could significantly enhance user engagement and open up new possibilities for interaction.For example, imagine using the Touch Bar to manipulate objects in a virtual world, adjusting their size, color, or position with precise control. This could revolutionize how we interact with virtual environments, making them more intuitive and engaging.
Expanded Functionality
The Touch Bar could be expanded to include new features and functionality, catering to a wider range of applications and user needs. For instance, it could be used for more complex tasks like coding, graphic design, or even musical composition.For example, imagine using the Touch Bar as a virtual keyboard for coding, allowing developers to input code snippets with ease.
Pro tip: Snap a screenshot of your MacBook Pro’s Touch Bar to capture those quick settings or app shortcuts you use all the time. Speaking of quick fixes, if you’re struggling to get calls through on your iPhone, you might want to check out How to activate AT&T Wi-Fi Calling on your iPhone.
It’s a lifesaver when you’re in a dead zone. Once you’ve got that sorted, go back to your MacBook Pro and start snapping those Touch Bar screenshots!
Or, imagine using it to manipulate design elements in graphic design software, adjusting colors, shapes, and textures with intuitive gestures.
Customization and Personalization
The Touch Bar could become even more customizable, allowing users to personalize its functionality based on their specific needs and preferences. This could involve creating custom control panels for specific applications or tailoring the Touch Bar to different workflows.For example, imagine customizing the Touch Bar to display frequently used keyboard shortcuts for a specific application, making it easier and faster to access those functions.
Or, imagine creating a custom control panel for a specific game, allowing you to quickly adjust game settings or access in-game menus.
Touch Bar and Accessibility
The Touch Bar, a customizable strip of touch-sensitive controls on MacBook Pro models, offers a unique opportunity to enhance accessibility for users with disabilities. By adapting the Touch Bar’s functionality, it can be tailored to individual needs, making it a valuable tool for improving user experience and inclusivity.
Touch Bar Customization for Accessibility
The Touch Bar’s adaptability allows for customization to address various accessibility needs. For example, users with visual impairments can benefit from features like:
- Larger text and icons: The Touch Bar can display larger text and icons, making it easier for users with low vision to read and interact with controls.
- High-contrast themes: Dark mode or high-contrast themes can be applied to the Touch Bar, enhancing visibility for users with visual impairments.
- Voice control: Users can use voice commands to control the Touch Bar, eliminating the need for physical interaction.
Users with motor impairments can also benefit from Touch Bar customizations such as:
- Simplified controls: The Touch Bar can be customized to provide access to essential functions with fewer taps or gestures.
- One-handed operation: The Touch Bar can be configured to be operated with one hand, making it accessible for users with limited hand mobility.
- Alternative input methods: Users can use alternative input methods like eye tracking or head movements to control the Touch Bar.
Wrap-Up
From documenting your custom Touch Bar setup to sharing a tricky error with tech support, mastering the art of taking Touch Bar screenshots can be a real game-changer. So, next time you need to capture that dynamic strip of magic, don’t hesitate to grab a screenshot.
It’s a simple trick that can save you a lot of time and frustration. And who knows, you might even impress your friends with your tech prowess.
Frequently Asked Questions
How do I know if my MacBook Pro has a Touch Bar?
If your MacBook Pro was released after 2016, it likely has a Touch Bar. You can check by looking at the top of the keyboard – if there’s a narrow, black strip above the keys, that’s the Touch Bar.
What are some other uses for Touch Bar screenshots?
Besides troubleshooting and documentation, Touch Bar screenshots can be used for educational purposes, like creating tutorials or visual aids for presentations. You can even share your unique Touch Bar customizations with others!