Plug Your Guitar Into Your Iphone And Ipad With This Diy Irig
Plug Your Guitar into your iPhone and iPad with this DIY iRig, and unlock a world of musical possibilities! Tired of lugging around bulky amps and pedals? This project lets you record and practice guitar anywhere, anytime, using the convenience of your iOS devices.
Forget expensive interfaces; with a few basic components and some DIY ingenuity, you can build your own iRig and access a universe of guitar apps, amp simulations, and effects.
This guide will walk you through every step, from gathering the necessary parts to connecting your guitar and recording your first track. We’ll cover the essential components, step-by-step instructions, and troubleshooting tips, making this project accessible even for beginners. Get ready to unleash your creativity and take your guitar playing to the next level, all with a simple DIY iRig.
The iRig for Guitarists

The iRig is a small, portable device that allows guitarists to plug their instrument directly into their iPhone, iPad, or computer. This opens up a world of possibilities for guitarists, enabling them to record, practice, and perform in ways that were previously impossible.
Traditional guitar amplification methods, like using an amplifier or a PA system, can be bulky, expensive, and inconvenient. They require carrying heavy equipment, setting up complex systems, and often involve dealing with feedback issues.
The History of the iRig
The iRig was first introduced by IK Multimedia in 2010. The original iRig was a simple device that allowed guitarists to connect their instrument to their iPhone or iPad using a 1/4-inch jack. Since then, IK Multimedia has released several updated versions of the iRig, each with new features and improvements.
These include the iRig 2, which offers improved sound quality and a more durable design, and the iRig HD 2, which features a high-quality preamp and a built-in tuner.
Connecting Your Guitar: Plug Your Guitar Into Your IPhone And IPad With This DIY IRig
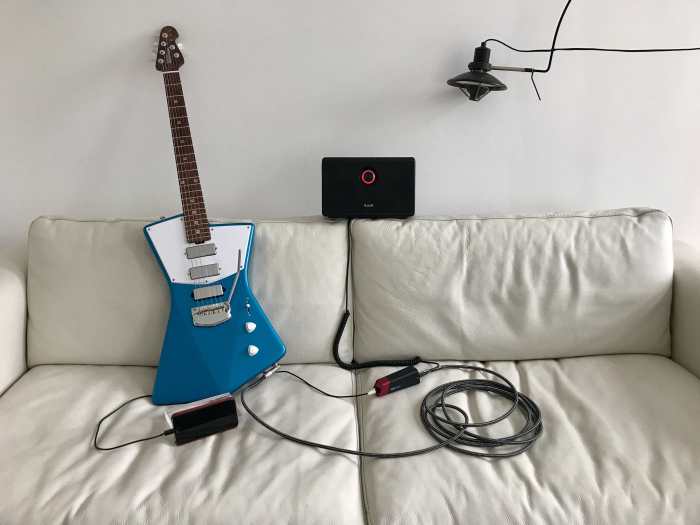
Connecting your guitar to your DIY iRig is a straightforward process that opens up a world of possibilities for recording and playing music on your iPhone or iPad. The connection itself is simple, but understanding the different cable types and how to adjust the input gain for optimal sound is crucial for achieving a clear and professional-sounding recording.
Guitar Cable Compatibility
Different guitar cables are designed for different purposes, and choosing the right one for your DIY iRig is important. Here are the most common types of guitar cables and their compatibility:
- Instrument Cable (TS):The most common type of guitar cable, with a standard 1/4-inch mono plug on each end. These cables are compatible with most guitar outputs and the DIY iRig’s input.
- Balanced Cable (TRS):These cables have a 1/4-inch stereo plug on one end and a 1/4-inch mono plug on the other. They are often used for microphones but can also be used for guitars. While not as common, they can be used with the DIY iRig if it has a TRS input.
- USB Cable:Some guitars have built-in USB connections, which allow you to directly connect to your computer or iPad. This eliminates the need for a separate guitar cable, but it’s important to check if your guitar supports this feature.
Adjusting Input Gain
The input gain controls the signal strength of your guitar as it enters the DIY iRig. Setting the gain correctly is essential for getting a clear and balanced sound without distortion.
- Too Low:If the input gain is set too low, the signal will be weak, resulting in a quiet and possibly distorted sound.
- Too High:If the input gain is set too high, the signal will be strong, leading to clipping and a distorted sound.
- Optimal Setting:To find the optimal gain setting, start with the gain knob turned down all the way. Slowly increase the gain while playing your guitar, listening for a clean signal without any distortion. The goal is to find the point where the signal is strong enough to be heard clearly without clipping.
It’s always a good idea to experiment with different gain settings to find the best sound for your specific guitar and playing style.
Recording with Your iPhone or iPad

The iRig unlocks a world of recording possibilities with your iPhone or iPad. You can easily capture your guitar ideas, create demos, and practice with backing tracks – all with the convenience of your mobile device.
Recording Apps for iOS Devices, Plug Your Guitar into your iPhone and iPad with this DIY iRig
Many recording apps are available for iOS devices, each with unique features and functionalities. Here’s a breakdown of some popular options:
- GarageBand: Apple’s free app offers a user-friendly interface with a wide range of virtual instruments, audio effects, and recording tools. It’s ideal for beginners and those who want to create basic tracks quickly.
- Amplitube: This app from IK Multimedia is designed specifically for guitarists, providing a wide selection of virtual amps, pedals, and effects. It’s perfect for those who want to experiment with different tones and create professional-sounding recordings.
- BandLab: This free app is a powerful multi-track recording studio that offers a wide range of features, including virtual instruments, audio effects, and collaboration tools. It’s a great choice for those who want to create more complex arrangements and work with other musicians.
Comparing Recording App Features
| App | Features | Price |
|---|---|---|
| GarageBand | Virtual instruments, audio effects, multi-track recording, basic mixing and mastering | Free |
| Amplitube | Virtual amps, pedals, and effects, realistic tone modeling, guitar-specific features | Paid (with free version available) |
| BandLab | Virtual instruments, audio effects, multi-track recording, collaboration tools, cloud storage | Free (with paid subscription option) |
Recording Guitar Tracks
Recording your guitar with the iRig is simple. Connect your guitar to the iRig, launch your chosen recording app, and start playing. You can record single tracks, layer multiple takes, and experiment with different effects and virtual amps.
Many apps offer real-time monitoring, allowing you to hear your guitar through the app’s output while recording.
Creating Demos
To create demos, you can record multiple tracks, such as guitar, vocals, and drums, using your iPhone or iPad. You can then use the app’s mixing and mastering tools to create a polished final product. Many apps offer features like loop recording and automatic beat detection, making it easy to create professional-sounding demos without extensive technical knowledge.
Practice Sessions
The iRig is also a valuable tool for practice sessions. You can record yourself playing along with backing tracks or use the app’s built-in metronome to improve your timing. Many apps offer features like slow-down playback and loop recording, allowing you to analyze your playing and focus on specific sections.
Amp Simulation and Effects

Amp simulation is a technology that replicates the sound of real-world guitar amplifiers using software or hardware. It’s essential for guitar recording because it allows you to achieve a wide range of tones without needing to lug around a heavy amplifier.
Plugging your guitar into your iPhone or iPad can open up a whole new world of possibilities for practicing, recording, and even performing. If you’re looking for a way to print out your guitar tabs or sheet music, you can easily do so from your iPad or iPhone by following the instructions on this helpful website: How To Print From Your iPad or iPhone.
Once you’ve got your printed music, you can start jamming out with your guitar and your iRig!
With amp simulation, you can experiment with different amplifier models, speaker cabinets, and effects, all within the confines of your iPhone or iPad.
So, you wanna plug your guitar into your iPhone or iPad, right? That’s awesome! But before you get started, you might want to check out how to make and use Memoji stickers without Face ID – it’s super fun! Then, once you’ve got your Memoji game on point, you can rock out with your guitar on your iPhone or iPad, and maybe even make a sick little music video using those custom stickers.
Get creative!
Popular Amp Simulation Apps
Amp simulation apps offer a wide variety of amplifier models, effects, and features. These apps allow you to create professional-quality guitar recordings using your iPhone or iPad.
- AmpliTube CSby IK Multimedia is a popular amp simulation app that offers a wide variety of amplifier models, effects, and recording features. It features a diverse selection of amps, from classic Fender and Marshall models to modern high-gain amps. AmpliTube CS also includes a range of effects, including overdrive, distortion, delay, and reverb, allowing you to fine-tune your sound.
- GarageBandis a free app that comes pre-installed on iPhones and iPads. While it’s primarily known for its music production capabilities, GarageBand also includes a selection of guitar amp models and effects. It provides a basic set of amp and effect options, suitable for experimenting with different guitar sounds.
- BIAS FX 2by Positive Grid is another popular amp simulation app known for its realistic amp models and extensive effects library. It features a vast collection of amps, from vintage classics to modern high-gain amps, and offers a comprehensive range of effects.
Want to jam on your iPhone or iPad without buying expensive gear? A DIY iRig can be your solution, and you can even customize it to fit your needs! Speaking of customization, you might want to check out This shortcut mutes iPhone audio when you enter Do Not Disturb , which can be super helpful if you’re recording and don’t want your phone ringing while you’re in the zone.
Back to the DIY iRig, you can find tons of tutorials online to get you started, and there’s even a cool community of people who share their own builds and tips.
BIAS FX 2 allows you to customize your tone in detail by adjusting individual amp settings, speaker cabinet choices, and microphone positions.
Using Amp Simulation and Effects to Enhance Guitar Sounds
Amp simulation and effects can be used to create a variety of guitar sounds, from classic rock and blues to modern metal and experimental sounds.
“Amp simulation apps allow you to explore a vast sonic landscape without the limitations of physical equipment.”
For example, you can use an amp simulation app to create a classic rock sound by selecting a Fender Twin Reverb amplifier model and adding a touch of overdrive and delay. For a heavier sound, you can choose a Marshall JCM800 amplifier model and add distortion and a heavy fuzz pedal.
For a more ambient sound, you can experiment with reverb and delay effects.
Performance and Live Use
The iRig is more than just a recording tool; it can be your gateway to performing live with your iPhone or iPad. Imagine the possibilities of using your favorite amp sims and effects on stage, adding a whole new dimension to your live sound.
Connecting to a PA System
Connecting your iRig to a PA system is simple and versatile. Here’s how:* Direct Connection:The iRig has a 1/4″ output jack, allowing you to plug directly into a PA system’s input. This is the most straightforward method.
Using an Audio Interface
For more advanced setups, you can connect the iRig to a separate audio interface, which provides additional features like multiple outputs, microphone inputs, and digital connectivity.
Using a DI Box
A DI box (Direct Injection) can be used to convert the iRig’s output to a balanced signal, suitable for long cable runs and professional audio setups.
Optimizing for Live Performance
- Monitor Your Sound:Use headphones or in-ear monitors to ensure you can hear your guitar signal clearly, even in a loud environment.
- Latency Management:Minimizing latency is crucial for a smooth live performance. Choose apps with low latency settings and ensure your iPhone or iPad has enough processing power.
- Power Management:Use a power bank or external battery to keep your device charged during extended performances.
- Backup Plan:Always have a backup plan in case your device malfunctions. Consider using a backup instrument or having a physical amp as a failsafe.
Closing Notes
With a DIY iRig, you’re not just building a piece of gear, you’re opening a gateway to a world of musical possibilities. Imagine recording your ideas on the go, experimenting with different amps and effects, and even sharing your music with the world, all from the convenience of your iPhone or iPad.
The DIY approach not only saves you money but also gives you the freedom to customize your iRig to your specific needs and preferences. So, gather your tools, embrace your inner techie, and embark on this exciting journey to create your own iRig.
The future of guitar recording is in your hands!
Question Bank
What type of guitar cable do I need for a DIY iRig?
You’ll need a standard 1/4-inch (6.35mm) guitar cable with a TS (Tip-Sleeve) connector on one end and a TRS (Tip-Ring-Sleeve) connector on the other end. The TS end plugs into your guitar, and the TRS end plugs into the DIY iRig.
Can I use my DIY iRig with any iOS device?
Yes, the DIY iRig should work with any iPhone or iPad that has a standard headphone jack. However, some newer models may require a lightning adapter for compatibility.
How do I troubleshoot noise or distortion coming from my DIY iRig?
Check your connections to ensure they are secure and properly seated. Also, make sure that the input gain on your iRig is not set too high, as this can lead to clipping and distortion. If you’re still experiencing problems, try a different guitar cable or check the soldering connections in your DIY iRig.
Can I use my DIY iRig for live performances?
While the DIY iRig can be used for live performance, it’s best suited for smaller venues or practice sessions. For larger gigs, a dedicated audio interface with higher output power may be necessary.