5 Hot Raspberry Pi Projects For Mac Geeks
5 Hot Raspberry Pi Projects for Mac Geeks – imagine turning your humble Raspberry Pi into a powerful Mac accessory, a home media server, a retro gaming console, a smart home hub, or even a gateway to the exciting world of IoT.
These projects are not just for tech enthusiasts; they’re for anyone who wants to unleash the potential of their Mac and explore the exciting possibilities of Raspberry Pi.
From enhancing your Mac’s functionality to building your own personalized smart home ecosystem, these projects offer a range of challenges and rewards. We’ll guide you through the steps, from setting up the hardware to configuring the software, so you can bring these projects to life.
So, grab your Raspberry Pi, fire up your Mac, and get ready to embark on a journey of innovation and creativity.
Raspberry Pi as a Mac Accessory
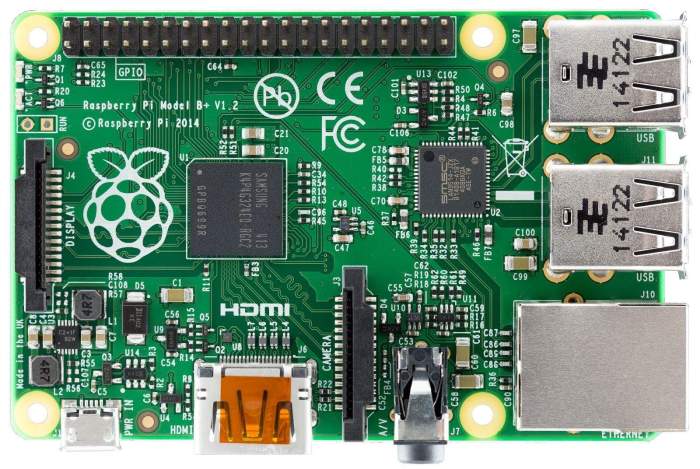
The Raspberry Pi, a credit card-sized computer, can be a valuable addition to any Mac user’s toolkit. It offers a range of capabilities that can enhance your Mac’s functionality, from creating a dedicated media server to setting up a home automation system.
Expanding Your Mac’s Capabilities
A Raspberry Pi can be used to extend the capabilities of your Mac in several ways. Its versatility allows you to create custom solutions tailored to your specific needs.
Media Server
A Raspberry Pi can be transformed into a dedicated media server for your home network. By installing software like Plex or Kodi, you can stream movies, TV shows, and music from your Mac to other devices on your network. This allows you to access your media library from anywhere in your home without relying on your Mac’s processing power.
From building a retro gaming console to creating a smart home hub, there are tons of cool Raspberry Pi projects Mac geeks can tackle. But sometimes, even the most tech-savvy among us need a little help with our phones.
If you’ve ever sent a text message and wished you could take it back, you’ll be interested in learning how to Unsend and edit iPhone messages after you send them. Once you’ve mastered that, you can get back to your Raspberry Pi projects with a newfound confidence!
Home Automation
With its GPIO pins, the Raspberry Pi can be used to control various home automation devices, such as smart lights, thermostats, and security systems. By connecting sensors and actuators to the GPIO pins, you can create custom automation scripts to control your home environment.
Retro Gaming Console
The Raspberry Pi can be turned into a retro gaming console, allowing you to play classic games from systems like the NES, SNES, and Sega Genesis. By installing emulators and ROMs, you can relive your childhood gaming experiences on a modern display.
Web Server
The Raspberry Pi can be used as a web server, hosting personal websites or web applications. This can be a cost-effective alternative to renting web hosting, allowing you to experiment with web development or create a personal website without incurring significant expenses.
Network Monitoring
By running network monitoring tools like Nagios or Zabbix, the Raspberry Pi can monitor your network traffic and alert you to potential issues. This can be a valuable tool for identifying network bottlenecks, security threats, or other problems that may affect your Mac’s performance.
Building a Home Media Server
Transform your Raspberry Pi into a central hub for all your media, allowing you to access your movies, music, and photos from any device in your home. With a Raspberry Pi as your home media server, you can enjoy a seamless and organized media experience.
Setting Up a Raspberry Pi as a Home Media Server
Setting up a Raspberry Pi as a home media server involves installing and configuring media server software. This process allows you to stream your media content to various devices on your network.
Installing and Configuring Media Server Software
There are several popular media server software options available for the Raspberry Pi. Two popular options are Plex and Kodi.
Plex
Plex is a powerful and user-friendly media server software that offers a wide range of features, including automatic metadata extraction, transcoding, and a sleek web interface. To install Plex on your Raspberry Pi, follow these steps:
- Download the latest version of Plex Media Server for the Raspberry Pi from the official Plex website.
- Unzip the downloaded file and navigate to the directory where the extracted files are located.
- Run the following command to install Plex Media Server:
sudo dpkg
i plexmediaserver*.deb
- Once the installation is complete, open a web browser and access the Plex web interface by entering the IP address of your Raspberry Pi followed by “:32400”.
- Sign in to your Plex account or create a new one.
- Follow the on-screen instructions to add your media libraries and configure other settings.
Kodi
Kodi is an open-source media player that can also be used as a media server. Kodi offers a highly customizable interface and supports a wide range of media formats. To install Kodi on your Raspberry Pi, follow these steps:
- Open a terminal window on your Raspberry Pi and run the following command to update the software repositories:
sudo apt update
- Install Kodi by running the following command:
sudo apt install kodi
- Once the installation is complete, launch Kodi and follow the on-screen instructions to configure your media libraries and other settings.
Optimizing the Raspberry Pi for Streaming Media Content
To ensure smooth streaming of media content, it is important to optimize your Raspberry Pi for performance. Here are some tips:
- Use a high-quality SD card: A fast and reliable SD card is crucial for smooth media playback. Consider using a Class 10 or UHS-I SD card for optimal performance.
- Connect the Raspberry Pi to your network using an Ethernet cable: A wired connection provides a more stable and reliable connection for streaming media content.
- Enable the “Overclocking” option in the Raspberry Pi configuration: Overclocking can improve the performance of the Raspberry Pi, but it can also generate more heat. Ensure proper cooling to prevent overheating.
- Transcode media files to a lower resolution: Transcoding media files to a lower resolution can reduce the strain on the Raspberry Pi and improve streaming performance, especially for older devices.
Creating a Retro Gaming Console

Want to relive your childhood gaming memories or introduce your kids to classic games? A Raspberry Pi can easily be transformed into a retro gaming console, allowing you to play a vast library of classic games from different eras. Let’s explore the steps involved in setting up your own retro gaming machine.
Installing and Configuring Emulators, 5 hot Raspberry Pi projects for Mac geeks
Emulators are software programs that mimic the hardware of older gaming consoles, enabling you to run games designed for those systems. The Raspberry Pi is compatible with numerous emulators, each supporting a specific console. Here are the common steps to install and configure emulators on your Raspberry Pi:
Choose an emulator
There are many emulators available for the Raspberry Pi, each specializing in a particular console. Popular choices include RetroArch, which supports various systems, and standalone emulators like PCSX2 for PlayStation 2 games.
Install the emulator
Emulators can be installed using the Raspberry Pi’s package manager, often through the command line. For example, you can install RetroArch by typing `sudo apt-get install retroarch` in the terminal.
Configure the emulator
Once installed, you can configure the emulator to your liking. This might include setting up controller mappings, adjusting graphics settings, and configuring other options.
Download BIOS files
Some emulators require BIOS files to function properly. These files contain the core software that allows the emulator to boot and run games. You can find BIOS files online, but ensure you acquire them legally.
Installing and Managing ROMs
ROMs are digital copies of the original game cartridges or discs. You can find ROMs online, but ensure you obtain them legally. Here’s how to install and manage ROMs on your Raspberry Pi:
Download ROMs
You can find ROMs for various systems online, but it’s crucial to ensure you obtain them legally. Some websites offer ROMs for purchase, while others allow downloading ROMs if you own the original game.
Organize ROMs
Once you’ve downloaded ROMs, organize them into folders based on the system they’re designed for. This makes it easier to navigate and launch games.
Transfer ROMs to Raspberry Pi
You can transfer ROMs to your Raspberry Pi using various methods, including copying them via USB drive, using a network connection, or using an SD card.
Choosing the Right Controllers and Accessories
The right controllers and accessories can enhance your retro gaming experience. Here are some tips for selecting the right ones:
Controllers
Many classic controllers are compatible with the Raspberry Pi. You can use original controllers from consoles like the NES, SNES, or PlayStation. Alternatively, you can opt for modern USB controllers that offer a more comfortable gaming experience.
HDMI Cable
From building a retro gaming console to setting up a home automation system, there are tons of cool Raspberry Pi projects that Mac users can dive into. And if you’re looking to tinker with older iOS apps, check out How to restore older versions of iOS apps , a helpful guide that might come in handy for your next Raspberry Pi project.
You can even use a Raspberry Pi to create a retro iOS emulator, allowing you to run classic apps on a modern display.
You’ll need an HDMI cable to connect your Raspberry Pi to your TV or monitor.
Power Supply
A reliable power supply is essential for your Raspberry Pi. You can use the official Raspberry Pi power supply, or you can purchase a compatible third-party power supply.
Case
A case can protect your Raspberry Pi from dust and damage. You can purchase a pre-made case, or you can build your own using 3D printing or other materials.
Developing a Smart Home Hub
The Raspberry Pi, with its versatility and affordability, makes a fantastic platform for building a smart home hub. It can control various smart home devices, automate tasks, and even act as a central control point for your entire home network.
Connecting Smart Home Devices
Connecting smart home devices to your Raspberry Pi can be done in various ways, depending on the device’s communication protocols. Here are some common methods:
- Wi-Fi:Many smart home devices connect directly to your Wi-Fi network, allowing them to communicate with the Raspberry Pi through the same network.
- Bluetooth:Bluetooth is another popular protocol for connecting smart home devices, such as smart bulbs and speakers. The Raspberry Pi can easily communicate with Bluetooth devices using a USB Bluetooth adapter.
- Zigbee and Z-Wave:These protocols are specifically designed for smart home applications and offer long-range communication and low power consumption. You can connect a Raspberry Pi to Zigbee and Z-Wave devices using USB dongles or dedicated hubs.
- Ethernet:Some smart home devices, like security cameras, might have an Ethernet port for a wired connection to the Raspberry Pi.
Setting Up Automation and Control Scripts
The Raspberry Pi’s versatility allows you to set up custom automation and control scripts for your smart home devices. You can use programming languages like Python or Node.js to create scripts that interact with the devices, triggering actions based on events or schedules.
- Home Assistant:Home Assistant is a popular open-source home automation software that runs on the Raspberry Pi. It provides a user-friendly interface for managing and automating smart home devices. You can easily create automations using its intuitive visual editor, allowing you to set up actions like turning on lights when you arrive home or adjusting the thermostat based on the weather forecast.
- Node-RED:Node-RED is a flow-based programming tool that simplifies the process of creating automation scripts. It uses a drag-and-drop interface to connect various nodes representing different actions, allowing you to build complex automation workflows without writing extensive code.
- Python:Python is a versatile programming language that can be used to interact with various smart home devices and APIs. You can use libraries like RPi.GPIO for controlling GPIO pins on the Raspberry Pi, allowing you to interact with devices connected directly to the Pi’s hardware.
Exploring the World of IoT

The Raspberry Pi’s versatility extends to the fascinating world of the Internet of Things (IoT). This tiny computer provides a powerful and affordable platform for building smart devices that can interact with their environment and each other, creating a connected world of possibilities.
Connecting Sensors and Actuators
Connecting sensors and actuators to a Raspberry Pi is the foundation of any IoT project. Sensors gather data about the environment, such as temperature, light, or motion, while actuators control physical devices, like motors, lights, or valves. The Raspberry Pi’s GPIO pins serve as the interface for connecting these components.
GPIO stands for General Purpose Input/Output, allowing the Raspberry Pi to communicate with external devices. There are various methods for connecting sensors and actuators, including:* Direct Connection:Some sensors and actuators can be directly connected to the GPIO pins using simple wiring techniques.
This method is suitable for basic projects with low power requirements.
I2C and SPI
These communication protocols are more efficient for connecting multiple sensors and actuators to the Raspberry Pi. They allow for data transmission over a single pair of wires, making them ideal for compact and complex projects.
USB
Many sensors and actuators come with USB interfaces, making them easy to connect and use with the Raspberry Pi.
Examples of Practical IoT Projects
The possibilities for IoT projects using a Raspberry Pi are vast. Here are a few examples:* Smart Home Automation:Build a system that controls lighting, temperature, and appliances using sensors and actuators connected to a Raspberry Pi. You can set up automated routines, such as turning on the lights when you enter a room or adjusting the thermostat based on your location.
Environmental Monitoring
From building a retro gaming console to creating a smart home hub, there are tons of cool Raspberry Pi projects for Mac geeks. But if you’re looking for a break from coding and soldering, try out some fun photo editing tricks on your iPhone.
You can now copy and paste subjects from one image to another in iOS 16, thanks to the new “Cutout” feature. Check out this article for a step-by-step guide: Have fun with photos: How to copy and paste subjects in iOS 16.
Once you’re back to your Raspberry Pi projects, you’ll have a fresh perspective and maybe even some new ideas for your next creation.
Use sensors to collect data about air quality, humidity, or soil moisture. This information can be displayed on a dashboard or used to trigger alerts if certain thresholds are exceeded.
Smart Gardening
Create an automated irrigation system that adjusts watering based on soil moisture levels and weather conditions.
Remote Monitoring
Build a system that monitors the status of remote equipment or systems using sensors and a Raspberry Pi. This can be used to track the health of servers, monitor power consumption, or even detect potential security breaches.
Personalized Health Monitoring
Develop a system that tracks your activity levels, sleep patterns, or vital signs using wearable sensors and a Raspberry Pi. This data can be used to improve your health and fitness.
The Raspberry Pi’s affordability, ease of use, and powerful capabilities make it an ideal platform for exploring the exciting world of IoT.
Closure
With a little creativity and a Raspberry Pi, you can transform your Mac into a powerful hub for entertainment, productivity, and even home automation. These projects are just the tip of the iceberg; the possibilities are truly endless. So, don’t be afraid to experiment, get your hands dirty, and see what you can create.
The world of Raspberry Pi is waiting to be explored!
Frequently Asked Questions: 5 Hot Raspberry Pi Projects For Mac Geeks
What kind of Raspberry Pi do I need for these projects?
Any Raspberry Pi model will work, but newer models like the Raspberry Pi 4 offer more processing power and memory, making them ideal for more demanding projects like media streaming and gaming.
Do I need any special software for these projects?
You’ll need to install software specific to each project, such as media server software for a home media server or emulation software for a retro gaming console. We’ll provide detailed instructions for each project.
Are these projects difficult to set up?
The complexity varies depending on the project. Some projects are relatively simple, while others require more technical knowledge. We’ll provide step-by-step instructions to guide you through each project.