Pro Tip: How To Get Itunes To Ignore Iphone While Charging
Pro Tip: How to get iTunes to ignore iPhone while charging? It’s a common problem: you plug in your iPhone, but iTunes pops up, ready to sync. This can be annoying, especially if you’re just trying to charge your phone and don’t want to mess with your data.
Luckily, there are a few ways to stop iTunes from syncing while charging your iPhone.
The key is to understand how iTunes manages syncing. It’s designed to automatically sync your phone with your computer when it’s connected. This can be helpful, but it can also be a hassle if you’re not ready to sync.
The good news is that you can change how iTunes behaves. You can disable automatic syncing, customize your sync preferences, or even use alternative software to manage your iPhone.
Understanding the Problem
You’ve plugged your iPhone into your computer to charge, but instead of just charging, iTunes decides to launch and start syncing your entire phone! This can be incredibly frustrating, especially if you’re trying to quickly charge your phone and don’t want to deal with the hassle of iTunes syncing all your data.
It feels like iTunes is ignoring your preference to not sync while charging, leaving you wondering why it keeps interrupting your workflow.
Reasons Why iTunes Might Sync While Charging
There are several reasons why iTunes might ignore your preference to not sync while charging.
- Automatic Syncing is Enabled:If you’ve enabled automatic syncing in iTunes, it will automatically sync your iPhone whenever it’s connected, regardless of whether you’re charging or not. This is the most common reason why iTunes might sync while charging.
- iTunes is Looking for Updates:iTunes might be trying to update your iPhone’s software or apps, even if you’ve disabled automatic syncing. This is because iTunes will periodically check for updates and might trigger a sync to install them.
- iTunes is Detecting Changes:If you’ve made changes to your iPhone’s content, such as adding new music or deleting photos, iTunes might sync to reflect those changes. This can happen even if you’ve disabled automatic syncing, as iTunes will try to keep your iPhone and computer in sync.
If you’re tired of iTunes constantly nagging you to sync your iPhone while it’s charging, there’s a simple trick: just unplug your iPhone. But if you’re also tired of iTunes constantly asking you to authorize your Mac, you might want to check out this article: Get iTunes to stop asking you to authorize your Mac.
Once you’ve dealt with that, you can get back to enjoying your iPhone without the constant interruptions from iTunes.
Disabling Automatic Syncing
Sometimes, iTunes can be a little overzealous about syncing your iPhone, even when you’re just trying to charge it. This can be frustrating, especially if you don’t want to lose any data or change any settings on your device. The good news is, you can easily disable automatic syncing in iTunes, giving you more control over how your iPhone interacts with your computer.
Disabling Automatic Syncing in iTunes
To prevent iTunes from automatically syncing your iPhone while charging, you’ll need to adjust the syncing settings within iTunes. This ensures that your iPhone only syncs with your computer when you explicitly choose to do so. Here’s how:
- Open iTunes on your computer and connect your iPhone using a USB cable.
- In iTunes, click on the iPhone icon in the upper-left corner, usually next to the “Music” tab.
- Navigate to the “Summary” tab in the sidebar.
- Under the “Options” section, uncheck the box next to “Sync with this iPhone over Wi-Fi.” This setting ensures that your iPhone only syncs when physically connected to your computer.
- You can also uncheck the box next to “Manually manage music and videos.” This will prevent iTunes from automatically adding or removing content from your iPhone, allowing you to control the content manually.
- Click “Apply” to save the changes.
Now, your iPhone will only sync with iTunes when you manually initiate the process, giving you complete control over the syncing behavior.
Understanding Automatic Syncing vs. Manual Syncing
The key difference between automatic and manual syncing lies in the level of control you have over the syncing process. Automatic syncing, as the name suggests, happens automatically when certain conditions are met, such as connecting your iPhone to your computer.
This can be useful for keeping your iPhone up-to-date, but it can also be intrusive if you prefer to manage your content manually.
Manual syncing, on the other hand, requires you to explicitly initiate the syncing process. This gives you more control over what data is synced, when it’s synced, and how it’s synced. For example, you can choose to sync only specific playlists, albums, or apps, rather than the entire content of your iPhone.
By disabling automatic syncing, you can ensure that your iPhone only syncs with your computer when you want it to. This gives you more control over your device and prevents unwanted changes to your data.
Managing Sync Preferences
You can control exactly what data syncs between your iPhone and iTunes, giving you fine-grained control over your device’s content and storage space. This allows you to selectively sync only the content you need, preventing unnecessary data transfers and maximizing your iPhone’s performance.
Customizing Sync Preferences for Different Content Types
You can adjust the sync settings for various content types, such as music, photos, videos, and apps. This allows you to choose what content to sync and what to leave behind.
- Music:You can choose to sync your entire music library, specific playlists, or even individual albums. This gives you the flexibility to only sync the music you listen to most frequently, saving space on your iPhone.
- Photos:You can sync all photos from your computer, specific albums, or even just selected photos. This allows you to manage your iPhone’s photo library and ensure you have only the photos you need.
- Videos:You can sync your entire video library, specific playlists, or even individual videos. This gives you the flexibility to only sync the videos you watch most frequently, saving space on your iPhone.
- Apps:You can choose to sync all apps from your computer or only specific apps. This allows you to manage the apps on your iPhone and ensure you have only the apps you need.
Selective Syncing of Music, Photos, Videos, and Other Data
By selectively syncing specific content types, you can tailor your iPhone’s content to your needs and preferences. This allows you to optimize storage space and improve performance.
- Music:If you only listen to a few playlists, you can sync only those playlists instead of your entire music library. This saves significant space on your iPhone and ensures you have only the music you listen to.
- Photos:If you have a large photo library, you can sync only your favorite photos or albums. This helps you manage your iPhone’s photo library and ensures you have only the photos you need.
- Videos:If you have a large video library, you can sync only your favorite videos or playlists. This helps you manage your iPhone’s video library and ensures you have only the videos you need.
- Apps:If you have a large number of apps, you can sync only the apps you use most frequently. This helps you manage the apps on your iPhone and ensures you have only the apps you need.
Impact of Syncing Specific Content Types on Storage Space and Performance
Syncing specific content types can significantly impact your iPhone’s storage space and performance.
- Storage Space:Syncing a large amount of data, such as your entire music library or photo library, can quickly consume your iPhone’s storage space. This can lead to performance issues and prevent you from downloading new apps or content.
- Performance:Syncing large amounts of data can also impact your iPhone’s performance, making it slower and less responsive. This is because your iPhone has to process and store all the synced data, which can strain its resources.
Using iTunes Alternatives
Okay, so maybe iTunes isn’t your jam. That’s totally cool! There are other ways to manage your iPhone without having to deal with all the syncing drama. There are some great alternatives out there that can help you keep your iPhone organized and up-to-date, while also giving you more control over what gets synced and when.
Comparing iTunes to Alternatives
iTunes is Apple’s official software for managing your iPhone, iPad, and iPod. It’s been around for a long time, and it can do a lot, but it’s also known for being a bit clunky and complicated. Here’s a breakdown of iTunes versus its alternatives:
| Feature | iTunes | Alternatives |
|---|---|---|
| Syncing | Automatic syncing can be a hassle, especially if you don’t want everything on your iPhone to be replaced with what’s on your computer. | More control over syncing, often allowing you to choose what to sync and when. |
| File Management | iTunes can be used to manage files on your iPhone, but it can be a bit cumbersome. | Many alternatives offer a more user-friendly interface for managing files on your iPhone. |
| Backup and Restore | iTunes can back up and restore your iPhone, but it can take a long time and use a lot of storage space. | Some alternatives offer faster and more efficient backup and restore options. |
| Price | Free | Most alternatives are free, but some offer paid versions with additional features. |
Features That Address Automatic Syncing
Many alternative software programs are designed with user-friendliness and flexibility in mind. They often allow you to:
- Choose what to sync: Instead of automatically syncing everything, you can select specific files, folders, or apps to sync with your iPhone. This gives you more control over what’s on your device and prevents unwanted data from being overwritten.
- Sync on demand: You can sync your iPhone with your computer only when you need to, rather than having it happen automatically in the background. This can be helpful if you’re worried about losing data or if you just want to manage your iPhone’s storage space more efficiently.
- Manage sync preferences: Some alternatives offer advanced settings that allow you to customize your syncing experience. For example, you might be able to set specific sync schedules or choose which folders to sync automatically.
Pros and Cons of Using Alternatives
There are definitely advantages and disadvantages to using alternative software instead of iTunes.
Pros
- More control: Alternatives generally give you more control over what’s synced and when. This can be a big advantage if you’re trying to manage your iPhone’s storage space or if you just want to be more selective about what’s on your device.
- User-friendly interface: Many alternatives are designed with a simpler and more intuitive interface than iTunes, making it easier to navigate and find what you’re looking for.
- Faster syncing: Some alternatives offer faster syncing speeds than iTunes, which can be helpful if you’re syncing large amounts of data.
- More features: Some alternatives offer additional features that aren’t available in iTunes, such as the ability to manage your iPhone’s storage space more efficiently or to customize your device’s appearance.
Cons
- Compatibility issues: Not all alternative software programs are compatible with all versions of iOS or all iPhones. Be sure to check the compatibility before you download and install any alternative software.
- Security concerns: Some alternative software programs might not be as secure as iTunes, so be careful about downloading software from unknown sources.
- Limited support: Alternative software programs might not have the same level of support as iTunes, so you might have to rely on online forums or community support if you encounter problems.
Troubleshooting iTunes Issues

Sometimes, despite our best efforts, iTunes might still act up. This is where troubleshooting comes in. It’s like being a detective, figuring out what’s causing the problem and fixing it.
Troubleshooting Steps
Let’s start with the basics. These steps can help you identify and resolve common syncing issues:
- Restart your computer and iPhone:This simple step can often resolve temporary glitches. It’s like giving your devices a fresh start.
- Check your internet connection:A strong and stable internet connection is crucial for syncing. Make sure you’re connected and have a good signal strength.
- Close and reopen iTunes:This helps clear any lingering issues or corrupted data in the application. It’s like giving iTunes a quick refresh.
- Update iTunes and your iPhone:Outdated software can lead to compatibility issues. Keep both iTunes and your iPhone updated to the latest versions.
- Check for available storage space:Ensure you have enough free space on both your iPhone and your computer to accommodate the data being synced.
Checking for Software Updates and Compatibility Issues
Keeping your software up-to-date is essential. Here’s how to check for updates:
- iTunes:In iTunes, go to Help > Check for Updates.
- iPhone:On your iPhone, go to Settings > General > Software Update.
If you’re still experiencing syncing problems after updating, it’s possible that there’s a compatibility issue between your iPhone and the version of iTunes you’re using. You might need to upgrade or downgrade iTunes to match your iPhone’s software version.
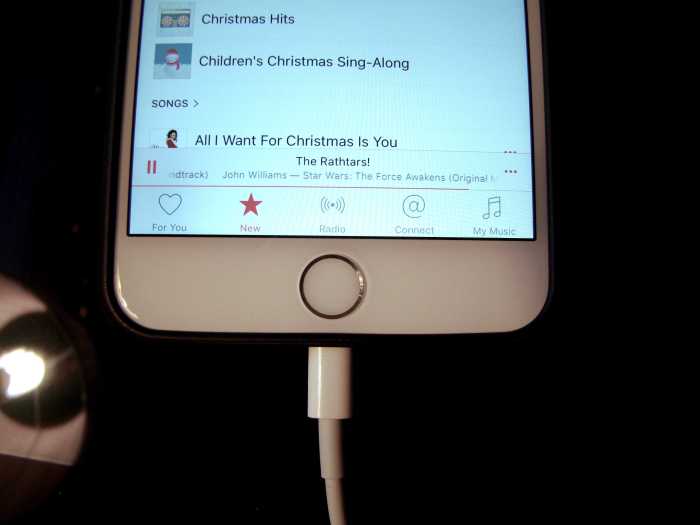
Okay, so you want to charge your phone without iTunes messing around? You gotta put it in airplane mode. But hey, while you’re at it, maybe you want to go back to an older version of your favorite app.
You can totally do that! Check out this guide How to restore older versions of iOS apps to get the lowdown. Anyway, back to the charging thing, just remember to turn airplane mode off once you’re done. You’ll be good to go!
Resolving Syncing Errors, Pro Tip: How to get iTunes to ignore iPhone while charging
Syncing errors can be frustrating, but there are ways to address them:
- Check for error messages:iTunes often provides helpful error messages that can guide you towards a solution. Pay close attention to the message and search for it online to find relevant troubleshooting steps.
- Try syncing again:Sometimes, a simple retry can fix temporary errors.
- Disable and re-enable syncing:In iTunes, go to Edit > Preferences > Devicesand uncheck the box next to your iPhone. Then, re-enable syncing by checking the box again.
- Reset syncing:In iTunes, go to Edit > Preferences > Devicesand click Reset Sync. This will remove all sync data and allow you to start fresh.
If none of these steps resolve the issue, it might be time to consider seeking help from Apple support or a qualified technician.
Optimizing iPhone Charging: Pro Tip: How To Get ITunes To Ignore IPhone While Charging
It’s important to optimize your iPhone charging to ensure you’re getting the most out of your battery life. Faster charging speeds can help you get back to using your phone quickly, while understanding the impact of different charging accessories can help you make informed choices about how to charge your phone.
Okay, so you’re trying to get iTunes to stop messing with your iPhone while it’s charging, right? Totally get that. But, speaking of Apple products, have you seen the new Vision Pro? It’s pretty amazing! Check out this article on How to use your Mac with Vision Pro to learn how to integrate it with your Mac.
Anyway, back to the iPhone charging thing, make sure to disable “Automatic Updates” and “Find My iPhone” in your settings. That should do the trick!
Understanding Charging Speeds and Factors
Different iPhone models support different charging speeds. For example, the iPhone 14 Pro supports up to 30W fast charging, while older models may only support 18W or less.
- Charging cable:Using a certified USB-C to Lightning cable that supports the maximum charging speed for your iPhone is crucial. Non-certified cables can be slower and may even damage your phone.
- Power adapter:The power adapter you use also affects charging speed. A higher wattage adapter will charge your phone faster than a lower wattage adapter. For example, a 30W adapter will charge an iPhone 14 Pro faster than a 18W adapter.
- Battery temperature:The temperature of your iPhone’s battery can also affect charging speed. Extreme temperatures, both hot and cold, can slow down charging.
- Battery health:As your iPhone’s battery ages, its capacity and charging speed can decrease.
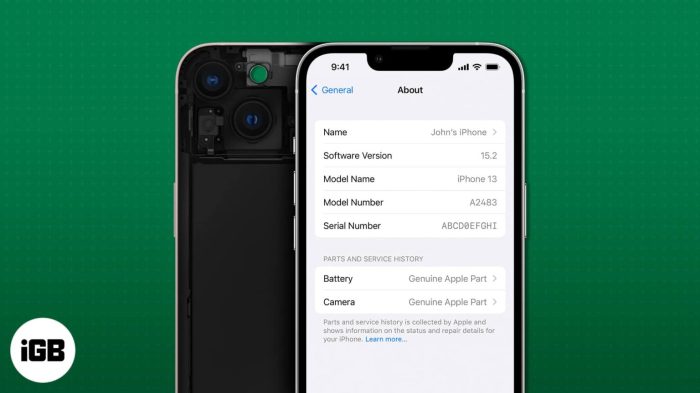
Monitoring Battery Health and Charging Efficiency
You can monitor your iPhone’s battery health and charging efficiency using the Settings app.
- Go to Settings > Battery.
- Tap Battery Health.
This screen will show you the following information:
- Maximum Capacity:This indicates the percentage of the battery’s original capacity that remains. A lower maximum capacity means your battery is aging and may need to be replaced.
- Peak Performance Capability:This indicates whether your battery is able to deliver peak performance. If your battery is degraded, you may see a message here that says “Battery needs servicing”.
Maintaining iPhone Data

It’s essential to safeguard your iPhone data to prevent loss. This involves creating backups, which are copies of your iPhone’s content stored elsewhere. Backups act as a safety net, allowing you to restore your data if your iPhone is lost, stolen, damaged, or needs a software update.
Types of iPhone Backups
Creating backups is crucial for data protection. There are two main types of backups available for iPhones:
- iCloud Backups:iCloud backups store your data in Apple’s cloud storage. This means your backups are accessible from any device with an iCloud account. iCloud backups include your device settings, app data, photos, videos, and messages.
- iTunes Backups:iTunes backups are stored on your computer. They provide a more comprehensive backup than iCloud backups, including data like your health data and purchased media. However, iTunes backups require a computer and a USB cable to perform.
Creating iPhone Backups
To create an iCloud backup:
- Open the Settingsapp on your iPhone.
- Tap on your Apple IDat the top of the screen.
- Select iCloud.
- Tap on iCloud Backup.
- Ensure that iCloud Backupis turned on.
- Tap on Back Up Nowto start an immediate backup.
To create an iTunes backup:
- Connect your iPhone to your computer using a USB cable.
- Open iTuneson your computer.
- Click on the iPhoneicon in the top left corner of the iTunes window.
- Click on Summaryin the left sidebar.
- Under Backups, click on This Computer.
- Click on Back Up Nowto start a backup.
Restoring iPhone Data from Backups
If you need to restore your iPhone data from a backup, you can do so using either iCloud or iTunes.To restore from an iCloud backup:
- During the initial setup of a new iPhone, you’ll be prompted to restore from an iCloud backup. Select the desired backup and follow the on-screen instructions.
- If you’re restoring to an existing iPhone, go to Settings> General> Transfer or Reset iPhone> Erase All Content and Settingsand follow the prompts to restore from iCloud.
To restore from an iTunes backup:
- Connect your iPhone to your computer using a USB cable.
- Open iTuneson your computer.
- Click on the iPhoneicon in the top left corner of the iTunes window.
- Click on Summaryin the left sidebar.
- Click on Restore Backupand select the desired backup from the list.
- Follow the on-screen instructions to complete the restore process.
Understanding iPhone Security
Your iPhone holds a wealth of personal information, from financial details to private messages. It’s essential to protect your data from unauthorized access. Let’s explore how to secure your iPhone and keep your information safe.
Enabling Passcodes and Touch ID
A passcode acts as a barrier to your iPhone, preventing others from accessing your data. Touch ID, if available on your iPhone, adds an extra layer of security by using your fingerprint to unlock your device. Here’s how to set up a passcode and Touch ID:* Setting a Passcode:Go to Settings> Face ID & Passcode(or Touch ID & Passcode) and tap Turn Passcode On.
Enter a six-digit passcode twice, and you’re good to go.
Enabling Touch ID
If your iPhone has Touch ID, go to Settings> Touch ID & Passcode. Tap Add a Fingerprintand follow the on-screen instructions.
Enabling a passcode and Touch ID is crucial for safeguarding your iPhone data.
Protecting iPhone Data
Beyond passcodes and Touch ID, there are additional steps you can take to protect your data.* Use Strong Passwords:When creating accounts on your iPhone, use strong, unique passwords for each service.
Enable Two-Factor Authentication
This extra layer of security requires you to enter a code sent to your phone or email when logging into an account, making it harder for hackers to gain access.
Be Mindful of Apps
Only download apps from the App Store to minimize the risk of malware.
Regularly Update Your iPhone
Apple regularly releases software updates that include security patches.
Back Up Your Data
Regularly back up your iPhone to iCloud or your computer. This way, if your device is lost or damaged, you can restore your data.
Exploring Future Developments
It’s exciting to think about the future of iPhone management software. With advancements in technology and the ever-evolving needs of users, we can expect to see significant changes in how we interact with our iPhones and manage their data.The future of iPhone management software will likely focus on increased automation, improved security, and enhanced user control.
Imagine a world where your iPhone seamlessly adapts to your needs, anticipating your actions and ensuring a smooth and efficient experience.
Enhanced Syncing Features and User Control
Enhanced syncing features and user control will be a key aspect of future iPhone management software. Imagine a world where you can customize your syncing experience, choosing specific data types to sync and setting granular control over how and when syncing occurs.
- Selective Syncing:The ability to choose specific data types to sync, such as photos, music, or documents, rather than syncing everything. This will allow users to manage their storage space more effectively and prioritize syncing only the most essential data.
- Sync Scheduling:The option to schedule syncing to occur at specific times, such as overnight or during periods of low network activity. This will help users avoid syncing interruptions and ensure efficient use of their internet bandwidth.
- Sync Preferences:Enhanced control over syncing preferences, including the ability to set sync priorities, define sync limits, and choose different sync methods (Wi-Fi only, cellular data, etc.).
Seamless and Intuitive iPhone Management Experience
The future of iPhone management will revolve around creating a seamless and intuitive experience for users. Imagine a software that anticipates your needs, automatically managing your iPhone’s data and settings without requiring constant intervention.
- Predictive Management:The software could anticipate your needs and automatically manage your iPhone’s data and settings. For example, it could automatically clear storage space when needed, update apps in the background, or optimize battery usage based on your usage patterns.
- Personalized Recommendations:The software could provide personalized recommendations based on your usage habits and preferences. This could include suggestions for app updates, storage optimization tips, or security enhancements.
- Contextual Awareness:The software could leverage contextual awareness to provide relevant information and assistance. For example, it could suggest nearby charging stations when your battery is low or offer to connect to a Wi-Fi network when you’re in a new location.
Epilogue

So, whether you’re trying to avoid syncing while charging or simply want more control over your data, there’s a solution for you. By understanding how iTunes works and taking a few steps to adjust its settings, you can have a much smoother experience.
Remember, you’re in control. Make iTunes work for you, not the other way around.
FAQ Overview
Why does iTunes keep syncing my iPhone when I just want to charge it?
iTunes is designed to automatically sync your iPhone with your computer when it’s connected. This is a default setting, but you can change it.
Is there a way to charge my iPhone without iTunes syncing it?
Yes, you can disable automatic syncing in iTunes. This will prevent iTunes from syncing your iPhone when you connect it to your computer.
What are some alternatives to iTunes for managing my iPhone?
There are several alternatives to iTunes, including iCloud, AirDrop, and third-party software like iMazing.