Start A Screen Recording On Iphone Or Ipad Inside Control Center
Start a screen recording on iPhone or iPad inside Control Center is a handy feature that lets you capture what’s happening on your device, perfect for tutorials, demos, or simply saving a funny moment. Control Center, accessible with a swipe from the bottom of the screen, offers a quick way to start and stop recordings without digging through settings.
This guide walks you through the steps of enabling and using screen recording on your iPhone or iPad, covering everything from basic setup to customizing your recordings. We’ll also explore advanced features and troubleshoot common issues, making sure you can capture those screen moments with ease.
Screen Recording on iPhone and iPad
Screen recording on your iPhone or iPad is a super helpful feature, letting you capture what’s happening on your device’s screen. This can be great for creating tutorials, demonstrating apps, or even just recording gameplay. The best part is that you can quickly access the screen recording tool directly from Control Center, making it super easy to start recording whenever you need to.
Accessing Screen Recording in Control Center
Control Center is a convenient hub that provides quick access to frequently used settings and features. Here’s how to access screen recording:
- Open Control Center:Swipe down from the top-right corner of your iPhone’s screen (or from the top of your iPad’s screen) to reveal Control Center.
- Find the Screen Recording Button:Look for the circle with a white dot inside. This is the screen recording button.
- Tap to Start Recording:Tap the button to begin recording your screen.
Prerequisites
Before you can start recording your screen on your iPhone or iPad using Control Center, there are a few things you need to make sure are in place. These prerequisites will ensure a smooth and successful screen recording experience.
iOS Version
You need to be running iOS 11 or later on your iPhone or iPad to use the screen recording feature in Control Center. This means you need to update your device to the latest version of iOS to access this feature.
iPhone and iPad Models
The screen recording feature is compatible with most iPhone and iPad models released after the introduction of iOS However, some older models may not be supported. Here’s a quick overview of the compatibility:
- iPhone:All models released after the iPhone 6s and 6s Plus are compatible. This includes the iPhone 7, 7 Plus, 8, 8 Plus, X, XR, XS, XS Max, 11, 11 Pro, 11 Pro Max, 12, 12 Pro, 12 Pro Max, 13, 13 Pro, 13 Pro Max, 14, 14 Pro, 14 Pro Max, and SE (2nd and 3rd generation).
- iPad:All iPad models released after the iPad Pro (9.7-inch) and iPad (5th generation) are compatible. This includes the iPad Pro (10.5-inch), iPad Pro (12.9-inch, 2nd generation), iPad (6th generation), iPad mini (5th generation), iPad Air (3rd generation), iPad Pro (11-inch), iPad Pro (12.9-inch, 3rd generation), iPad (7th generation), iPad Air (4th generation), iPad Pro (11-inch, 2nd generation), iPad Pro (12.9-inch, 4th generation), iPad (8th generation), iPad mini (6th generation), iPad Air (5th generation), iPad Pro (11-inch, 3rd generation), iPad Pro (12.9-inch, 5th generation), iPad (9th generation), iPad mini (6th generation), iPad Air (5th generation), and iPad (10th generation).
Enabling Screen Recording in Control Center

To start recording your iPhone or iPad screen, you need to enable the Screen Recording feature in Control Center. This handy tool allows you to quickly and easily start recording your screen, perfect for tutorials, gameplay walkthroughs, or capturing any other screen activity.
Adding Screen Recording to Control Center
You’ll need to add the Screen Recording button to Control Center to access it. Here’s how:
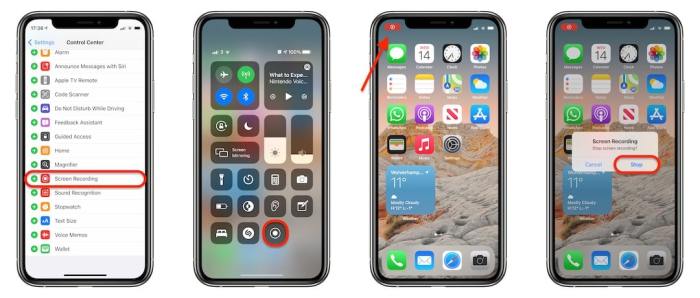
- Open the Settingsapp on your iPhone or iPad.
- Scroll down and tap on Control Center.
- Tap on Customize Controls.
- Scroll down the list of controls and find Screen Recording. Tap the green plusbutton next to it to add it to your Control Center.
- You can now exit the Settings app.
Starting a Screen Recording
You’re ready to capture your iPhone or iPad screen, and it’s easier than you think! Let’s dive into how to initiate a screen recording using the Control Center.
Using the Control Center Button
The Control Center is your one-stop shop for quick access to common settings and actions on your iPhone or iPad. To start a screen recording, follow these steps:
- Open Control Center:Swipe down from the top-right corner of your screen (on iPhones with a Face ID) or swipe up from the bottom of the screen (on iPhones with a Touch ID or iPads).
- Locate the Screen Recording Button:You’ll find the Screen Recording button within the Control Center. It typically looks like a circle with a filled-in circle inside.
- Press and Hold:Tap and hold the Screen Recording button. You’ll see a countdown timer appear, giving you a heads-up before recording starts.
- Start Recording:Once the countdown completes, your iPhone or iPad screen will begin recording. A red status bar will appear at the top of your screen, indicating that recording is active.
Visual and Audio Cues
You’ll know your screen recording is in progress thanks to these visual and audio cues:
- Red Status Bar:A red status bar will appear at the top of your screen, indicating that recording is active.
- Microphone Icon:If you’ve chosen to record audio, a microphone icon will appear in the status bar.
- Audio Feedback:You’ll hear a brief sound when recording starts and stops.
Customizing Screen Recordings
Okay, so you’ve got the basics of screen recording down, but what about making your recordings even better? Let’s dive into how to customize your screen recordings on iPhone and iPad.You can tweak things like what audio is included and how the recording looks, which is pretty handy for making more polished or specific videos.
Audio Options
So, you want to add some sound to your screen recording, right? There are a couple of ways to do this:
- Microphone:This is the most common option. It captures your voice and any sounds around you. It’s perfect for tutorials, gameplay walkthroughs, or any time you want to talk through what you’re doing.
- Device Audio:This one captures the audio playing through your iPhone or iPad’s speakers. This is ideal for recording music, videos, or games with sound effects.
To choose your audio source, simply open the Control Center while recording and tap the microphone icon. It’ll switch between the options, and you’ll see a visual indicator to show you which one’s active.
Resolution and Frame Rate
Alright, let’s talk about how your video looks. You can change the resolution (basically, how sharp and detailed the video is) and the frame rate (how many images are shown per second, which affects how smooth the video looks).
Here’s the deal:
- Resolution:Higher resolutions mean sharper images but also larger file sizes. Think of it like a photo: a higher resolution photo will be more detailed but also take up more space on your phone.
- Frame Rate:A higher frame rate makes your video look smoother, especially if there’s a lot of motion. Think of it like a flipbook: more frames per second make the animation look smoother.
To adjust these settings, go to Settings > Control Center > Customize Controlsand tap the green plus button next to Screen Recording. This will add the Screen Recording settings to your Control Center. Now, when you long-press the Screen Recording button in Control Center, you’ll see options to adjust the resolution and frame rate.
Keep in mind that the available options for resolution and frame rate can vary depending on your iPhone or iPad model.
Stopping a Screen Recording

Once you’ve captured all the content you need, it’s time to wrap up your screen recording. This is as simple as tapping a button.You’ll notice a red bar at the top of your screen indicating that the recording is in progress.
To stop the recording, simply tap this red bar. It will turn white and display a “Stop” button. Tap the “Stop” button to finalize your recording.
Accessing and Sharing Your Screen Recording
Once you’ve stopped the recording, the video will be saved to your Photos app. You can access it by opening the Photos app and looking for the most recent video. You can then share the video through various methods, such as:
- Sharing to social media:You can easily share your screen recording to platforms like Instagram, TikTok, Facebook, or Twitter. Just open the video in the Photos app and tap the share button. Select the platform you want to share to, and follow the usual sharing steps.
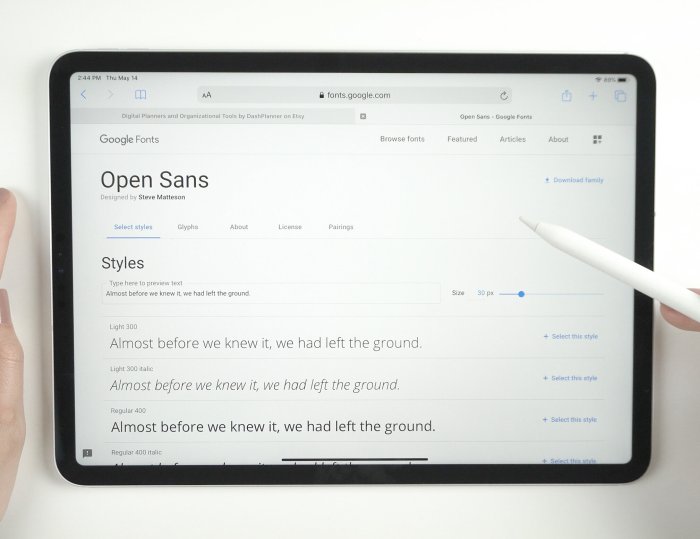
If you’re trying to record your screen on your iPad, you can quickly do it through Control Center. But, if you’re eager to test out the latest iPadOS 17 features, you can install the Developer Beta by following the instructions on this website: How to install the iPadOS 17 Developer Beta.
Once you’ve got the beta installed, you’ll be able to try out the new features, like the updated Control Center, which might even have a cool new way to start screen recording!
- Sharing via messaging apps:You can also share your recording via messaging apps like WhatsApp, Telegram, or iMessage. Again, open the video in the Photos app, tap the share button, and select the messaging app you want to use.
- Saving to your computer:If you need to save your recording to your computer, you can use AirDrop or iCloud to transfer the video. You can also use a USB cable to connect your iPhone or iPad to your computer and transfer the video through your file explorer.
Troubleshooting Common Issues
Screen recording on iPhone and iPad is generally a smooth process, but sometimes you might encounter issues. These issues can range from a failed recording to missing audio. Let’s explore some common problems and how to fix them.
So you wanna record your screen on your iPhone or iPad? It’s super easy with Control Center. Just swipe down from the top right corner, tap the screen recording button, and boom! You’re rolling. But if you’re watching a YouTube video and want to save your progress in case Safari decides to reload the tab, you’ll need a little extra help.
Check out this article on how to keep your place: How to save your progress in a YouTube video, even if Safari reloads the tab. Then you can get back to your screen recording, no worries about losing your spot!
Failed Recordings
If your screen recording doesn’t start or stops unexpectedly, it’s important to understand the potential causes and how to resolve them.Here are some reasons why your screen recordings might fail:
- Insufficient storage space: If your iPhone or iPad doesn’t have enough free storage space, the screen recording might fail. Ensure you have sufficient storage space before starting a recording.
- App permissions: Some apps might not allow screen recording. Check the app’s settings and ensure that screen recording is enabled. If the app doesn’t allow screen recording, you won’t be able to record it.
- System bugs: Occasionally, iOS or iPadOS might have a bug that prevents screen recording. If you suspect a system bug, try restarting your device. If the issue persists, you might need to wait for a software update from Apple to address the bug.
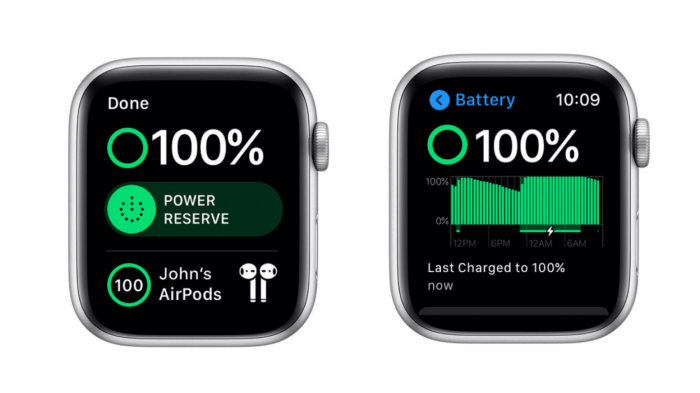
Recording your iPhone screen is super easy! Just swipe up from the bottom of your screen to access Control Center, then tap the record button. But before you go recording, make sure your battery is up to the task.
If you have an iPhone 6s and are experiencing battery issues, you can check if your battery is eligible for a free replacement here. Once you’ve got a fresh battery, you can record all the amazing things you do on your iPhone!
- Background activity: If too many apps are running in the background, your device might not have enough resources to record your screen. Close unnecessary apps in the background to free up resources.
Missing Audio
Sometimes, your screen recordings might capture the screen but not the audio. This can be frustrating, especially if you’re recording a video tutorial or a gameplay session. Here are some possible reasons and solutions:
- Microphone access: Ensure that your iPhone or iPad has permission to access your microphone. Check the privacy settings for the microphone and make sure the screen recording app has access. You can also try using a different microphone if available.
- Microphone mute: If your microphone is muted, your screen recording won’t capture any audio. Check your device’s microphone settings and make sure it’s not muted. If you’re using headphones, check that the microphone on your headphones is not muted.
- Background noise: If your device is in a noisy environment, the microphone might pick up too much background noise, making the audio quality poor. Try recording in a quieter environment to improve audio quality.
- System settings: Check the settings for your screen recording app. Some apps might have specific settings for audio recording. Ensure that audio recording is enabled and that the correct microphone is selected.
Advanced Features
Beyond the basics, iOS screen recording offers some cool features that let you capture your screen in more specific ways or share it with others.
Recording Specific App Windows
If you want to record a specific app window, you can use the “Record Selected Portion” feature. This is super useful for capturing a particular part of your screen, like a video call or a specific app window.
To use this feature, you need to have iOS 15 or later.
- Open Control Center and tap and hold the screen recording button.
- Select “Record Selected Portion.”
- Drag the corners of the rectangle to adjust the recording area.
- Tap the red record button to start recording.
Mirroring Your Screen to Another Device
If you want to share your iPhone or iPad screen with another device, you can use the built-in screen mirroring feature. This is great for presentations, watching videos together, or just showing someone what you’re doing on your device.
- Open Control Center and tap the “Screen Mirroring” button.
- Select the device you want to mirror your screen to.
- Once the connection is established, your iPhone or iPad screen will be mirrored on the other device.
Using Third-Party Apps for Enhanced Screen Recording
There are tons of third-party apps available that offer more advanced screen recording features than the built-in app. These apps can provide features like:
- Recording audio from your microphone.
- Adding annotations or drawings to your recordings.
- Recording in different video formats.
- Editing your recordings directly in the app.
Some popular third-party screen recording apps include:
- Reimagine:This app lets you record your screen, add audio from your microphone, and edit your recordings directly in the app. It also offers features like screen mirroring and the ability to record specific app windows.
- Screen Recorder:This app provides a simple and easy-to-use interface for recording your screen. It offers features like recording audio from your microphone and adding annotations to your recordings.
Security and Privacy Considerations
Screen recording on your iPhone or iPad can be a handy tool, but it’s essential to be aware of the potential privacy implications. It’s important to understand how screen recording might affect your personal information and what steps you can take to protect yourself.
Data Security and Privacy Concerns
Screen recordings capture everything displayed on your device’s screen, including sensitive information like passwords, credit card details, personal messages, and more. If these recordings fall into the wrong hands, it could lead to identity theft, unauthorized access to your accounts, or other privacy violations.
Safeguarding Your Privacy
Here are some tips to help protect your privacy while screen recording:
- Be Mindful of What You Record:Before starting a screen recording, think about what information might be visible on your screen. Avoid recording sensitive data or conversations that you wouldn’t want others to see.
- Use a Secure Password:If you’re recording your device’s screen, ensure you have a strong and unique password for all your accounts. This will help prevent unauthorized access if your recording is compromised.
- Enable Two-Factor Authentication:Two-factor authentication adds an extra layer of security to your accounts, requiring you to enter a code from your phone or email in addition to your password. This makes it much harder for someone to access your accounts even if they have your password.
- Limit Access to Your Recordings:Store your screen recordings in a secure location, like a password-protected folder or a cloud storage service with strong encryption. This will help prevent unauthorized access to your recordings.
- Be Cautious of Public Wi-Fi:When recording your screen, avoid using public Wi-Fi networks, as they are less secure and more susceptible to hacking. If you must use public Wi-Fi, consider using a VPN to encrypt your internet traffic.
Applications and Use Cases: Start A Screen Recording On IPhone Or IPad Inside Control Center
Screen recording on your iPhone or iPad is a versatile tool that can be used for a variety of purposes, from documenting your daily life to creating professional content. Whether you’re a student, a teacher, a gamer, or a professional, there’s a good chance you can benefit from screen recording.
Education
Screen recording can be a valuable tool for students and teachers alike. Students can record their screens while working on assignments or studying for exams, providing a visual record of their progress. Teachers can use screen recording to create engaging and informative video lessons.
- Creating video tutorials:Teachers can use screen recording to create step-by-step tutorials for students on how to use specific software or complete assignments. This can be particularly helpful for subjects like coding or design, where visual demonstrations are essential.
- Recording lectures:Students can use screen recording to capture their lectures and review them later, especially if they miss a class or need to refresh their understanding of a topic. This can also be helpful for students who have learning disabilities and may need to watch lectures at their own pace.
- Demonstrating problem-solving:Students can record their screens while solving problems in math, science, or other subjects. This can help them identify their mistakes and understand the steps involved in reaching the correct solution.
Entertainment
Screen recording can also be used for entertainment purposes, such as capturing gameplay footage, creating funny videos, or sharing your screen with friends and family.
- Recording gameplay:Gamers can use screen recording to capture their gameplay footage and share it online with friends or on platforms like YouTube. This can be a fun way to show off their skills or create entertaining content.
- Creating funny videos:Screen recording can be used to create funny videos by capturing your screen while playing games, browsing the internet, or using apps. This can be a great way to share a laugh with friends and family.
- Sharing your screen with friends and family:Screen recording can be used to share your screen with friends and family in real time. This can be helpful for collaborating on projects, showing them something interesting you found online, or simply giving them a virtual tour of your favorite apps.
Professional Purposes
Screen recording can also be used for professional purposes, such as creating product demos, recording webinars, or documenting software bugs.
- Creating product demos:Businesses can use screen recording to create product demos that can be shared with potential customers or investors. This can be a more engaging and informative way to showcase their products than traditional written descriptions or static images.
- Recording webinars:Companies can use screen recording to record webinars and share them with employees, customers, or partners. This can be a convenient way to share information and provide training to a large audience.
- Documenting software bugs:Developers can use screen recording to document software bugs and share them with their team. This can help them identify the problem more quickly and efficiently and provide a visual record of the issue for future reference.
Conclusion
Screen recording on iPhone and iPad is a powerful feature that can be used for various purposes, from capturing gameplay to creating tutorials and documenting presentations. By understanding the prerequisites, enabling screen recording in Control Center, and learning the basics of starting, customizing, and stopping recordings, you can effectively utilize this tool for your needs.
Exploring Further Resources, Start a screen recording on iPhone or iPad inside Control Center
The world of screen recording is vast, and there are many resources available to help you explore its full potential. You can find numerous tutorials, articles, and forums dedicated to screen recording on iOS devices. Experimenting with different settings, apps, and techniques will help you discover new ways to utilize this feature for your specific needs.
Concluding Remarks
With screen recording on iPhone and iPad, you have a powerful tool at your fingertips to capture and share your digital experiences. Whether you’re creating content for social media, documenting a process, or just preserving a memorable moment, the ability to record your screen is incredibly useful.
Experiment with the different features, explore advanced options, and unlock the full potential of screen recording on your Apple device.
FAQ Explained
Can I record audio with my screen recording?
Yes, you can choose to record audio from your microphone, the device itself, or both. You can select your audio source before starting the recording.
How do I know if my screen recording is working?
When you start a recording, a red status bar appears at the top of your screen, and a timer icon will be visible in Control Center. You’ll also hear a countdown sound.
Where are my screen recordings saved?
Screen recordings are saved in your Photos app, just like any other video you take. You can find them in the “Videos” album.
What if my screen recording fails?
If a recording fails, it’s often due to insufficient storage space or a problem with the microphone. Check your storage and make sure your microphone is not muted or blocked.