Four Ways To Send Email Attachments On Iphone And Ipad
Four ways to send email attachments on iPhone and iPad – Ever find yourself needing to send a document, photo, or video from your iPhone or iPad but struggling to figure out the best way to attach it to your email? You’re not alone! There are actually several methods for sending email attachments on these devices, each with its own advantages and quirks.
Let’s dive into four common ways to send attachments, from using the built-in Mail app to leveraging third-party apps and cloud storage.
Whether you’re a student sharing notes, a professional sending presentations, or just a friend sharing vacation photos, understanding these different options will help you choose the method that best suits your needs.
Using the Mail App
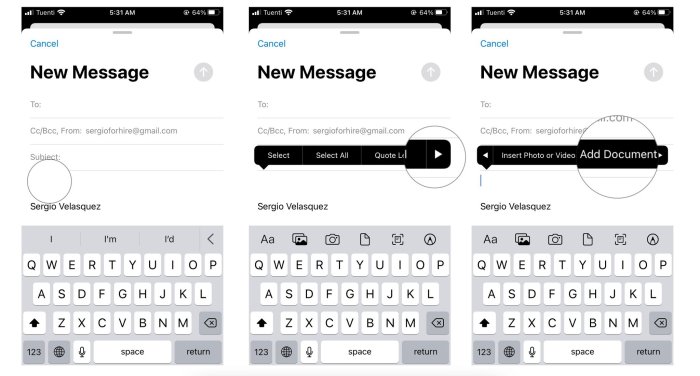
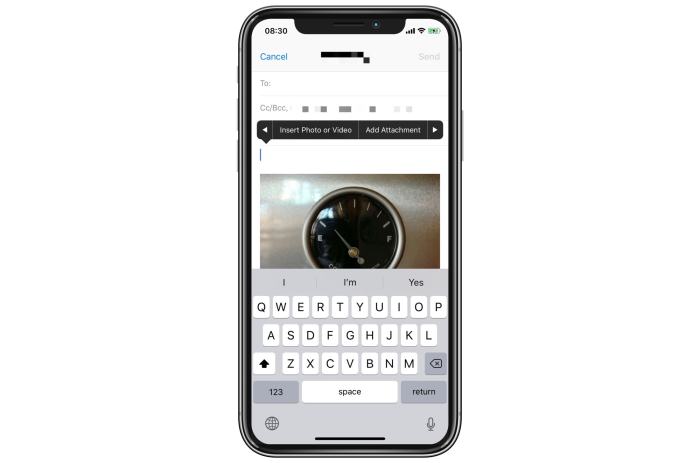
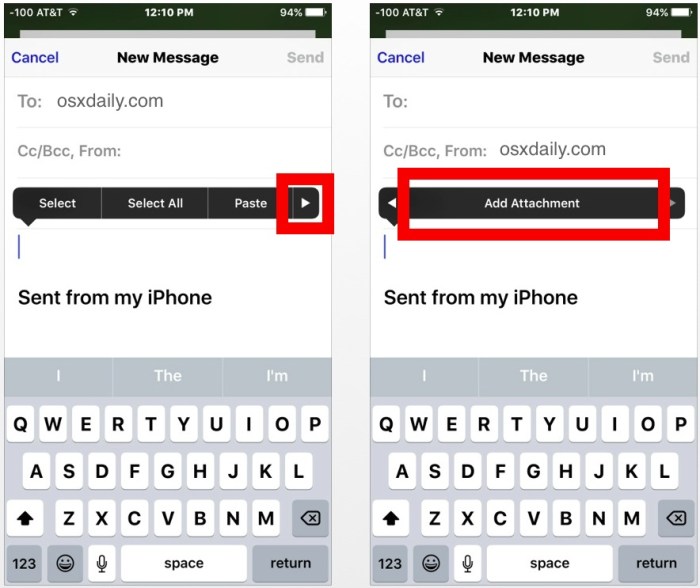
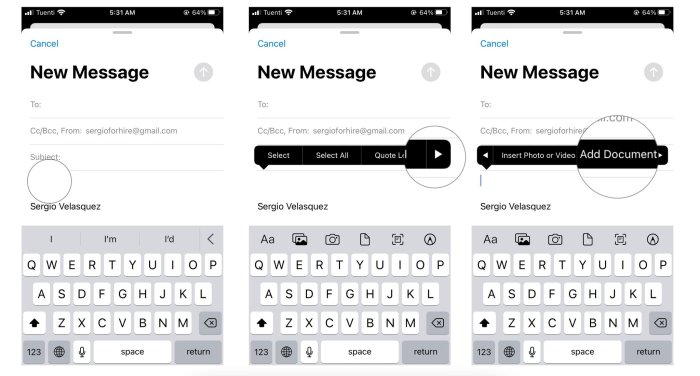
The Mail app on your iPhone and iPad is your go-to for sending emails, and it makes attaching files a breeze. You can easily add files from your Files app, Photos app, or even other apps using the Share Sheet.
Attaching Files from the Files App
The Files app is your central hub for all your documents, spreadsheets, presentations, and other files. To attach a file from the Files app within the Mail app, follow these steps:
- Open the Mail app and start composing a new email.
- Tap the paperclip icon to access the attachment menu.
- Select “Files” from the list of options.
- Navigate to the location of the file you want to attach in the Files app.
- Tap the file to select it, and it will be added to your email.
Attaching Photos or Videos from the Photos App
The Photos app stores all your precious memories, and you can easily share them through email. Here’s how to attach photos or videos directly from the Photos app:
- Open the Mail app and start composing a new email.
- Tap the paperclip icon to access the attachment menu.
- Select “Photos” from the list of options.
- Browse through your photo library and select the photos or videos you want to attach.
- Tap “Done” to add them to your email.
Attaching Files from Other Apps using the Share Sheet
Many apps allow you to share files directly with other apps, including the Mail app. This handy feature is called the Share Sheet, and it gives you quick access to various sharing options. Here’s how to use the Share Sheet to attach files:
- Open the app containing the file you want to attach.
- Tap the “Share” button, which is usually represented by a square with an arrow pointing upwards.
- The Share Sheet will appear with a list of apps you can share with.
- Select “Mail” from the list.
- Choose the recipient(s) and write your email message.
- Tap “Send” to send the email with the attached file.
Creating a New Email with an Attachment Directly from the Files App
If you’re working directly in the Files app and want to quickly send a file via email, you can create a new email with an attachment right from the Files app. Here’s how:
- Open the Files app and navigate to the file you want to attach.
- Tap the “Share” button (represented by a square with an arrow pointing upwards).
- Select “Mail” from the list of apps.
- Choose the recipient(s) and write your email message.
- Tap “Send” to send the email with the attached file.
Utilizing iCloud Drive
iCloud Drive is a fantastic way to store and access files across all your Apple devices, and it’s also a convenient way to share files with others, including through email. Here’s how to use iCloud Drive to attach files to your emails on your iPhone or iPad.
Attaching a File from iCloud Drive
Attaching a file from iCloud Drive is a straightforward process. Here’s how:
- Open the email you’re composing.
- Tap the paperclip icon to access the attachment menu.
- Select “iCloud Drive” from the list of attachment options.
- Navigate to the file you want to attach in iCloud Drive.
- Tap the file to select it, and it will be added to your email.
This method allows you to send various file types, including documents, spreadsheets, presentations, images, and more, directly from your iCloud Drive storage.
Leveraging Third-Party Apps
Sometimes, the built-in Mail app on your iPhone or iPad might not cut it, especially when you’re dealing with larger attachments or need more advanced features. This is where third-party email apps come in handy. They offer a wider range of functionalities and can make sending attachments a breeze.
Popular Third-Party Email Apps
The world of email apps is vast, but some stand out for their attachment management capabilities. Here are a few popular options:
- Spark: Spark is known for its clean interface and powerful features. It allows you to easily attach files from various cloud storage services, including Dropbox, Google Drive, and OneDrive. You can even preview attachments directly within the app, saving you time and effort.
- Edison Mail: Edison Mail focuses on making email management simpler. It integrates with popular cloud services like iCloud Drive, Google Drive, and Dropbox, allowing you to attach files directly from these platforms. It also offers features like scheduling emails and managing subscriptions.
- Outlook: Microsoft’s Outlook app is a reliable option for those who want a familiar experience. It seamlessly integrates with OneDrive, allowing you to easily attach files from your cloud storage. You can also use the app to manage your calendar, contacts, and tasks.
Sending files on your iPhone or iPad is a breeze, especially with the Mail app. You can attach photos, documents, and even videos directly from your device. But if you’re having trouble with your Mac, you might need to reset your password.
Luckily, it’s pretty easy to do – just follow the steps outlined on How To Reset Your Mac Password. Once you’re back in business, you can get back to attaching those files and sending emails like a pro.
Features and Functionalities
Third-party email apps often offer features that go beyond the basic attachment management capabilities of the built-in Mail app. These features can simplify the process of attaching files and make your email experience more efficient:
- Direct Cloud Integration: Most third-party apps offer direct integration with popular cloud storage services like iCloud Drive, Google Drive, Dropbox, and OneDrive. This allows you to easily attach files from your cloud storage without having to download them first.
- File Compression: Some apps allow you to compress files before attaching them, reducing their size and making them easier to send. This is particularly helpful for large files that might otherwise exceed email attachment limits.
- Advanced Attachment Management: Third-party apps often offer more advanced attachment management features, such as the ability to preview attachments, rename them, and organize them into folders.
Examples of Attachment Simplification
Let’s take a look at how these apps simplify the process of attaching files from cloud storage services:
- Spark: When you want to attach a file from Google Drive in Spark, you simply tap the attachment icon, select “Google Drive,” and browse your files. You can then choose the file you want to attach and send it in your email.
- Edison Mail: Edison Mail allows you to attach files directly from iCloud Drive. Simply tap the attachment icon, select “iCloud Drive,” and browse your files. You can then select the file you want to attach and send it in your email.
- Outlook: Outlook makes it easy to attach files from OneDrive. When you compose an email, tap the attachment icon, select “OneDrive,” and browse your files. You can then select the file you want to attach and send it in your email.
So you’ve got your email attachments ready to go on your iPhone or iPad, but you’re sending a ton of files and they’re all named “IMG_1234” – not exactly helpful, right? Well, before you hit send, take a minute to organize those files on your Mac using this awesome trick: Rename multiple files on Mac the easy way.
Once you’ve got them sorted, you’ll be able to send those attachments with confidence, knowing that everyone will know exactly what they’re looking at!
Pros and Cons of Using Third-Party Apps, Four ways to send email attachments on iPhone and iPad
While third-party email apps offer numerous benefits, it’s important to consider both the pros and cons before switching from the built-in Mail app:
| Pros | Cons |
|---|---|
| Wider range of features and functionalities, including advanced attachment management, file compression, and direct cloud integration | May require learning a new interface and workflow |
| Often offer a more streamlined and efficient email experience | May require a subscription or in-app purchases for premium features |
| Can be customized to meet your specific needs | May not be compatible with all email providers |
Advanced Attachment Techniques
Sometimes, the standard email attachment methods aren’t enough. You might need to send multiple files, large files, or files that aren’t compatible with email. Don’t worry, there are some handy techniques to help you out!
Compressing Files into a ZIP Archive
Sending multiple files as attachments can lead to a long list of files, which can be cumbersome for the recipient. Compressing these files into a ZIP archive can significantly reduce the file size and make it easier to manage. To compress files into a ZIP archive on your iPhone or iPad, you can use the built-in Files app.
Here’s how:
- Open the Files app.
- Navigate to the folder containing the files you want to compress.
- Tap “Select” in the top right corner.
- Select the files you want to compress.
- Tap the “Share” icon in the bottom left corner.
- Choose “Compress” from the options.
- The compressed ZIP file will be saved in the same folder as the original files.
Converting Files to Compatible Formats
Sometimes, the file format you want to send might not be compatible with email. For example, you might have a .pages file that you want to send to someone who doesn’t have Pages. Luckily, there are tools to help you convert these files to compatible formats.You can use a variety of apps to convert files.
Many apps offer free versions with limited functionality or paid versions with more features. Here are some popular options:
PDF Converter
This app can convert various file types, including Word documents, PowerPoint presentations, and Excel spreadsheets, into PDF files.
Sending email attachments on your iPhone or iPad is super easy, whether you’re sharing a photo with your bestie or sending a document for work. Just make sure you’re not sending any germ-ridden files – especially these days! If you’re running low on hand sanitizer, you can always whip up your own by following this handy guide: How to make your own hand sanitizer.
Once your hands are squeaky clean, you can get back to sending those attachments without worrying about spreading any unwanted germs.
CloudConvert
This web-based service offers a wide range of file conversions, including document formats, images, audio, and video.
Zamzar
Another web-based service that allows you to convert files to different formats.
Attaching Large Files Using File-Sharing Services
Email providers often have file size limits for attachments. If you need to send a large file that exceeds this limit, you can use file-sharing services like Dropbox, Google Drive, or OneDrive. Here’s how to attach large files using file-sharing services:
- Upload the large file to your chosen file-sharing service.
- Get the shareable link for the file.
- Copy and paste the link into the email you’re sending.
- The recipient can then click on the link to download the file.
Email Provider File Size Limits
Different email providers have different file size limits for attachments. Here’s a table outlining some common file size limits:
| Email Provider | File Size Limit |
|---|---|
| Gmail | 25 MB |
| Outlook | 20 MB |
| Yahoo Mail | 25 MB |
| Apple Mail | 20 MB |
Ending Remarks: Four Ways To Send Email Attachments On IPhone And IPad
With a variety of options at your fingertips, sending email attachments from your iPhone or iPad doesn’t have to be a struggle. From the convenience of the Mail app to the power of third-party apps and cloud storage, there’s a solution for every situation.
So, the next time you need to send a file, remember these four methods and choose the one that best fits your needs. Now go forth and email with confidence!
Quick FAQs
What if my attachment is too large to send through email?
For large files, consider using file-sharing services like Dropbox or Google Drive. You can upload the file and then share a link to it within your email.
Are there any file size limits for email attachments?
Yes, each email provider has its own file size limits. It’s best to check the specific limits for your email service.
What if I need to send multiple files at once?
You can compress multiple files into a ZIP archive to make them easier to send. This can also help reduce the overall file size.

