How To Draw A Portrait With Apple Pencil
How to draw a portrait with Apple Pencil sets the stage for this enthralling narrative, offering readers a glimpse into a story that is rich in detail and brimming with originality from the outset. This guide will walk you through the process of creating stunning portraits using your iPad and Apple Pencil, from setting up your workspace to mastering advanced techniques.
Whether you’re a seasoned artist or a complete beginner, this comprehensive guide will equip you with the knowledge and skills to unleash your artistic potential.
From understanding basic drawing principles to exploring advanced techniques, this guide will cover everything you need to know to create realistic and expressive portraits. You’ll learn how to choose the right reference image, create a sketch, build form and depth, refine features, add color and texture, and finalize your artwork.
Along the way, you’ll discover tips and tricks for maximizing your creativity and achieving professional results.
Setting Up Your Workspace
A well-organized workspace is essential for creating beautiful and detailed portraits with an Apple Pencil. It ensures comfort, efficiency, and a smooth workflow. To achieve this, consider the following factors:
iPad Models
The iPad you choose will significantly impact your drawing experience. Consider these factors:
- Display Size:A larger display offers more space for detail and a more immersive experience. The iPad Pro 12.9-inch is a popular choice for portrait artists.
- Screen Resolution:A high-resolution screen provides sharper lines and finer details. The iPad Pro models boast Retina displays with excellent pixel density.
- Processor Power:A powerful processor ensures smooth and responsive drawing, especially when working with complex layers and brush strokes. The M1 and M2 chip-equipped iPad Pros deliver exceptional performance.
Software Recommendations
The software you use plays a crucial role in your portrait-drawing process. Some popular options include:
- Procreate:Known for its intuitive interface, wide range of brushes, and powerful features, Procreate is a favorite among digital artists.
- Adobe Fresco:A cloud-based app that combines the best of traditional and digital painting techniques. It offers a natural brush experience and integration with Adobe Creative Cloud.
- Affinity Designer:A vector-based design app with advanced tools for precise illustrations and linework. It offers a robust feature set and a user-friendly interface.
Accessories
Certain accessories can enhance your drawing experience and make it more comfortable:
- iPad Stand:A stand allows you to position your iPad at an ergonomic angle, reducing strain on your neck and shoulders. Adjustable stands offer flexibility for different drawing positions.
- Apple Pencil (2nd Generation):The latest Apple Pencil features a more responsive tip, pressure sensitivity, and tilt detection, enhancing the drawing experience.
- Screen Protector:A screen protector protects your iPad’s display from scratches and smudges, ensuring a smooth drawing surface.
Calibrating the Apple Pencil
Calibrating your Apple Pencil ensures accurate pressure sensitivity and responsiveness. You can do this within your chosen drawing app:
- Open the app’s settings menu.
- Locate the Apple Pencil settings.
- Follow the on-screen instructions to calibrate the pencil.
Customizing App Settings
Tailoring the app’s settings to your preferences can significantly enhance your workflow:
- Brush Size and Opacity:Adjust the brush size and opacity to match your desired level of detail and line weight.
- Color Palette:Create a custom color palette with your favorite shades for quick access while drawing.
- Canvas Size and Resolution:Choose a canvas size and resolution that suit the scale and detail of your portrait.
- Layer Management:Utilize layers to organize your drawing process, allowing you to work on specific elements independently.
Understanding Basic Drawing Principles

Before we dive into the specifics of drawing a portrait, it’s essential to grasp some fundamental drawing concepts. These principles will guide you in creating a realistic and compelling representation of a human face.
Line Weight
Line weight refers to the thickness of a line. It’s a powerful tool for conveying depth, dimension, and emphasis. In portraiture, line weight can be used to highlight features like the contours of the face, the edges of the eyes, and the shape of the lips.
For example, thicker lines can be used to emphasize the nose bridge, while thinner lines can be used to define the subtle curves of the cheekbones.
Shading
Shading is the process of creating the illusion of light and shadow on a surface. It’s crucial for giving a portrait volume and realism. You can achieve shading using a variety of techniques, including hatching, cross-hatching, and blending.
Hatching involves drawing parallel lines close together to create darker areas. Cross-hatching adds another layer of lines at a different angle to create even darker tones. Blending involves using your finger or a tool to smooth out the lines and create a more gradual transition between light and dark areas.
Perspective
Perspective is the way objects appear to change size and shape as they move further away from the viewer. Understanding perspective is essential for creating a portrait that looks realistic and three-dimensional.
For example, when drawing a face, the features closer to the viewer will appear larger than those further away. You can use perspective to create the illusion of depth and distance.
Anatomy
A basic understanding of human anatomy is essential for creating a realistic portrait. You need to know the structure of the skull, the muscles of the face, and the placement of the features.
For example, understanding the placement of the cheekbones, the jawline, and the brow bone will help you draw a more accurate and believable portrait.
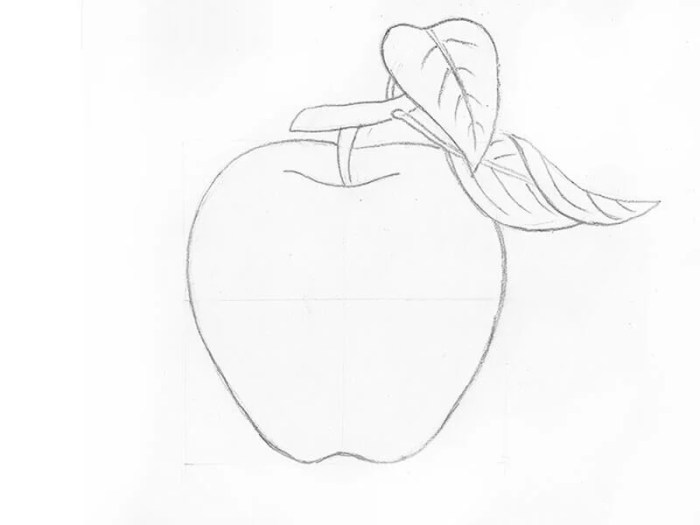
Using Simple Shapes and Lines
Before starting to draw the detailed features of a portrait, it’s helpful to create a basic structure using simple shapes and lines. This will serve as a foundation for your drawing.
Drawing a portrait with Apple Pencil can be a super fun way to capture someone’s likeness, but it can be tricky to get the details right. Once you’ve got your masterpiece, you might want to share it as a Live Photo on your phone.
A good thumbnail can really make your art pop, so check out this Pro Tip: How to pick a new thumbnail for your Live Photos for some helpful advice. Then, once you’ve got the perfect thumbnail, you’ll be ready to share your amazing portrait with the world!
- Start by drawing an oval for the head.
- Divide the oval into halves vertically and horizontally. This will help you to position the features accurately.
- Add two circles for the eyes, positioned slightly below the horizontal midline.
- Draw a curved line for the nose, starting between the eyes and extending downwards.
- Draw a line for the mouth, positioned below the nose.
- Use these basic shapes and lines as a guide to build up the details of the portrait.
Choosing a Reference Image
Your reference image is the foundation of your portrait, so choosing the right one is crucial. A good reference image provides clear details, accurate proportions, and a sense of the subject’s personality.Think of your reference image as a guide for your drawing.
Drawing a portrait with an Apple Pencil can be super fun, especially when you’re jamming to your favorite tunes. If your AirPods keep falling out, though, it can be a real buzzkill. Check out How to mod your AirPods to fit tight in your ears for some tips on how to make them stay put.
Once you’ve got those bad boys secured, you can focus on creating that perfect portrait with your Apple Pencil.
It will help you capture the essence of your subject and create a realistic and compelling portrait.
Finding the Right Reference Image
Finding the right reference image can be an exciting process. Here are some tips for finding a suitable image:
- Consider the Style:Determine the style you want to achieve. If you’re aiming for a realistic portrait, look for high-resolution photos with good lighting and clear details. For a more stylized portrait, you might choose a sketch, painting, or even a photograph with a unique composition.
- Check for Quality:Ensure the image is high-resolution and free of distortion or blur. Zoom in on the image to check for sharpness and clarity, especially in areas like the eyes and hair.
- Look for a Variety of Angles:Explore different angles and perspectives to find one that best captures the subject’s features and personality. Consider using a reference image that shows the subject’s head tilted or looking directly at the viewer.
- Consider Lighting:Pay attention to the lighting in the reference image. Good lighting can enhance the subject’s features and create a sense of depth and dimension. Look for images with soft, diffused light that avoids harsh shadows.
Analyzing the Reference Image
Once you’ve found a reference image, it’s time to analyze it closely. This step helps you understand the subject’s features, proportions, and the overall composition.
- Study the Proportions:Pay attention to the proportions of the face, including the distance between the eyes, the width of the nose, and the length of the jawline. You can use a ruler or your Apple Pencil to measure these proportions on the screen.
- Focus on the Features:Examine the subject’s eyes, nose, mouth, and other features. Note their shape, size, and how they interact with each other. Pay attention to details like wrinkles, lines, and shadows that add depth and realism to the portrait.
- Observe the Lighting:Analyze the direction and intensity of the light in the reference image. Notice how it affects the shadows and highlights on the subject’s face. This understanding will help you create a sense of volume and form in your drawing.
- Analyze the Composition:Consider the overall composition of the reference image. How is the subject positioned within the frame? What is the background like? These factors can influence the mood and storytelling of your portrait.
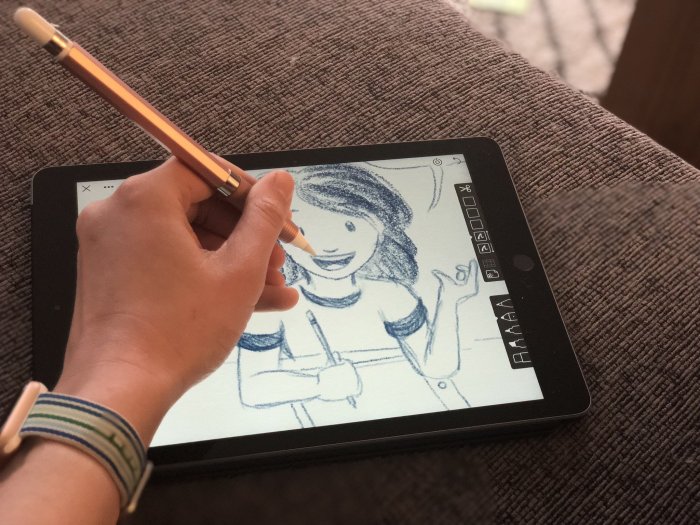
Starting the Sketch
Now that you have your workspace set up and a reference image selected, it’s time to begin sketching! This is where the magic happens, and you start to bring your portrait to life.The first step is to transfer your reference image onto your iPad screen.
This can be done using a few different methods.
Using the Reference Image Feature
You can use the built-in reference image feature in most drawing apps. This allows you to import your reference image and then adjust its opacity, size, and position on the canvas. This way, you can see the image underneath your sketch while you draw.
Here’s how to use the reference image feature:
- Open your drawing app and create a new canvas.
- Import your reference image by selecting the “Import Image” or “Add Reference” option in the app’s menu.
- Adjust the opacity, size, and position of the image as needed. You can use the app’s tools to zoom in on specific areas of the image or rotate it for a better view.
Using a Separate App, How to draw a portrait with Apple Pencil
You can use a separate app to import your reference image and then share it with your drawing app. This can be helpful if you prefer to use a different app for managing your reference images.Here’s how to use a separate app:
- Open an app that allows you to import and view images, such as the Photos app.
- Select your reference image and share it with your drawing app.
- The drawing app will open a new canvas with your reference image imported. You can then adjust its opacity, size, and position as needed.
Creating a Light Sketch
Once your reference image is on your iPad screen, you can begin sketching. This is where you start to capture the basic shapes and proportions of the portrait. It’s important to keep your lines light and loose at this stage, as you can easily adjust them later.Use the Apple Pencil’s pressure sensitivity to create different line thicknesses.
Light pressure creates thin lines, while heavy pressure creates thicker lines. This can be helpful for creating different effects, such as defining edges or adding shadows.Here are some tips for creating a light sketch:
- Start with the Artikel of the head and face. Use light, flowing lines to capture the general shape of the head and the position of the features.
- Focus on the key features: eyes, nose, mouth, ears, and hair. Use simple shapes to represent these features, paying attention to their proportions and placement.
- Don’t worry about getting every detail right at this stage. The goal is to create a basic framework for your portrait. You can add more detail later.
Remember, this is just a sketch. It’s okay if it’s not perfect. The important thing is to get a basic understanding of the subject’s proportions and features.
Building Form and Depth
Now that you have a basic sketch, it’s time to bring your portrait to life by adding depth and dimension. This is where the magic of shading and highlighting comes in, giving your portrait a sense of realism and volume.
Shading Techniques
Shading is the art of using different tones of gray to create the illusion of depth and form. With the Apple Pencil, you have the flexibility to create smooth transitions between light and shadow areas, adding depth and dimension to your portrait.
Here are some common shading techniques:* Hatching:This technique involves drawing parallel lines close together to create darker areas. The closer the lines are, the darker the area will appear. You can adjust the pressure of the Apple Pencil to control the darkness of the lines.* Cross-Hatching:This technique is similar to hatching, but the lines are drawn in different directions, creating a more textured effect.
This is a good way to add more depth and detail to your shading.* Blending:This technique involves using your finger or a blending tool to soften the edges of your shading, creating a smooth transition between light and shadow areas.
You can achieve this in Procreate by using the “Smudge” tool or by selecting a brush with a soft, blended tip.
Drawing a portrait with Apple Pencil is super fun, but sometimes you need to take a break to get some inspiration. You can totally customize your iPhone’s Home screen with the new “Ask Alexa” widget – check out how to add it – and then get back to those artistic vibes!
Using Pencil Pressure for Different Effects
The Apple Pencil is pressure-sensitive, allowing you to create different effects with varying levels of pressure. * Light Pressure:Applying light pressure creates a light, subtle shade. This is useful for highlighting areas and creating soft transitions.* Medium Pressure:Medium pressure creates a darker shade, ideal for building up the form and adding more detail.* Heavy Pressure:Applying heavy pressure creates the darkest shades, perfect for creating shadows and adding depth to your portrait.
Adding Highlights
Highlights are areas of light that reflect off the surface of your subject. They help to create a sense of realism and add a touch of sparkle to your portrait. * White Pencil:You can use a white pencil or a light gray to create highlights.
Use light pressure to create subtle highlights, or increase the pressure for more dramatic highlights.* Eraser:You can also use the eraser tool in Procreate to create highlights by erasing areas of shading.
Creating Smooth Transitions
Smooth transitions between light and shadow areas are essential for creating a realistic portrait. * Blending:Blending is crucial for creating smooth transitions. Use the “Smudge” tool in Procreate or a brush with a soft, blended tip to soften the edges of your shading.* Layers:Using multiple layers can also help to create smooth transitions.
You can create a separate layer for each shading step, allowing you to blend them together seamlessly.
Refining the Features
Now that you have a solid foundation for your portrait, it’s time to dive into the details and bring your subject to life. This is where you’ll truly capture their personality and unique characteristics.
Refining the Eyes
The eyes are often considered the windows to the soul, so getting them right is crucial. Pay attention to the shape, size, and placement of the eyes, and use your Apple Pencil to refine the details.
Tip:Use a smaller brush for delicate details, like the eyelashes and the iris, and a larger brush for shading the eye sockets and eyelids.
Here are some additional things to consider:
- The Iris:The iris is the colored part of the eye. Use a variety of shades to create depth and dimension. Pay attention to how the light reflects off the iris.
- The Pupil:The pupil is the black center of the eye. It should be small and dark, and it should reflect the light source in the scene.
- The Eyelashes:Eyelashes can add a lot of character to a portrait. Use a small, thin brush to create individual eyelashes, or a slightly thicker brush to create a more general effect.
- The Eyelids:The eyelids create shadows and highlights that give the eyes a sense of depth. Use a soft brush to blend the shadows and highlights.
Refining the Nose
The nose is another important feature to refine. It’s a three-dimensional shape, so you’ll need to use shading and highlights to create a realistic effect. Pay attention to the bridge of the nose, the nostrils, and the tip of the nose.
Tip:Use a soft brush to blend the shadows and highlights, and a smaller brush to refine the details of the nostrils and the tip of the nose.
Here are some additional things to consider:
- The Bridge of the Nose:The bridge of the nose is the area between the eyes. Use a soft brush to blend the shadows and highlights on the bridge of the nose.
- The Nostrils:The nostrils are the openings at the bottom of the nose. Use a small brush to create the shape of the nostrils and add some detail to the edges.
- The Tip of the Nose:The tip of the nose is the most prominent part of the nose. Use a soft brush to blend the shadows and highlights on the tip of the nose.
Refining the Mouth
The mouth is a complex feature that can convey a lot of emotion. Pay attention to the shape, size, and placement of the mouth, and use your Apple Pencil to refine the details.
Tip:Use a smaller brush for delicate details, like the lips and the teeth, and a larger brush for shading the area around the mouth.
Here are some additional things to consider:
- The Lips:The lips are the most prominent part of the mouth. Use a soft brush to blend the shadows and highlights on the lips.
- The Teeth:The teeth are a smaller detail, but they can add a lot of realism to a portrait. Use a small brush to create the shape of the teeth and add some detail to the edges.
- The Corners of the Mouth:The corners of the mouth can be used to convey a variety of emotions. Pay attention to the way the corners of the mouth are shaped and how they are shaded.
Refining the Ears
The ears are often overlooked, but they are an important part of a portrait. Pay attention to the shape, size, and placement of the ears, and use your Apple Pencil to refine the details.
Tip:Use a smaller brush for delicate details, like the cartilage and the earlobe, and a larger brush for shading the area around the ears.
Here are some additional things to consider:
- The Cartilage:The cartilage is the outer part of the ear. Use a soft brush to blend the shadows and highlights on the cartilage.
- The Earlobe:The earlobe is the bottom part of the ear. Use a small brush to create the shape of the earlobe and add some detail to the edges.
- The Inner Ear:The inner ear is the part of the ear that is hidden by the outer ear. Use a soft brush to shade the inner ear.
Adding Details and Textures
Once you’ve refined the basic features of your portrait, you can start adding details and textures to create a more realistic effect.
Tip:Use a variety of brushes to create different textures. For example, you can use a soft brush to create smooth skin, a rough brush to create wrinkles, and a textured brush to create hair.
Here are some additional things to consider:
- Wrinkles:Wrinkles can add a lot of character to a portrait. Use a rough brush to create wrinkles and then blend them with a soft brush to create a more natural effect.
- Freckles:Freckles are small, brown spots that appear on the skin. Use a small, round brush to create freckles.
- Hair:Hair can be a challenging feature to draw, but it can also be very rewarding. Use a variety of brushes to create different hair textures. For example, you can use a soft brush to create smooth hair, a rough brush to create curly hair, and a textured brush to create frizzy hair.
Adding Color and Texture

Now that your portrait has a solid foundation, it’s time to bring it to life with color! This is where you can really express your artistic vision and create a unique piece of art. Adding color to your portrait isn’t just about filling in the lines.
It’s about creating depth, mood, and a sense of realism. We’ll explore different approaches to adding color, including using pre-made palettes or creating custom colors. We’ll also discuss how to use color to enhance the mood, lighting, and depth of your portrait.
Color Palettes
Choosing a color palette is the first step in adding color to your portrait. It’s like setting the stage for your artwork, creating a specific atmosphere and mood. There are two main approaches to choosing a color palette: using pre-made palettes or creating custom colors.
- Pre-made palettesoffer a curated selection of colors that work well together. You can find pre-made palettes online or in art books. Some popular online resources include Adobe Color, Coolors, and Palette Generator.
- Custom palettesgive you complete control over the colors you use. You can create your own color palettes by experimenting with different colors and combinations. You can also use color theory to create palettes that are harmonious and visually appealing.
Using Color to Enhance Mood, Lighting, and Depth
Color can be used to create a wide range of moods and effects in your portrait. For example, warm colors like reds and oranges can create a feeling of warmth and energy, while cool colors like blues and greens can create a feeling of calm and serenity.
- Mood:Color can be used to create a specific mood in your portrait. For example, a portrait with warm colors might feel happy and energetic, while a portrait with cool colors might feel more somber and reflective. Think about the emotions you want to evoke in your viewer and choose colors accordingly.
- Lighting:Color can be used to create the illusion of light and shadow in your portrait. For example, you can use lighter colors to represent areas that are illuminated by light, and darker colors to represent areas that are in shadow.
This technique can add depth and realism to your portrait.
- Depth:Color can also be used to create the illusion of depth in your portrait. For example, you can use warm colors in the foreground and cool colors in the background to create a sense of distance. This technique can help to make your portrait more visually interesting and engaging.
Final Touches and Presentation
You’ve reached the final stage of your digital portrait! Now it’s time to polish your masterpiece with finishing touches and prepare it for sharing with the world.This section will guide you through adding those last details that elevate your portrait to a professional level.
We’ll explore how to refine your artwork, add a background, and present your creation in various formats for online sharing.
Adding Finishing Touches
Adding finishing touches involves subtle adjustments and details that enhance the overall impact of your portrait. These finishing touches can include:
- Refining Details:You can further refine the features of your portrait by adjusting the edges of the hair, eyes, lips, and other details. Use the Apple Pencil to make subtle adjustments to the shape and texture, ensuring everything looks smooth and natural.
- Adding Background:While your portrait is the main focus, a background can add context and depth to your artwork. Consider a simple background, such as a blurred color gradient, or a more detailed scene that complements your subject. You can use the Procreate app’s various brushes and tools to create a seamless background that enhances your portrait.
- Adjusting Lighting and Color:Experiment with different lighting effects to create a mood or highlight specific features. You can use the Procreate app’s blending modes and color adjustments to fine-tune the lighting and color balance of your portrait.
Saving and Sharing Your Portrait
Once you’re satisfied with your portrait, it’s time to save and share it with the world!
- Saving in Different Formats:Procreate allows you to save your portrait in various formats, including PNG, JPG, and PSD. PNG is a good option for preserving transparency, while JPG is suitable for sharing on social media. PSD format allows you to retain layers, enabling further editing in other software like Photoshop.
- Sharing Online:There are several ways to share your digital portrait online:
- Social Media:Platforms like Instagram, Facebook, and Twitter are great for sharing your artwork with a wider audience. You can use relevant hashtags to reach a larger group of people interested in digital art.
- Art Websites:Websites like DeviantArt, ArtStation, and Behance are dedicated to showcasing digital art. These platforms offer opportunities for feedback, networking, and even potential commissions.
- Your Own Website:If you’re serious about showcasing your artwork, consider creating your own website or blog. This gives you complete control over your presentation and allows you to share your artistic journey with the world.
Exploring Advanced Techniques
Now that you’ve mastered the fundamentals, let’s delve into some advanced techniques to elevate your portrait drawings. These techniques will help you achieve a more realistic and expressive look, adding depth and dimension to your creations.
Utilizing Layers and Blending Modes
Layers and blending modes are powerful tools for creating complex and nuanced portraits. Layers allow you to work on different aspects of your drawing separately, while blending modes enable you to combine layers in various ways to achieve specific effects.For instance, you can use a separate layer for shadows, applying a “Multiply” blending mode to darken the underlying layer and create a sense of depth.
Similarly, you can use a “Screen” blending mode on a layer for highlights to brighten the underlying layer and create a more luminous effect.
Exploring Custom Brushes
Apple Pencil’s pressure sensitivity allows for the creation of custom brushes that mimic real-world tools like charcoal, pencils, or even paintbrushes. By experimenting with different brush shapes, sizes, and textures, you can create unique and expressive strokes.For example, a brush with a textured tip can simulate the rough texture of charcoal, while a brush with a soft, round tip can mimic the smooth strokes of a pencil.
Mastering Perspective, Anatomy, and Composition
A deep understanding of perspective, anatomy, and composition is crucial for creating professional-looking portraits.
Perspective
Perspective gives the illusion of depth and realism in your drawing. By understanding how objects appear smaller and closer together as they recede into the distance, you can create a sense of space and depth in your portrait.
Anatomy
Accurate anatomy is essential for capturing the form and structure of the human body. Studying anatomical references will help you understand the proportions, muscle structure, and bone placement of the human body, allowing you to draw realistic and believable portraits.
Composition
Composition refers to the arrangement of elements within your drawing. A strong composition guides the viewer’s eye through the artwork, creating a sense of balance and harmony.There are various composition rules, such as the rule of thirds, which suggests dividing the image into nine equal sections and placing key elements along the intersection points.
Closing Summary
So, grab your iPad and Apple Pencil, and let’s embark on this exciting journey of portraiture. With practice and passion, you’ll be amazed at the incredible portraits you can create. Remember, the key is to enjoy the process, experiment with different techniques, and let your creativity flow.
Happy drawing!
Clarifying Questions: How To Draw A Portrait With Apple Pencil
What iPad models are compatible with Apple Pencil?
The Apple Pencil is compatible with a variety of iPad models, including the iPad Pro, iPad Air, and iPad mini. Check the specifications of your iPad to ensure compatibility.
What drawing apps are recommended for portrait drawing?
Popular drawing apps for portrait drawing include Procreate, Adobe Fresco, Autodesk Sketchbook, and Affinity Designer. Each app offers unique features and functionalities, so it’s worth exploring different options to find the best fit for your needs.
How do I choose the right reference image for my portrait?
When selecting a reference image, look for high-quality photos with good lighting, clear facial features, and a composition that inspires you. Consider the mood and style you want to convey in your portrait.
What are some tips for creating realistic hair in my portrait?
Use different brush sizes and pressures to create varying hair strands and textures. Pay attention to the direction of the hair growth and how light interacts with it. Experiment with layering and blending to achieve a natural look.